3 Ways to Make a Basic Homemade Chicken Stock

Don’t waste your money on store brand chicken stock. Save money by learning how to make chicken stock at home.
Chicken stock is a building block in so many recipes. Before I started regularly making my own stock, I found myself buying several quarts of chicken broth from the grocery store every time I visited. What a waste of money! If you can boil water, you can make chicken stock. Really, it’s just that simple.
Don’t limit yourself to chicken stock! If you regularly make seafood dishes, check out this post on making homemade shrimp stock.
Chicken broth versus chicken stock
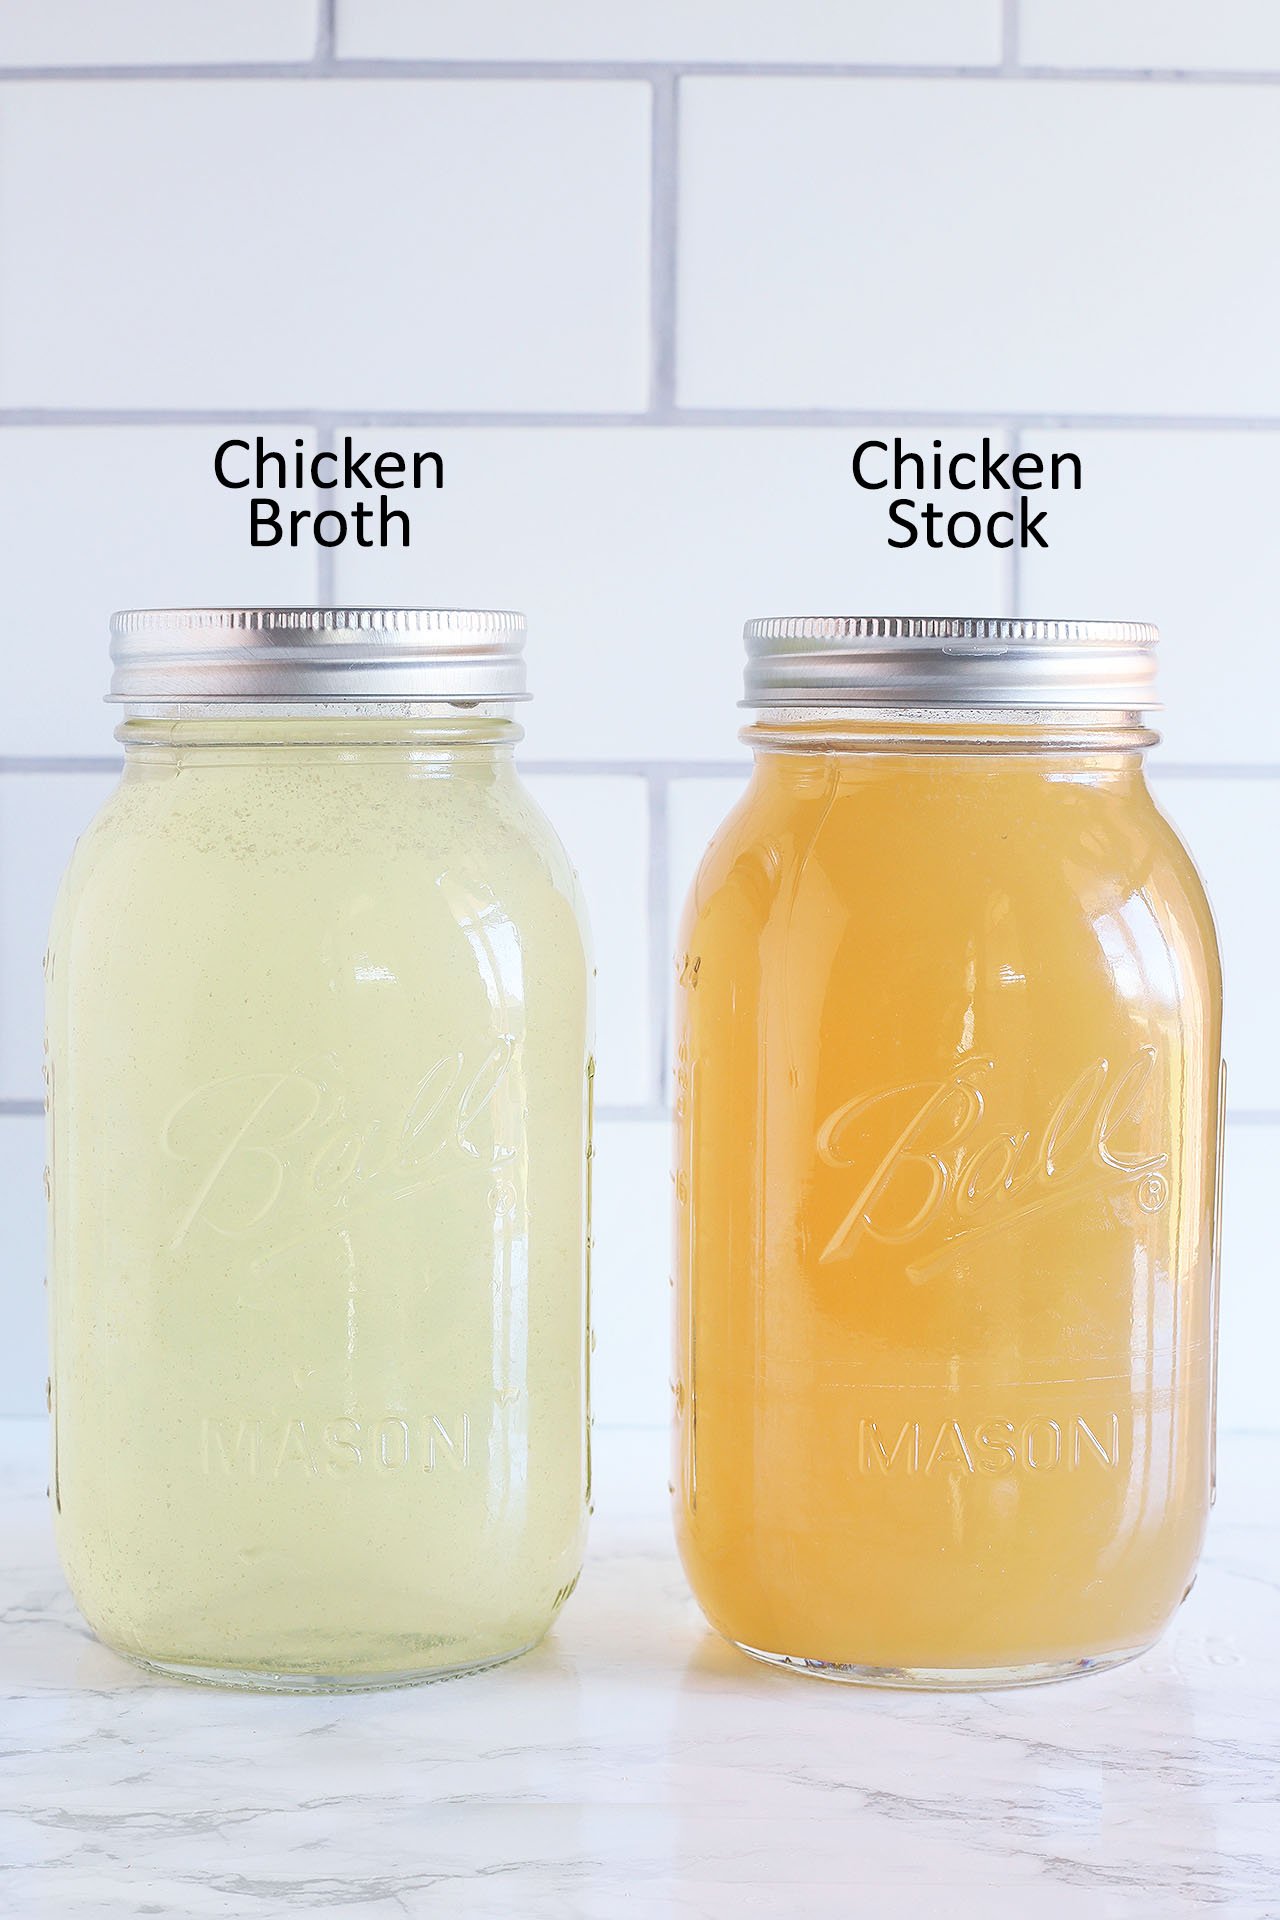
There is one main difference between chicken broth and chicken stock. Chicken broth is made from boiling chicken meat only. Chicken stock is made from boiling leftover chicken bones. Both usually include aromatics such as vegetables and herbs for extra flavor.
Chicken stock is typically cooked for several hours, allowing the bones to release their collagen and give the stock a deeper, richer flavor. Look at the side-by-side comparison of chicken broth and chicken stock below. The chicken broth is lighter in color and has a clear appearance. Chicken stock is darker and cloudy. Both can be used interchangeably, depending on the recipe. However, the chicken stock will give your dish a stronger “chicken” flavor.
Ingredients and tools you will need
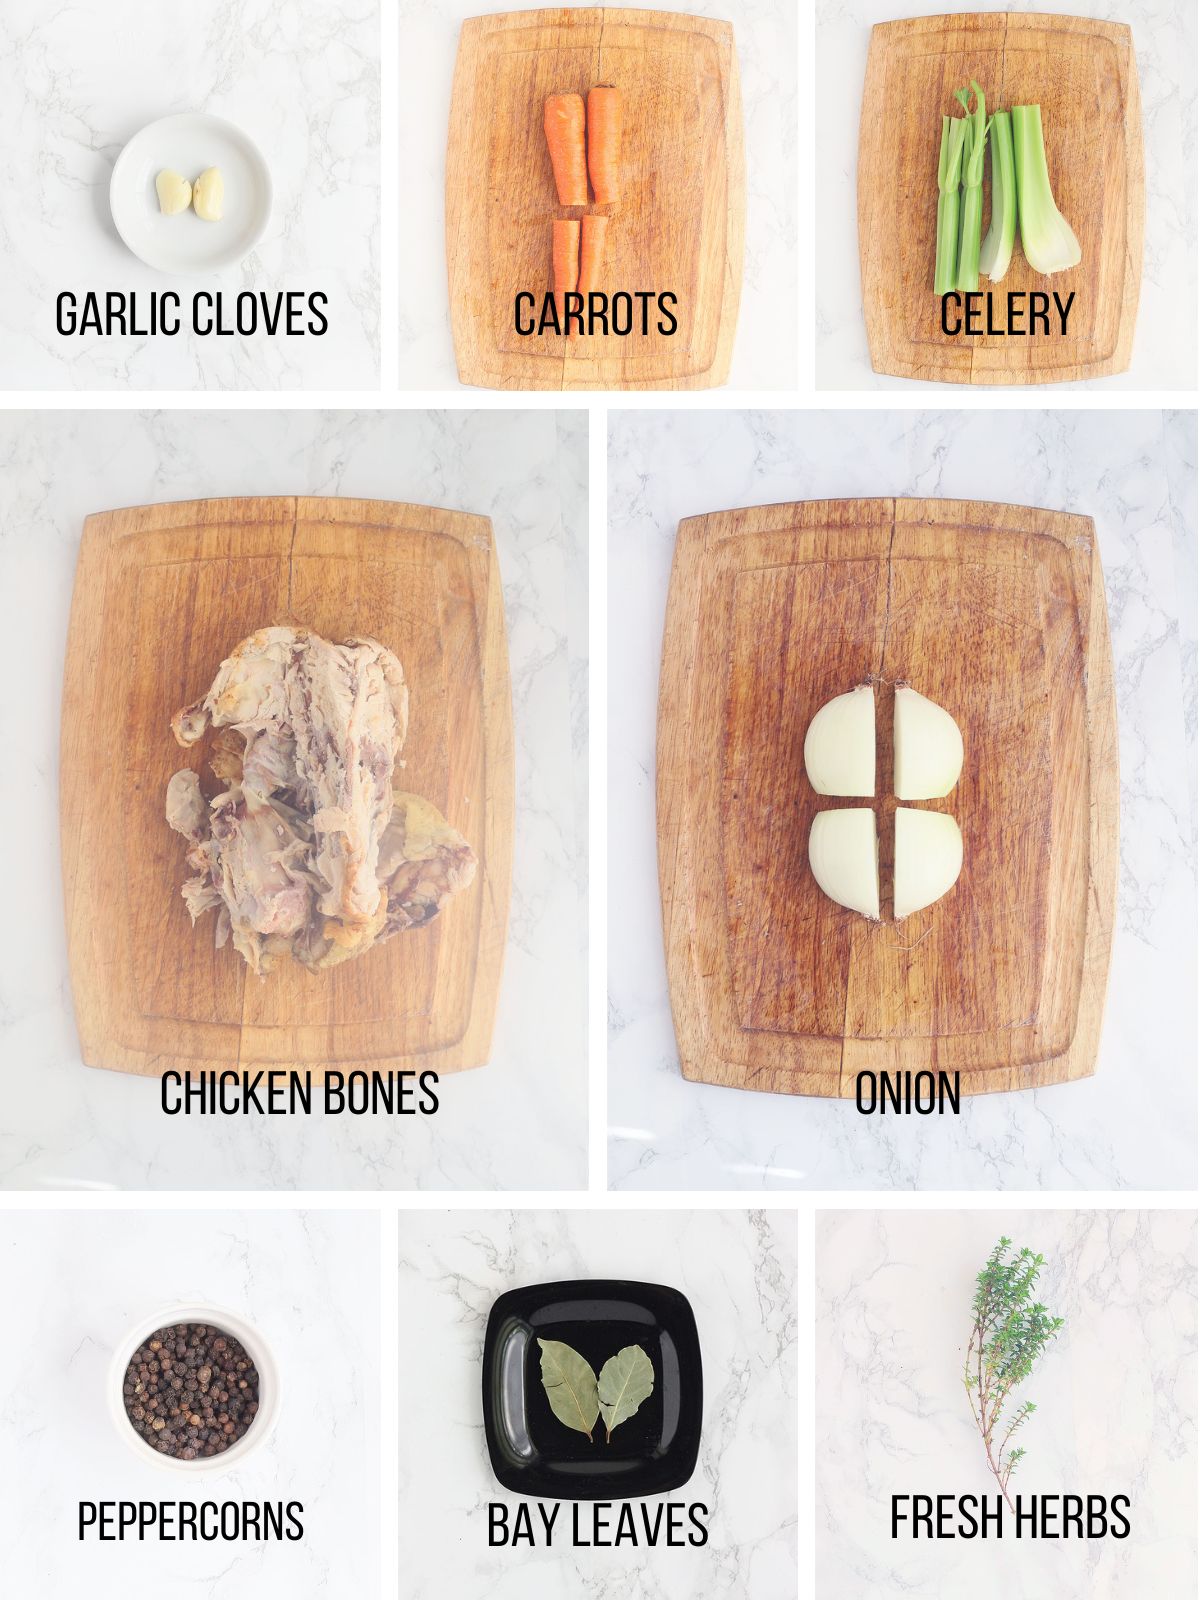
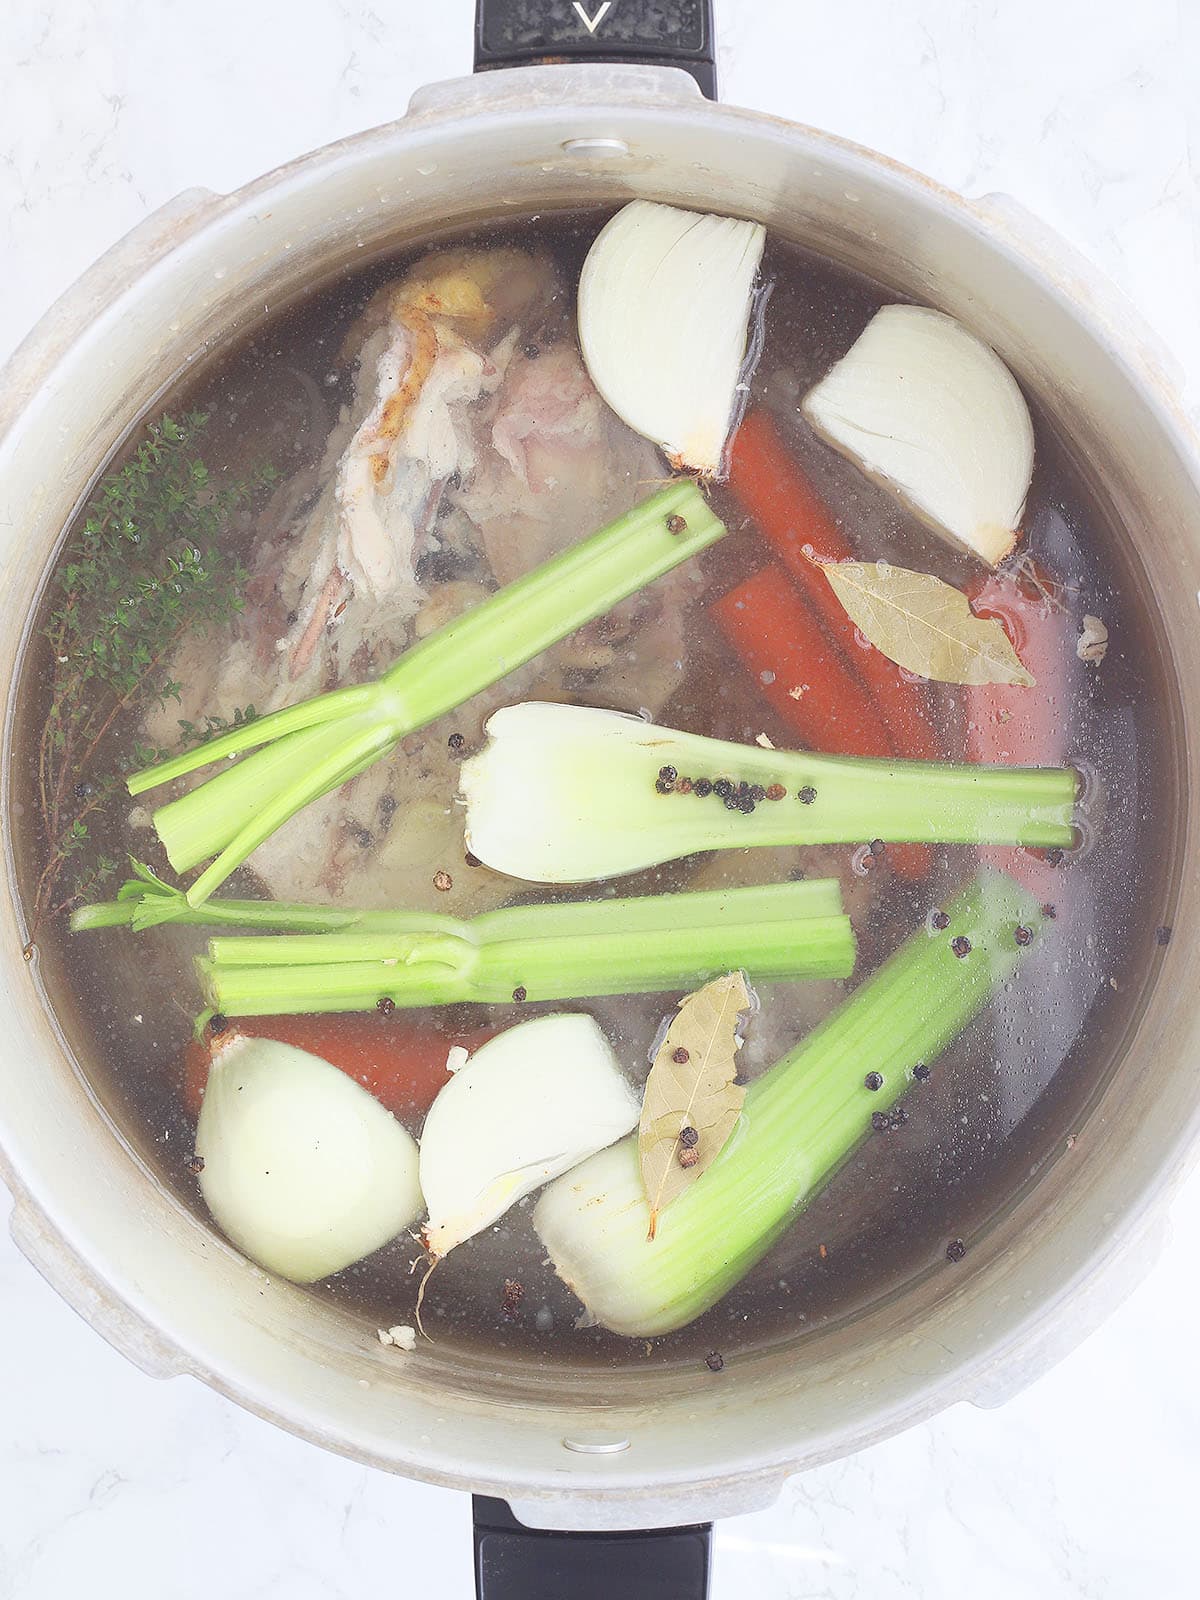
- 3-4 pounds of chicken bones – Try to remove as much meat and skin from the bones as you can. I’ve found more skin left on the bones creates more foam and grease. But, don’t get obsessive over removing every little morsel. If there is a little bit left clinging to the bones, that’s okay.
- 2 carrots, washed, halved crossways – don’t even worry about peeling the carrots. Just toss them in the pot. I cut them crossways so they fit in the pot better.
- 2 celery stalks, cleaned and halved crossways – I cut my celery stalks in half for the same reason. You can leave the leaves on.
- 2 whole cloves garlic, peeled
- 1 onion peeled and quartered – I’ve used both white and yellow onions. If I’m out of regular onions, I’ve even used green onions. However, I recommend staying away from red onions. The color will leach out into the broth while it simmers. While it won’t affect the flavor and it’s perfectly safe to eat, it will give your broth a grey, dingy color (I know this from experience).
- 1 teaspoon whole black peppercorns
- 2 bay leaves
- 1 bundle of fresh herbs – My go-to are thyme and/or rosemary because they grow in my garden year-round. But you could also use oregano, sage or parsley.
- Large stockpot, 6-quart or larger – you need to be able to cover the chicken bones with several inches of water and add your aromatics without the boiling water splashing out over the sides.
- Mesh sieve or fine-mesh strainer – you’ll need this later to remove all the solids from your broth and strain out any remaining grease. Cheesecloth can also be used.
Time saving tips
Don’t throw away those chicken bones!
Every time I serve a chicken dinner, I collect the bones in a plastic grocery bag and freeze them until I’m ready to make my own chicken stock. This can a leftover chicken carcass roasted whole chicken, chicken pieces, even a leftover rotisserie chicken from the grocery store. The only thing I would stay away from are bones from chicken that has been smoked. The smokey flavor will transfer into your broth and affect the taste.
Save your vegetable scraps
After you finish chopping an onion, what do you do with the tip and the root ends? Do you cut the ends off a stalk of celery? Toss those carrot peels in the garbage? Throw away the puny cloves of garlic that grow close to the center of a bulb? Stop doing that! Toss those unwanted bits and pieces in a freezer bag and save them to season your homemade stock.
Raid the vegetable drawer
Give new life to vegetables that are a bit past their prime by tossing them into the pot or chopping them up and adding them to your veggie scrap stash.
How to make homemade chicken stock
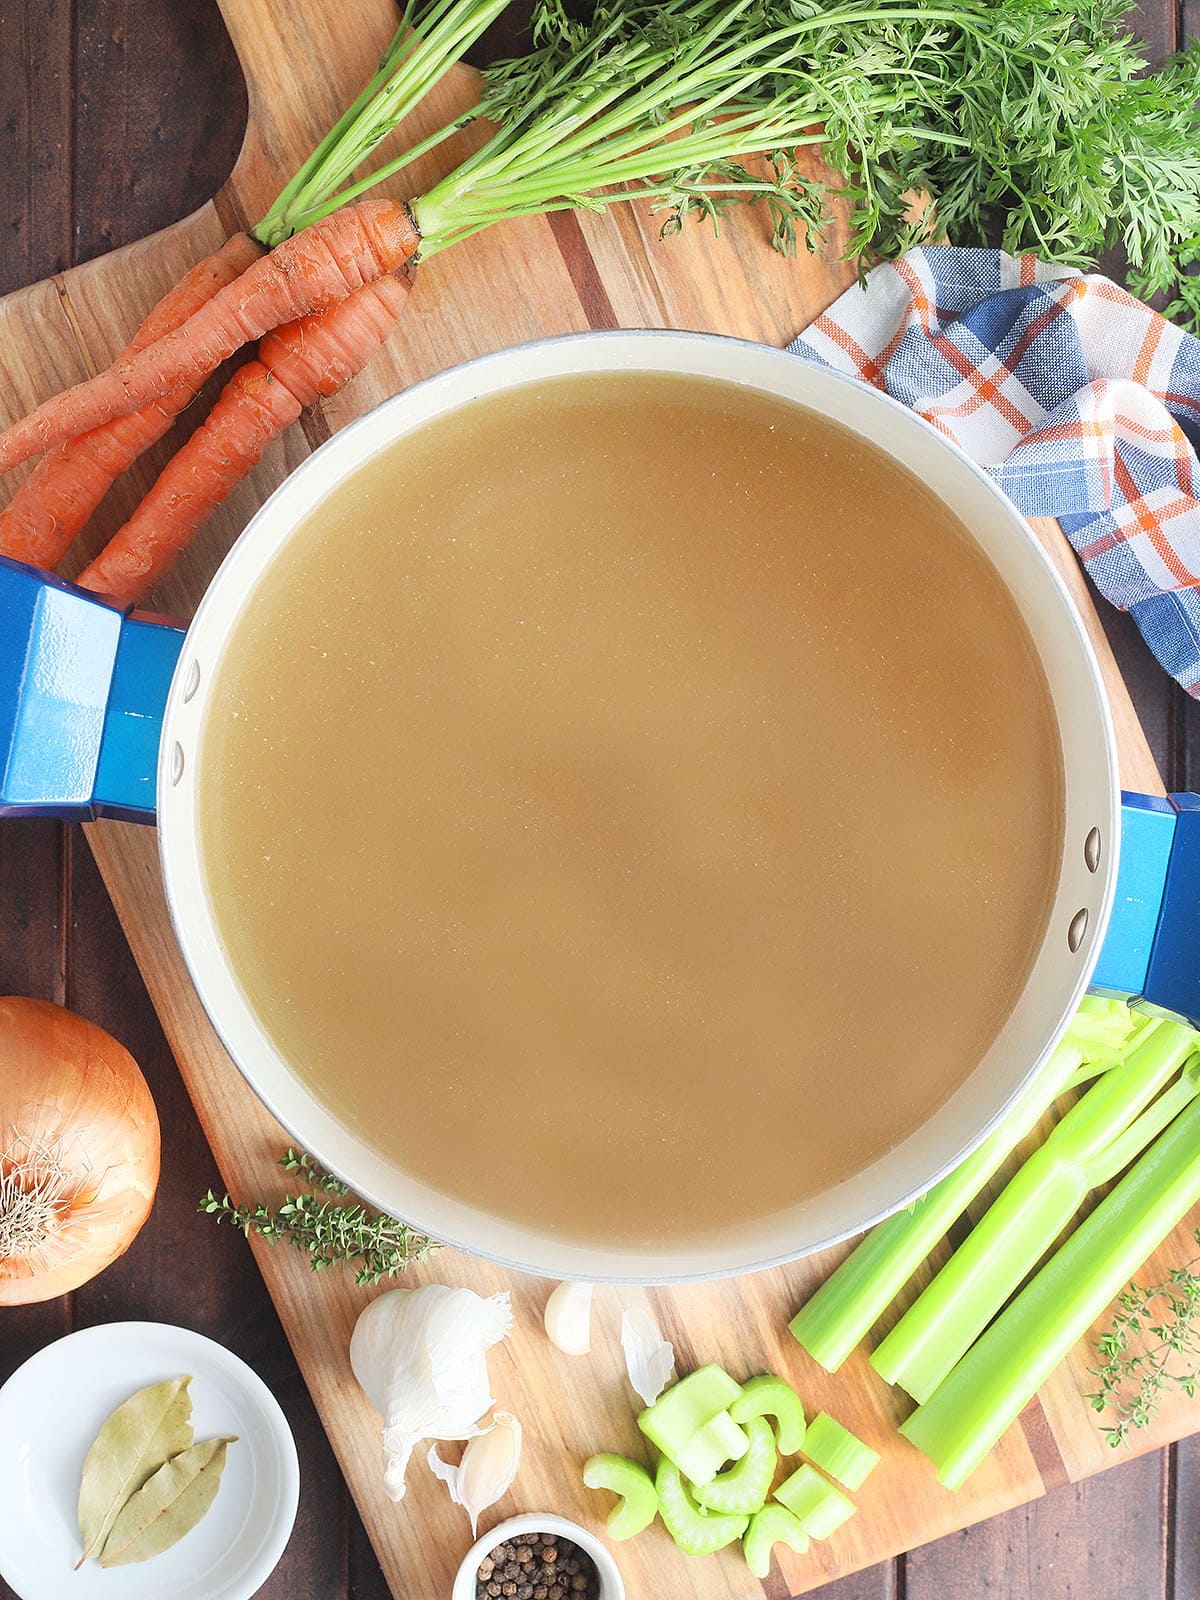
Place the chicken bones in the bottom of your stockpot and add enough cold water to cover the bones by three inches. Add the remaining ingredients and bring the water to a gentle boil over medium-high heat.
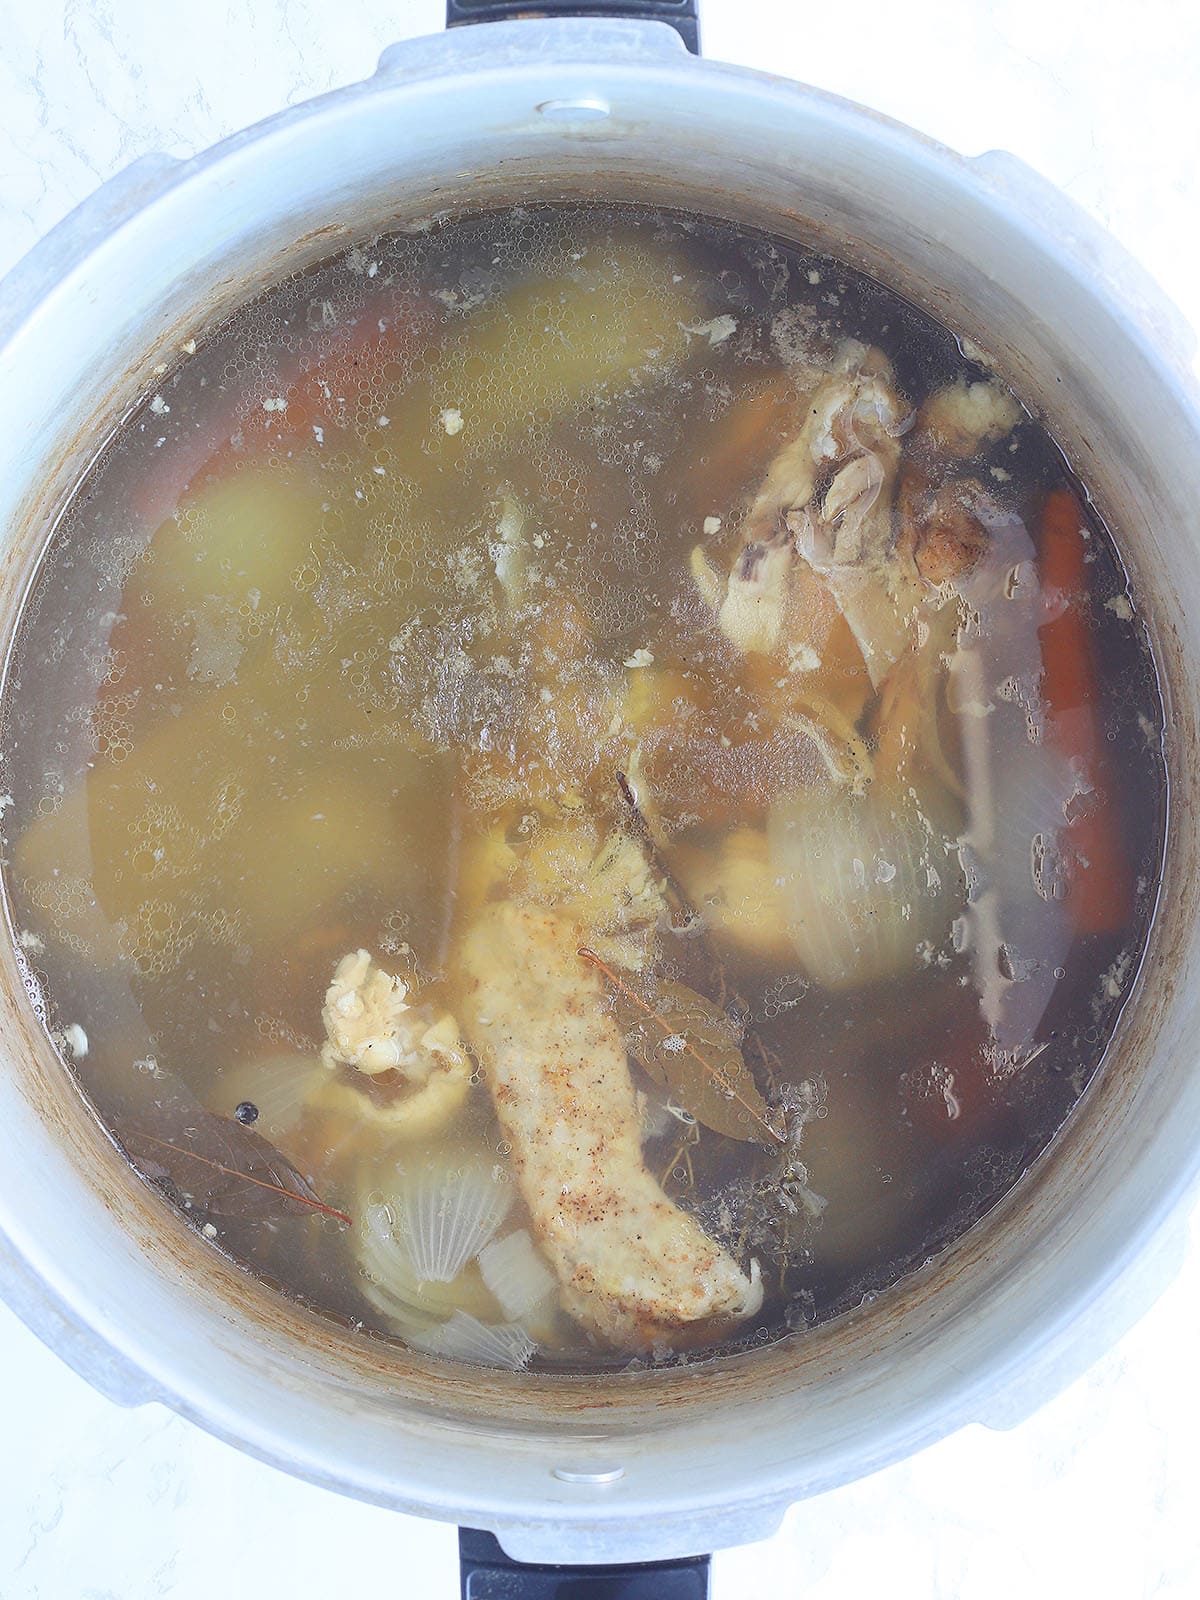
Once the water starts boiling, lower the temperature to medium-low heat and gently simmer for 2-3 hours. Try not to let the stock come to a heavy boil. In my experience, the harder the broth boils the more foam appears on the surface of the stock. The foam won’t hurt you — it’s just protein that has coagulated — and it doesn’t affect the flavor. But it can make your stock look murky and scummy. It is recommended that you skim the foam off the surface periodically with a strainer while the stock boils. But if you let the stock simmer gently rather than boil, you’ll have less foam to remove.
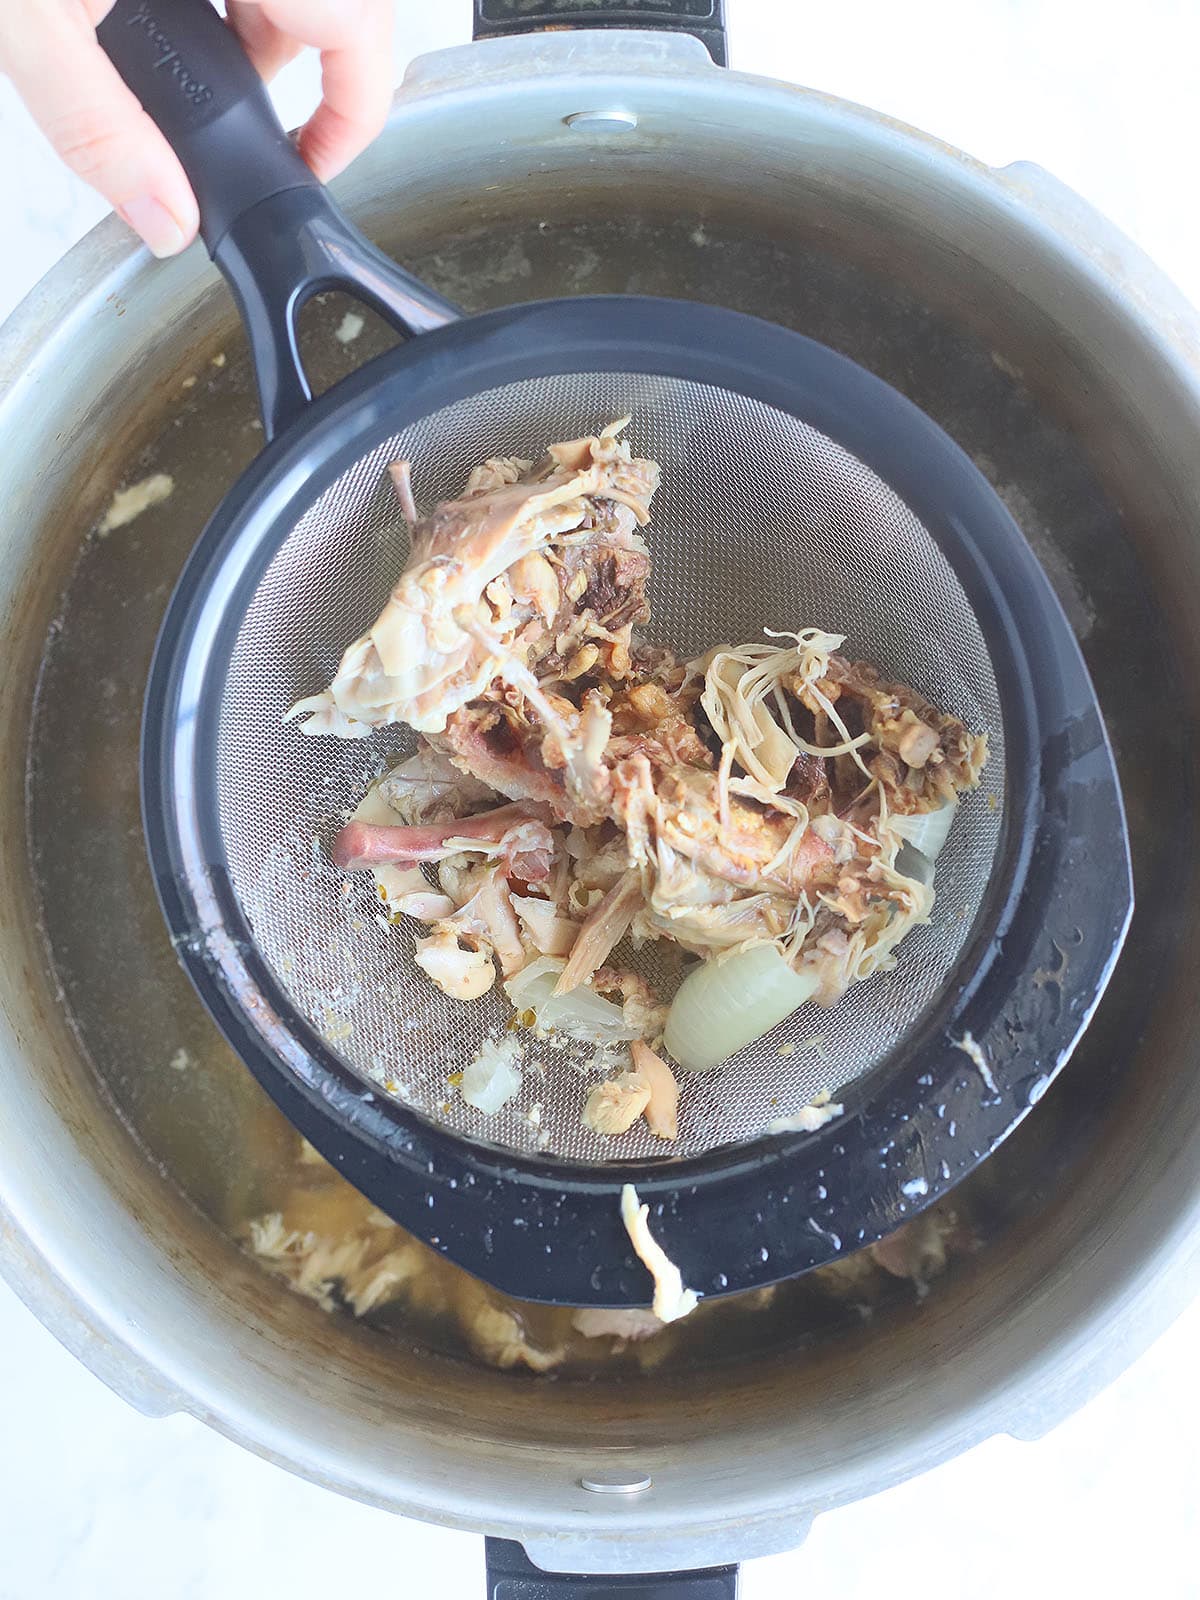
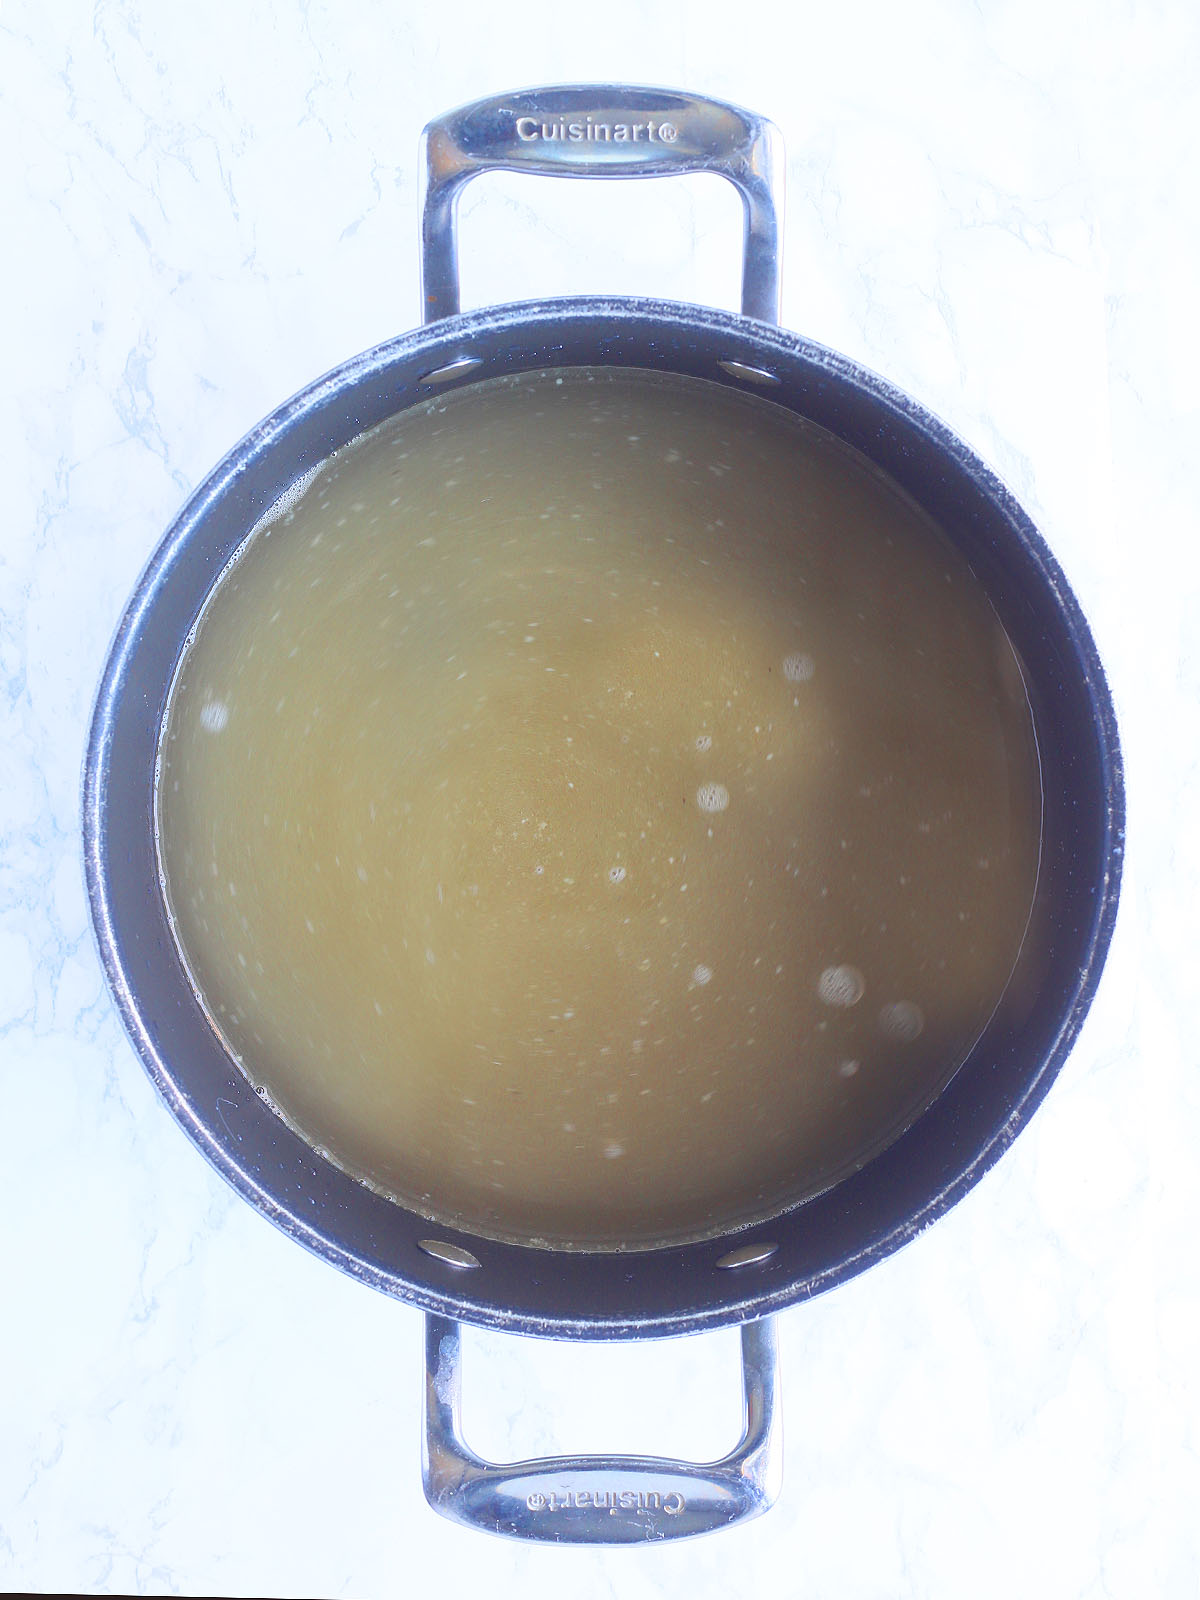
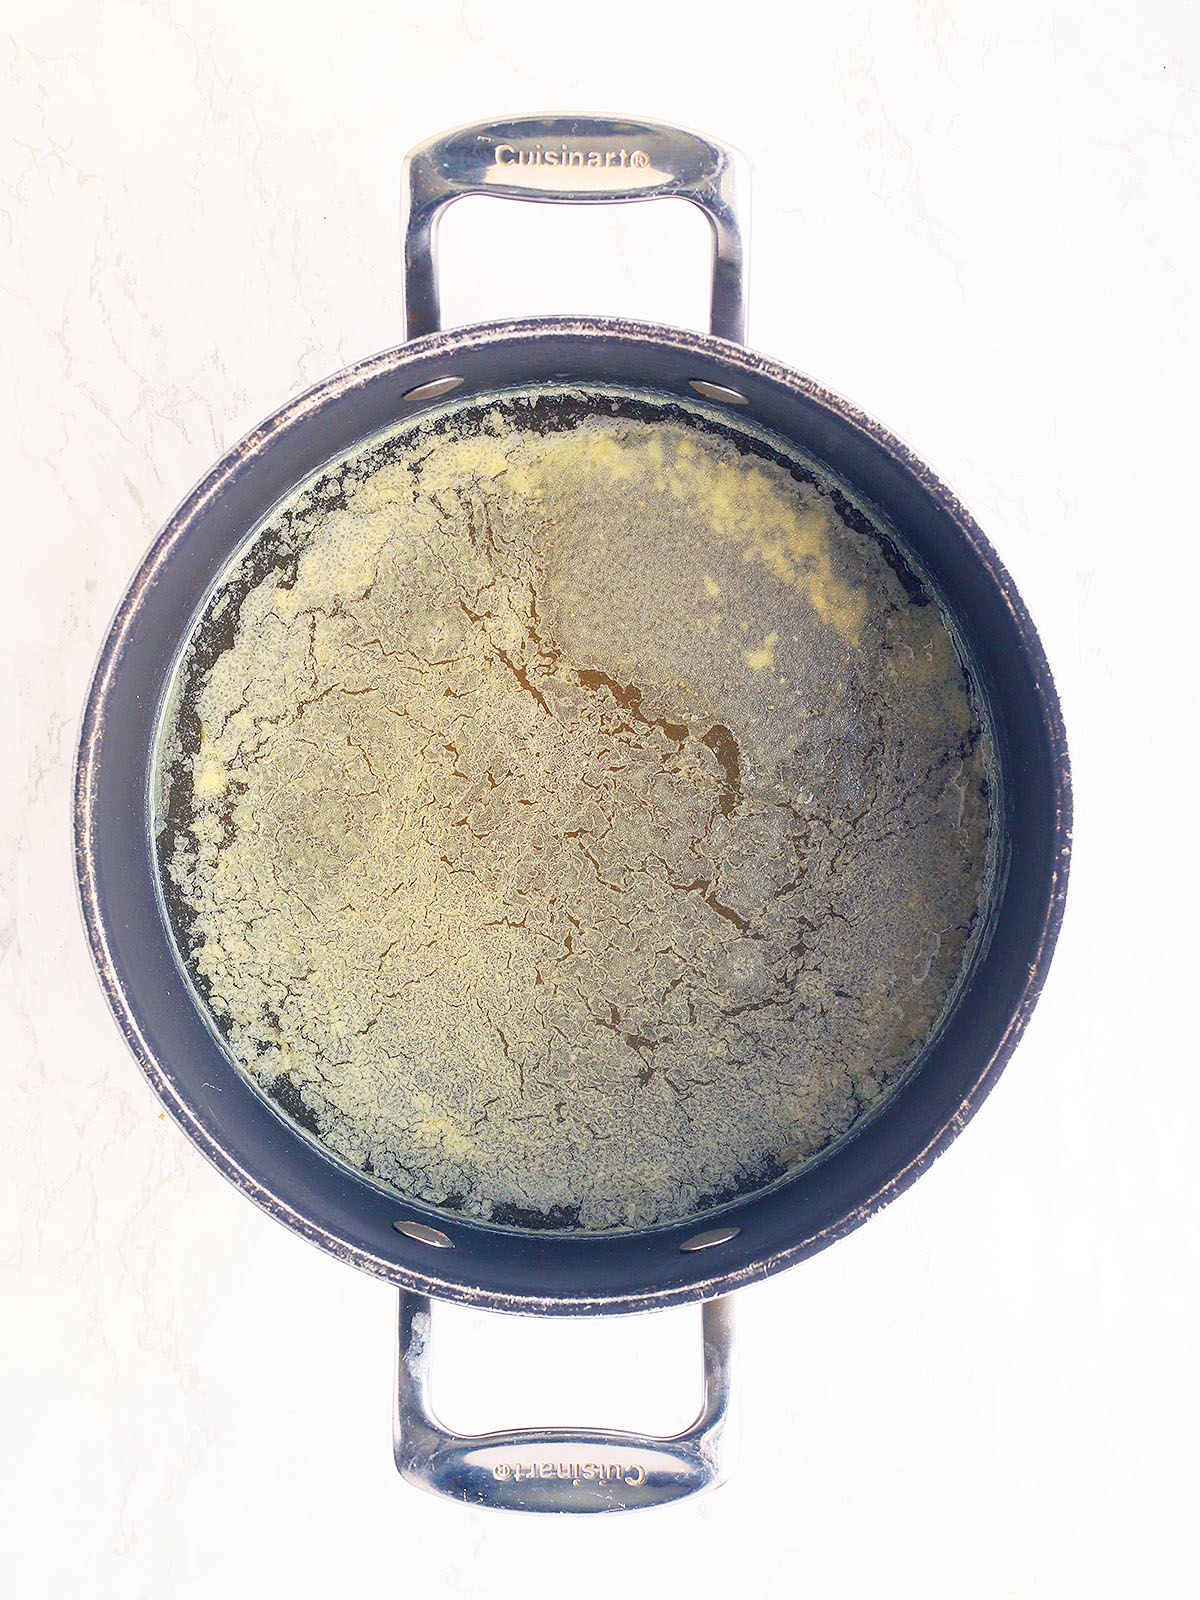
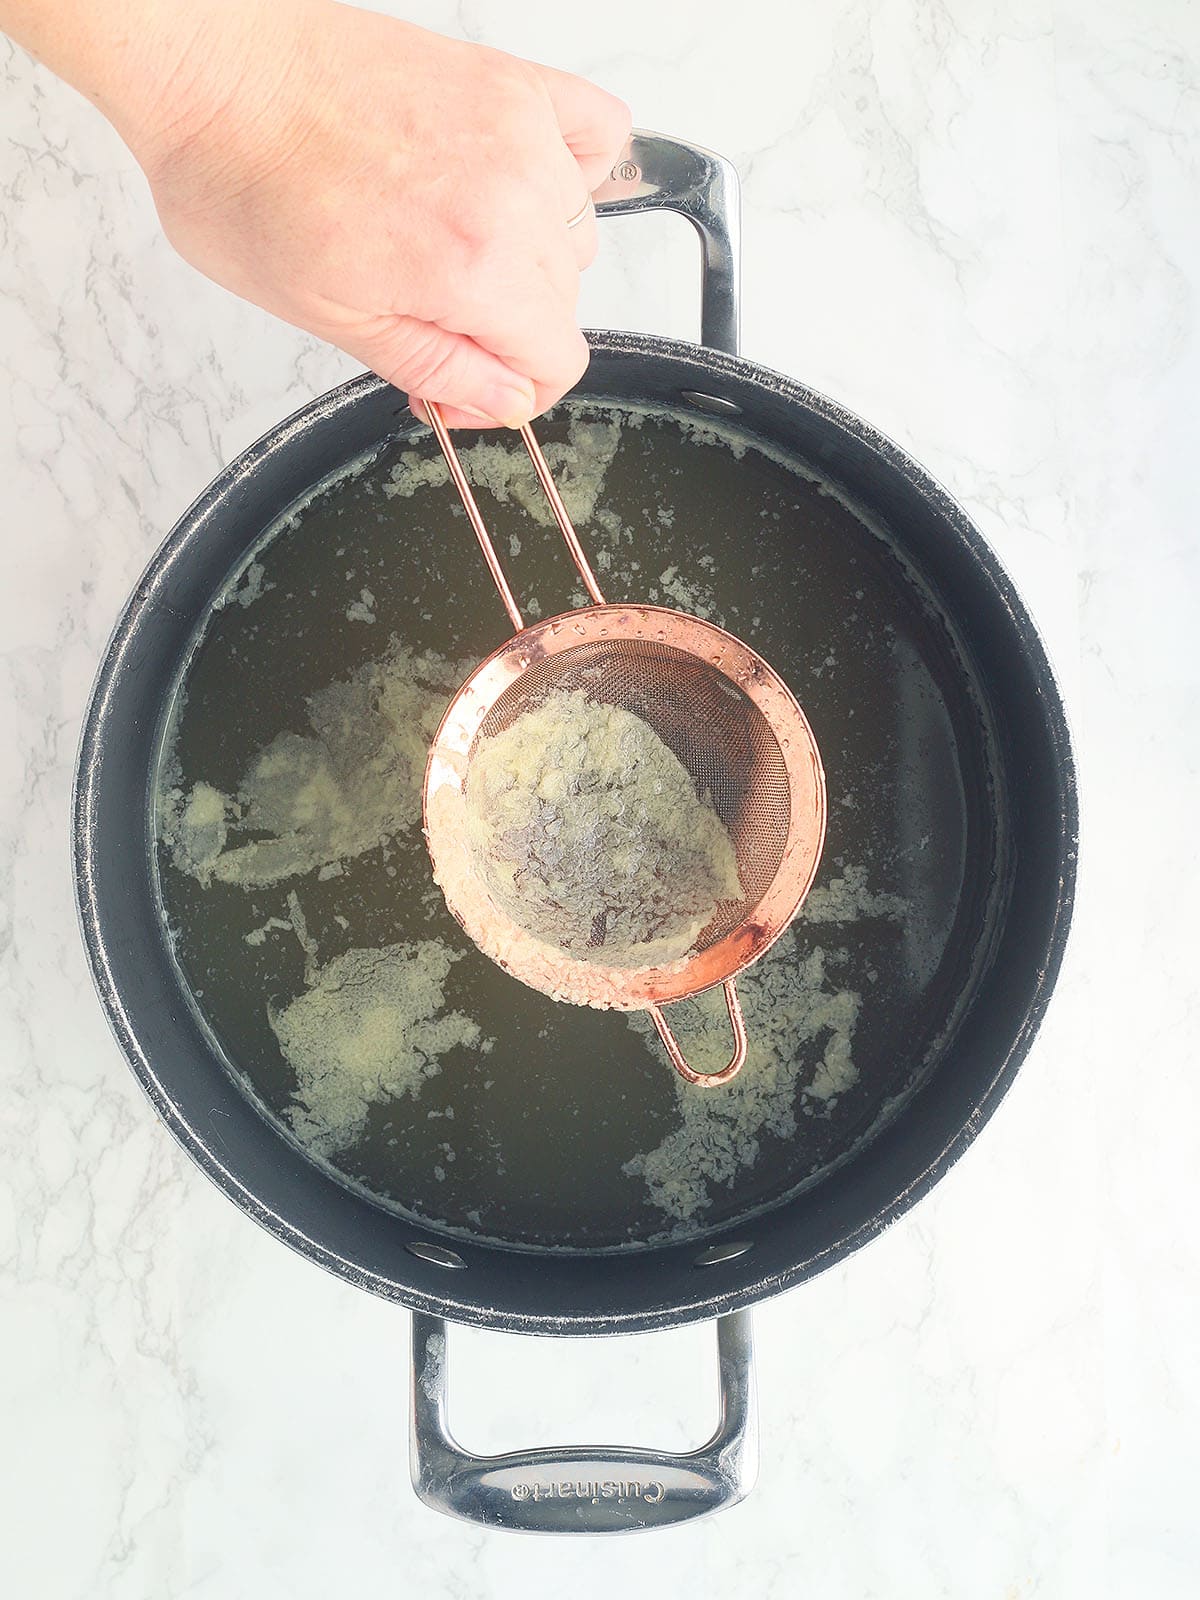
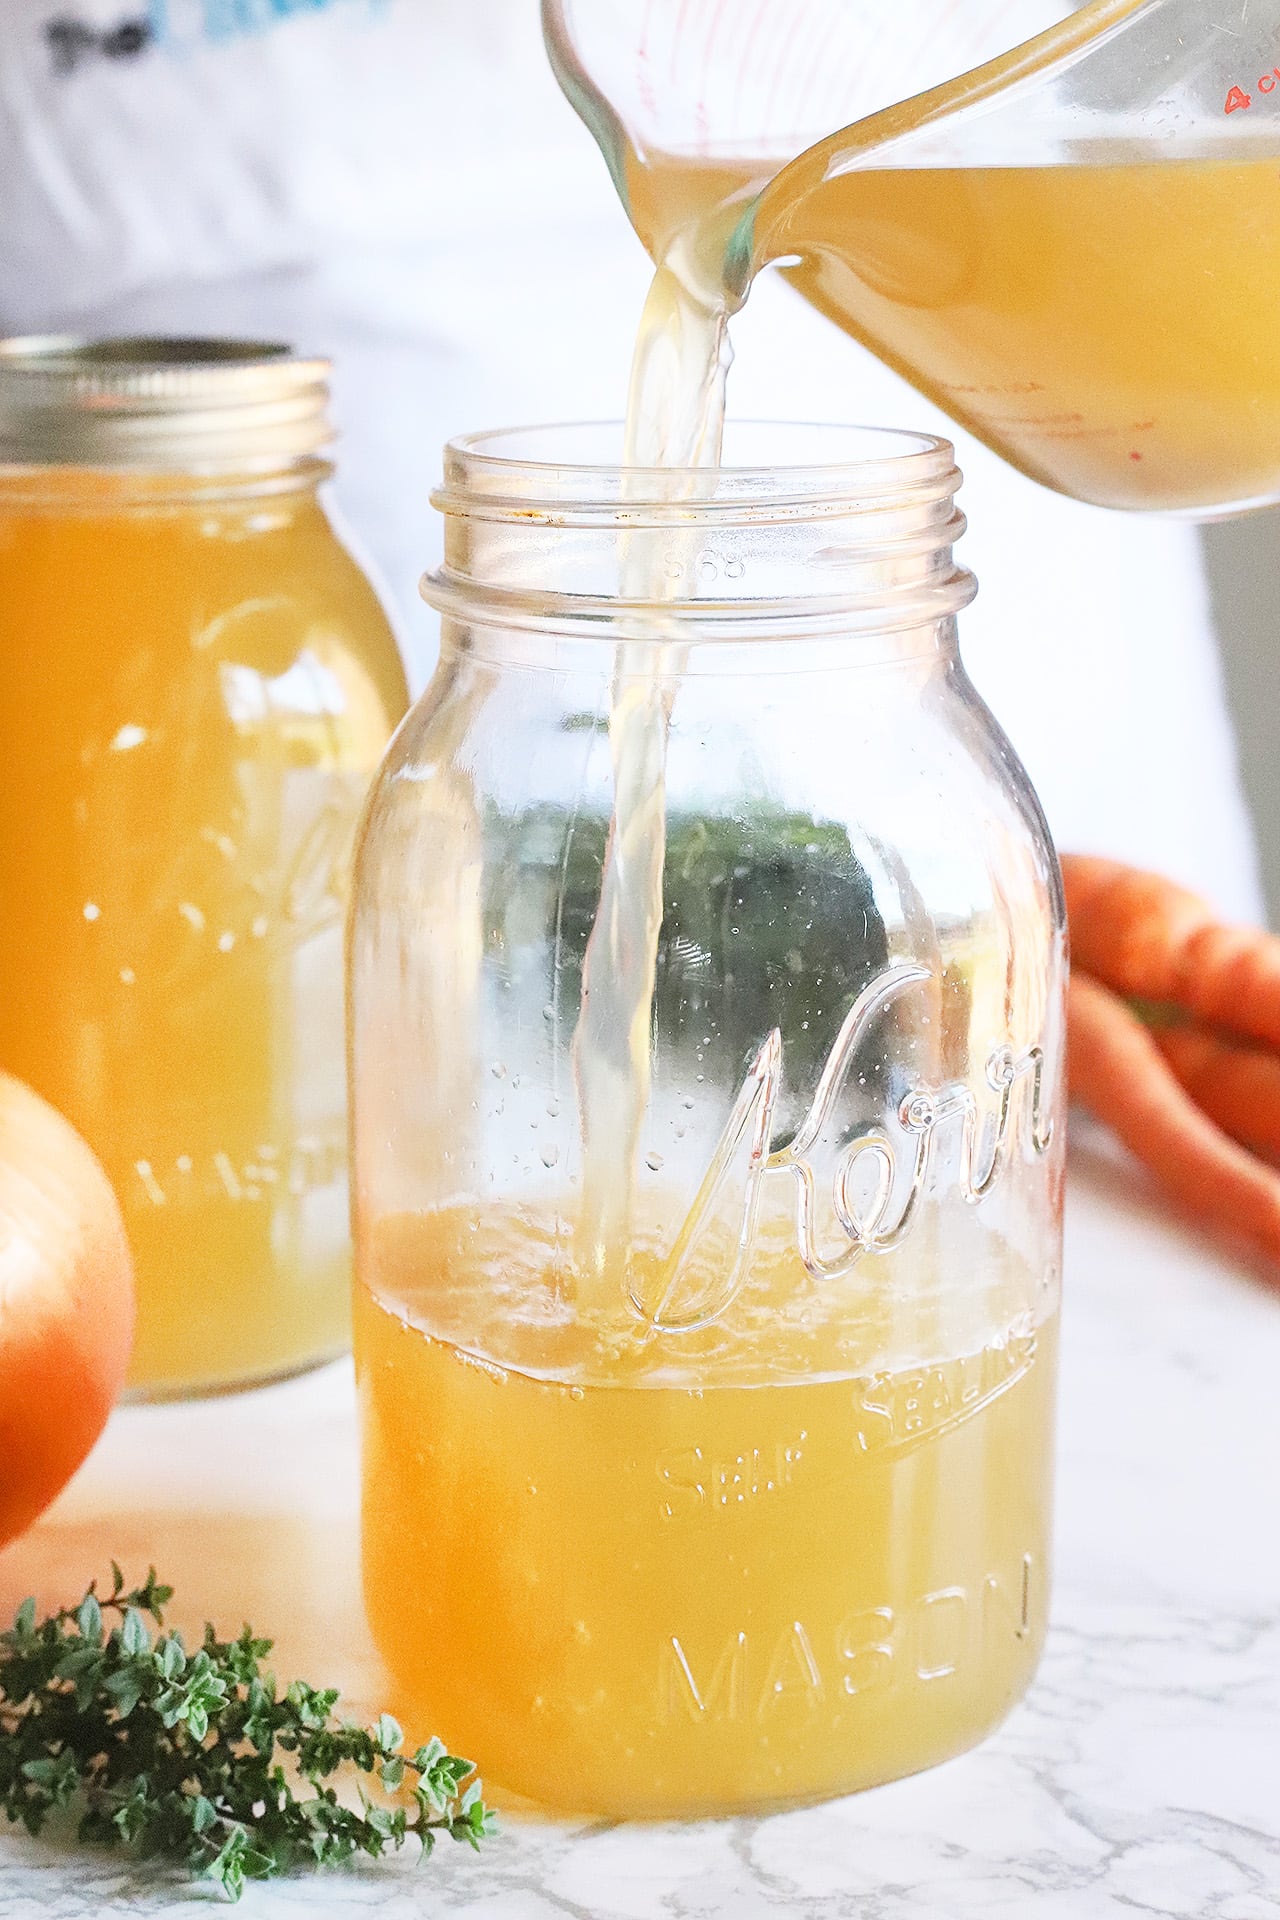
Remove the pot from the heat. Give the stock about an hour or so to cool before straining and discarding the solids. Once the large solids have been removed, I like to pour the stock through a fine mesh strainer into another container or pot to remove any small bits. Cover the cooled broth and store it in the refrigerator for eight hours. During this time, any fat will rise to the surface and harden. At this point, you can take your strainer and skim the fat off the surface.

Instant Pot chicken stock instructions
Since Instant Pots are smaller, this is not my favorite method because it results in less stock. But if you’re short on time, you can definitely make this homemade chicken stock recipe in the Instant Pot. Place the chicken, vegetables, herbs and spices in the insert.
Fill the Instant Pot with cold water until you reach the ⅔ full line. Lock and seal the Instant Pot. Select MANUAL. Then set the time to 50 minutes. Let the pressure release naturally. Strain and store the stock just as you would stovetop stock.
Slow Cooker chicken stock instructions
Place the chicken, vegetables, herbs and spices in the bottom of a slow cooker. Cover everything with cold water, leaving at least two inches of headspace between the surface of the water and the rim of the slow cooker. Cover the slow cooker, turn the heat on low and cook for at least eight hours or up to 12 hours. Strain and store just as you would stovetop stock.
Storage, freezing and reheating instructions
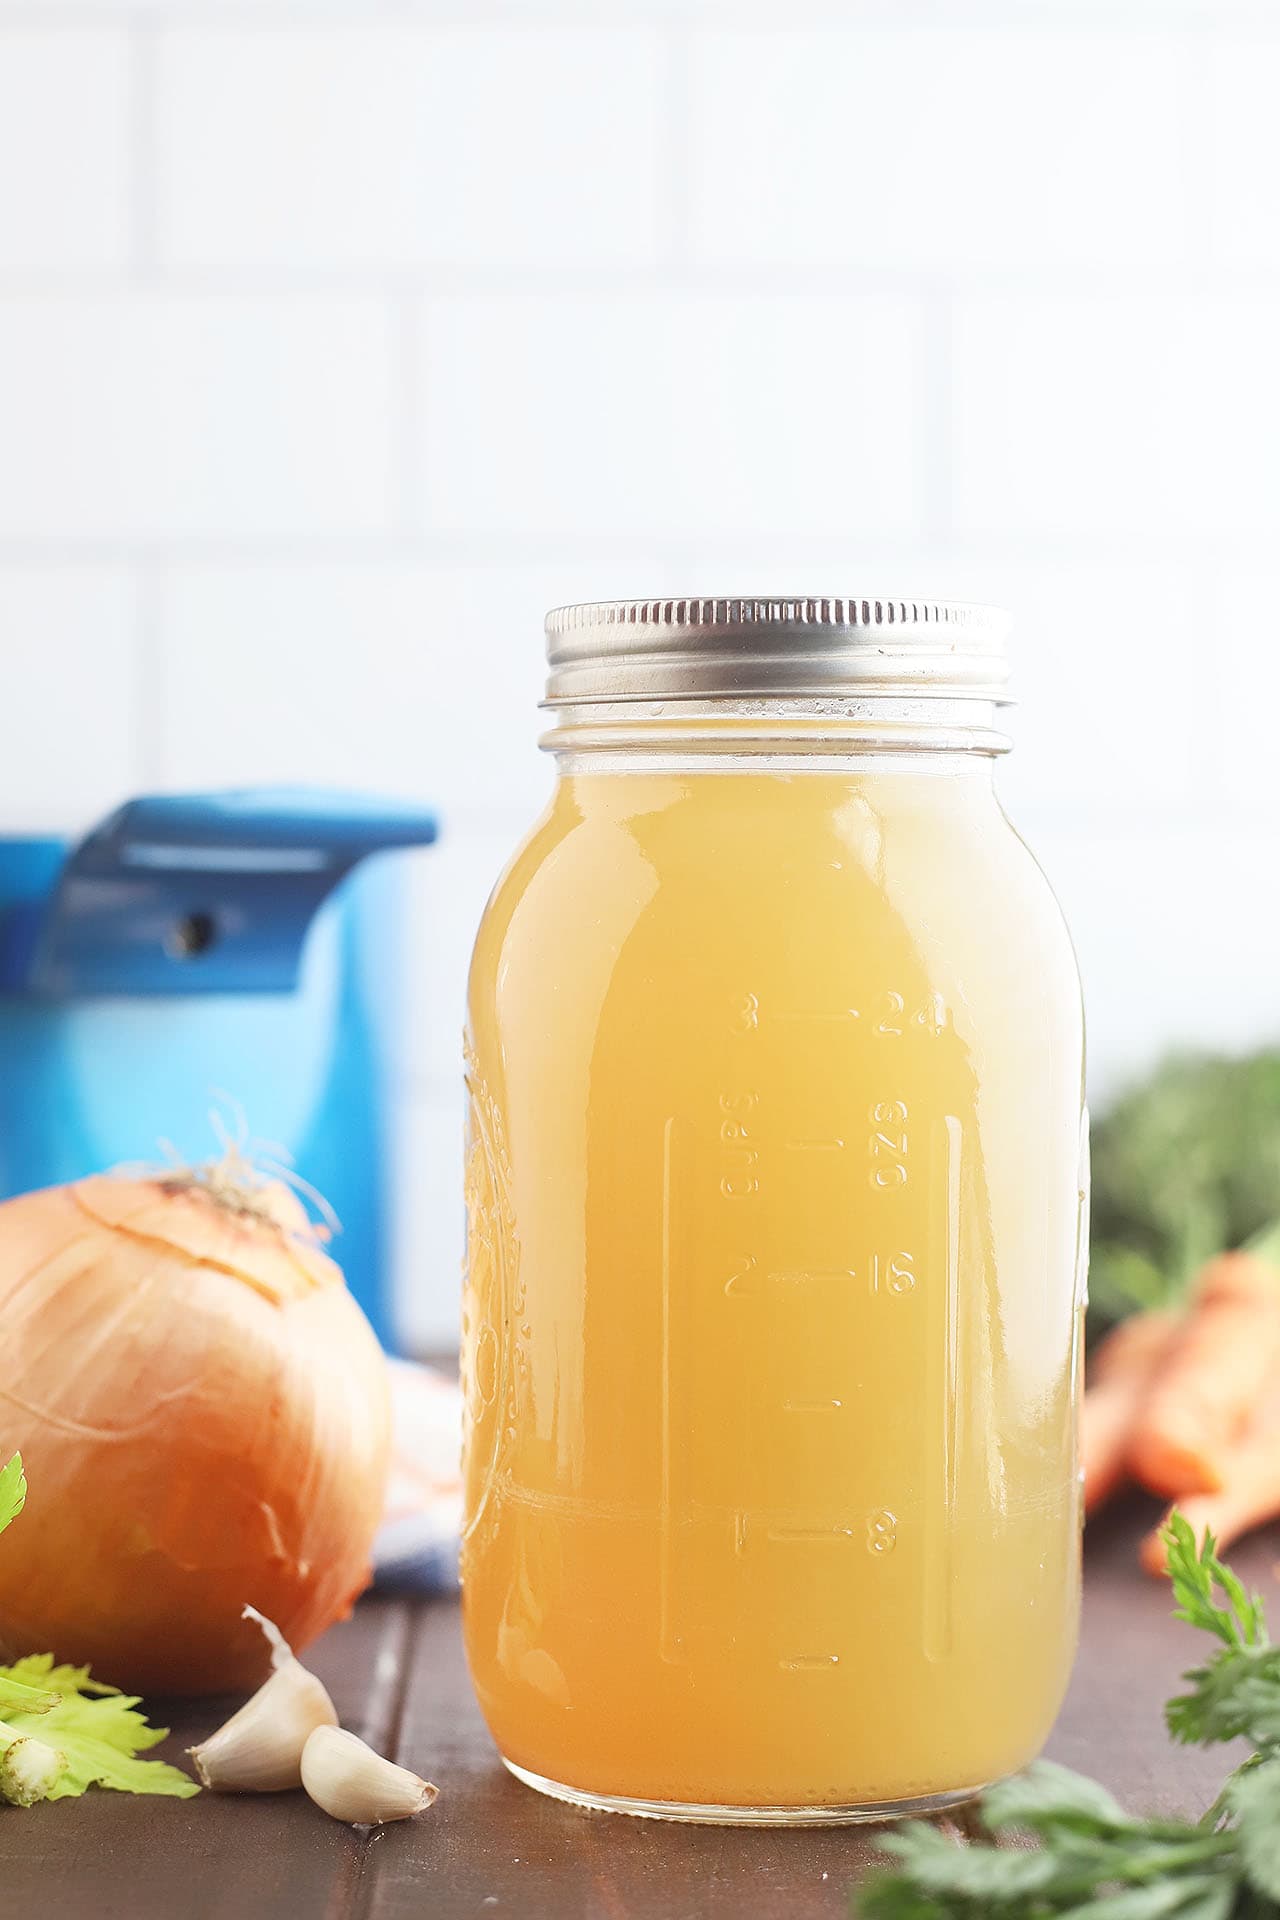
Storage. Homemade chicken stock should be stored in an airtight container in the refrigerator and consumed within four days.
Freezing. There are three ways to freeze chicken stock. Be sure to consume the stock within three months. Thaw before using.
- Freezer-safe containers with lids. Be sure to leave two inches at the top for expansion.
- Freezer bags. Again, leave 2-3 inches at the top for expansion, fold over the top of the bag to remove any air, then seal. I suggest laying the bag flat on a cookie sheet in the freezer until it’s solid. Then the bag can be stored upright.
- Ice cube trays. This is useful when you have a recipe that calls for a small amount of chicken stock. I like to portion out one tablespoon into each compartment. Place the tray on a flat surface until the stock is frozen solid, then remove the chicken broth cubes from the tray and transfer to a freezer bag.
Reheating. Reheat homemade chicken stock just as you would your favorite soup — for a few minutes in the microwave or over medium heat in a saucepan on the stove.
How to can chicken stock
This is my favorite way to store homemade chicken stock. It’s not taking up any room in the freezer and I don’t have the thaw it before using. I just crack open a jar! Before you get started, check your manufacturer’s instructions. If their instructions differ from mine, follow theirs.
Chicken stock can NOT be canned using the water bath canning method. This method only works for high-acid foods like jam, jelly and some vegetables. Low acids foods, like chicken stock and broth, must be heated to 240 degrees F to kill any bacteria, like botulism, that causes food poisoning. Water bath canners are only capable of reaching a maximum temperature of 212 degrees F. Even if you heat the jars and the lids seal, this is not an indication that they are safe to consume.
Pressure canning is the only way to achieve a temperature of 240 degrees F. You will need a pressure canner to do this. There are several models available. This pressure canner is the closest to what I have. While all pressure canners can double as a pressure cooker, not all pressure cookers can be used as a pressure canner. Make sure when you make the purchase that the description specifically says it can be used for pressure canning. Instant Pots are NOT pressure canners.
Fill pint or quart mason jars with warm (not hot) broth. Be sure to leave 1-inch of headspace between the top of the broth and the rim of the jar. The liquid will boil during canning and this prevents the stock from boiling out of the jar and preventing a good seal. Wipe the rims of the jar clean with a paper towel, then top with a lid and secure the lid with a ring.
Pressure canners come with a rack that fits into the bottom of the pot. It’s important to use this because it allows the heat to circulate freely around the jars and allows air bubbles to release without knocking the jars around inside the canner and causing them to crack, chip or break.
Place the jars on top of the rack. Then fill the canner with water according to the manufacturer’s instructions. Seal the canner and bring the pot to a boil over high heat. Once the canner starts to steam, allow it to vent for 10 minutes before setting the pressure. Process the jars at 10 pounds of pressure, 20 minutes for pint jars and 25 minutes for quart jars.
Remove the canner from the heat. Let the pressure in the canner release naturally. At this point, you can remove the jars from the canner, but I like to leave the jars in the canner for several hours until the pot and jars are cool. It could take up to 24 hours for a jar to completely seal. You know it’s sealed when the center of the lid does not flex up and down when gently pushed. If a jar did not seal, you will either need to store it in the fridge or make plans to re-can it. It is not safe to store a jar that is not properly sealed on a shelf. Remove the rings from the jars before storing. This prevents rust from forming under the lid and lets you know immediately if a jar comes unsealed at any point.
Frequently asked questions
How much stock will this recipe make?
It depends on the size of the chicken. Three to four pounds of bones will typically net four quarts of stock.
Do I need to roast the bones first?
If you’re using bones from meat that has NOT been cooked beforehand, it’s a good idea to roast the raw bones before making broth. Roasting the bones draws out impurities and carmelizes the bone marrow, giving your broth a richer flavor. Most of the time, the bones I use have been saved from a previously cooked chicken, so I don’t repeat this step.
Can I use turkey bones?
Yes! Turkey bones work just as well and I often save my leftover Thanksgiving turkey carcass for making turkey stock. However, if your turkey has been smoked, I would advise against it. The smokey flavor does get absorbed by the bones and it will affect the flavor of your broth.
Can I use frozen chicken bones and vegetables?
Yes. Remember, I throw all my leftover bones and vegetable scraps in the freezer until I’m ready to make my stock. You don’t even have the thaw the ingredients first. Just toss them in.
Can I cook this in a pressure cooker (not an Instant Pot)?
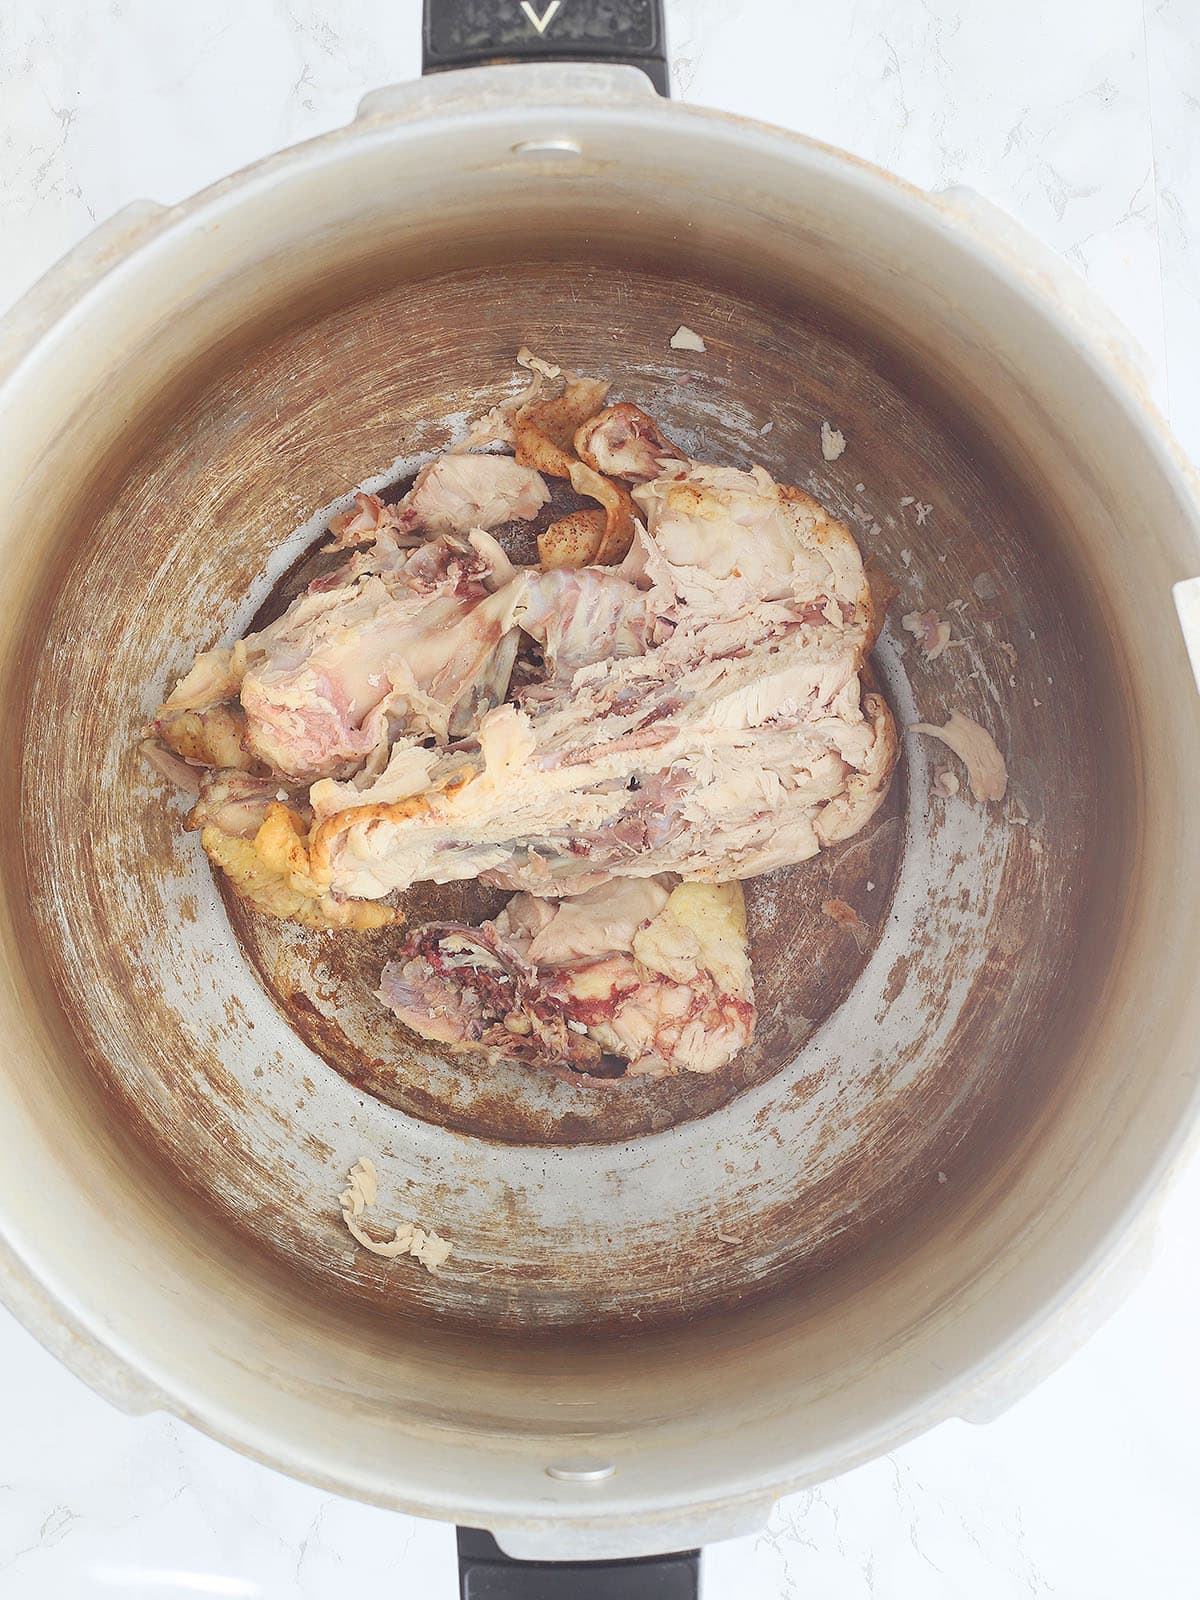
Yes. I often make my chicken in my stovetop pressure cooker. You get all the rich flavor in a fraction of the time. Put all the ingredients in the pressure cooker. Close the cover securely and bring the contents to a boil. Let the pressure cooker vent for 10 minutes, then cook at 15 pounds of pressure for 10 minutes. Remove the pot from the heat and let the pressure drop naturally. I recommend checking your manufacturer’s instructions beforehand. If their instructions differ from mine, follow theirs.
Can I eat the leftover vegetables instead of throwing them away?
Yes, the vegetables are safe to eat, but very soft at this point, so I usually toss them and the chicken bones in the trash. But if you have another idea, keep them by all means!
Can I reuse the bones for a second batch?
You can, but just like reusing tea leaves or coffee grounds, your stock will become weaker with each batch.
Can I use dried herbs instead of fresh?
Yes. However, dried herbs are more concentrated than fresh, so I would use half of the recommended amount. Start with one teaspoon of whatever herbs you are using. You can always add more if needed.
No salt?
No. I like to be able to control the amount of salt in my cooking. Therefore, I prefer to season a finished dish.
Is two hours really long enough?
I’ve always cooked my broth anywhere from 2-3 hours. When conducting research for this post, I was surprised to find recipes that simmered stock for 4-24 hours. Two hours has always worked for me, but if you want to simmer your stock for longer, go right ahead.
Why does my stock look milky?
The milkiness is a result of impurities in the stock. The milky appearance won’t hurt you. But next time, make sure to always start with bones and cold water. Don’t bring the water to a boil and add the bones second. Don’t let the stock come to a hard boil, but keep it at a gentle simmer. And be sure to periodically skim any foam from the surface of the broth.
Why did my stock turn to jelly?
This is not bad. Chicken bones contain collagen, which solidifies into gelatin when cooled. This usually occurs in stock cooked longer than four hours. There is nothing you need to do to remove it. It will melt and dissolve once reheated.
I made my stock and put it into quart jars to fit into the fridge. Can I put the cold jars in the pressure canner without warming it back to boiling again?
I don’t recommend doing this. Sudden, drastic changes in temperature can cause glass jars to shatter. You don’t have to bring the broth back to boiling, but you do need to warm the jars up before canning.
Ways to use homemade chicken stock
Homemade Chicken Stock
Ingredients
- 3 pounds chicken bones, as much skin removed as possible
- 2 whole carrots halved crossways
- 2 whole celery stalks cleaned and halved crossways
- 2 cloves garlic peeled
- 1 whole onion peeled and quartered
- 1 teaspoon whole black peppercorns
- 2 bay leaves
- 1 bundle fresh herbs thyme, rosemary, sage, oregano – whatever you have on hand
Instructions
Stockpot method:
- Place the chicken bones in a large stockpot. Add enough cold water to completely cover the chicken by about 2 - 3 inches.
- Add the vegetables, peppercorns, bay leaves, and herbs. Cover the pot and bring the water to a boil over medium-high heat. Skim off any foam that forms.
- Reduce the heat to low and allow the stock to simmer for about 2-3 hours. Remove the pot from heat and allow it to cool.
- Remove the large solids.
- Pour the stock through a mesh sieve into another container. Discard any solids left behind.
- Allow the stock to sit in the refrigerator overnight. Remove and discard any hardened grease that has formed on the surface.
- Transfer the stock to air-tight containers with lids or freezer bags.


I wouldn’t recommend it, Kristy. Putting cold glass into hot water could cause the glass to explode.
I made my stock and put it into quart jars to fit into the fridge. Can I put the cold stock filled cans in the pressure cooker without warming it back to boiling again?
I would recommend it. It prevents all your stock from evaporating while it simmers.