Homemade Cheese Straws

A beloved Southern treat, these spicy little cheese straws are simple to make and even more addictive to eat.
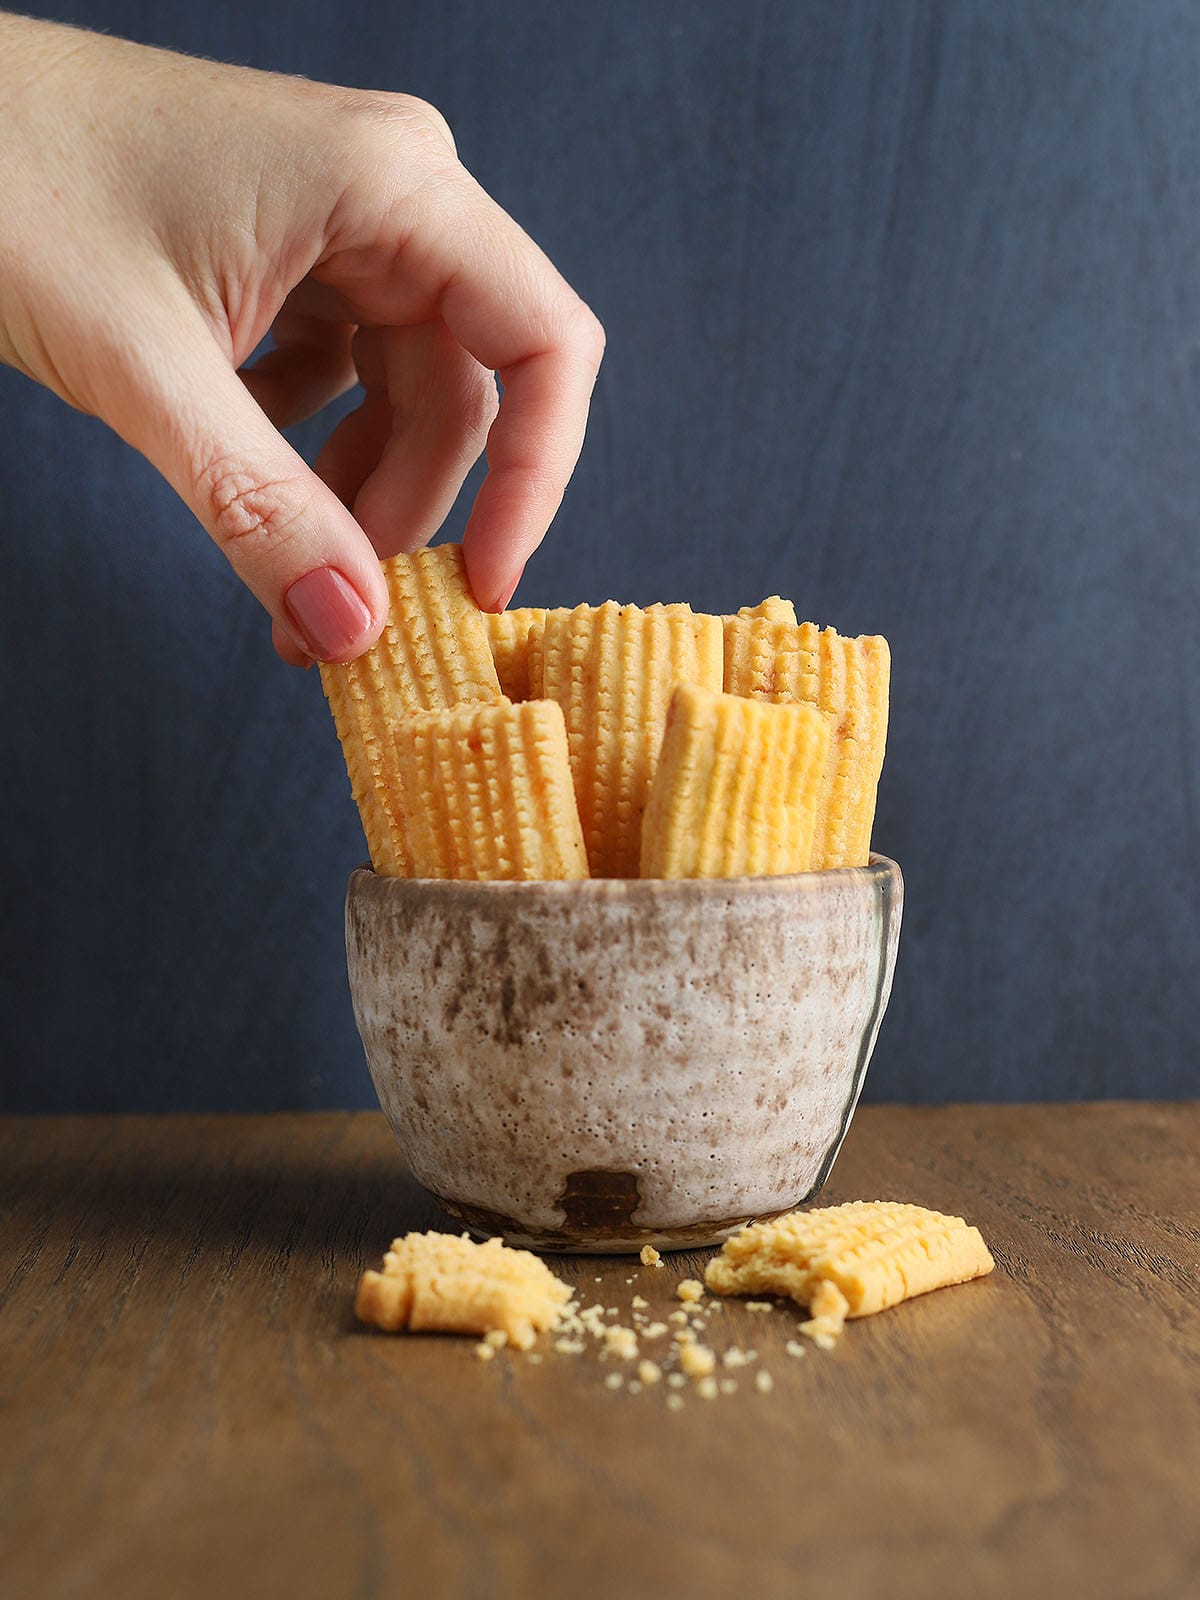
Cheese straws have been a beloved Southern treat for longer than I can remember. If you’ve never had one, they have the texture of a shortbread cookie but the flavor of cheese crackers, with a dash of cayenne pepper thrown in.
Growing up, people always gave them out as gifts during the holidays. But I see no reason why their enjoyment should only be limited to a couple months out of the year.
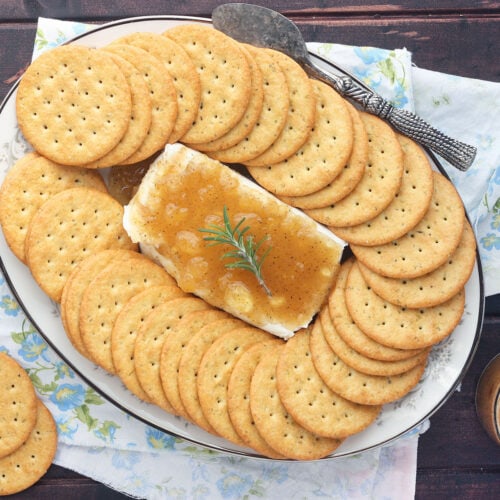
These homemade cheese straws are even more delicious when dipped in this creamy Homemade Onion Dip.
Recipe at a glance
- Classic Southern flavor. Sharp cheddar + butter + cayenne = perfection.
- Easy, no-fuss dough. Everything mixes together in one bowl.
- Customizable shape. Use a cookie press for traditional ridged straws or simply cut them by hand.
- Great for gifting. They keep well and look charming packaged up in tins or jars.
Summarize and save this content on
Jump to:
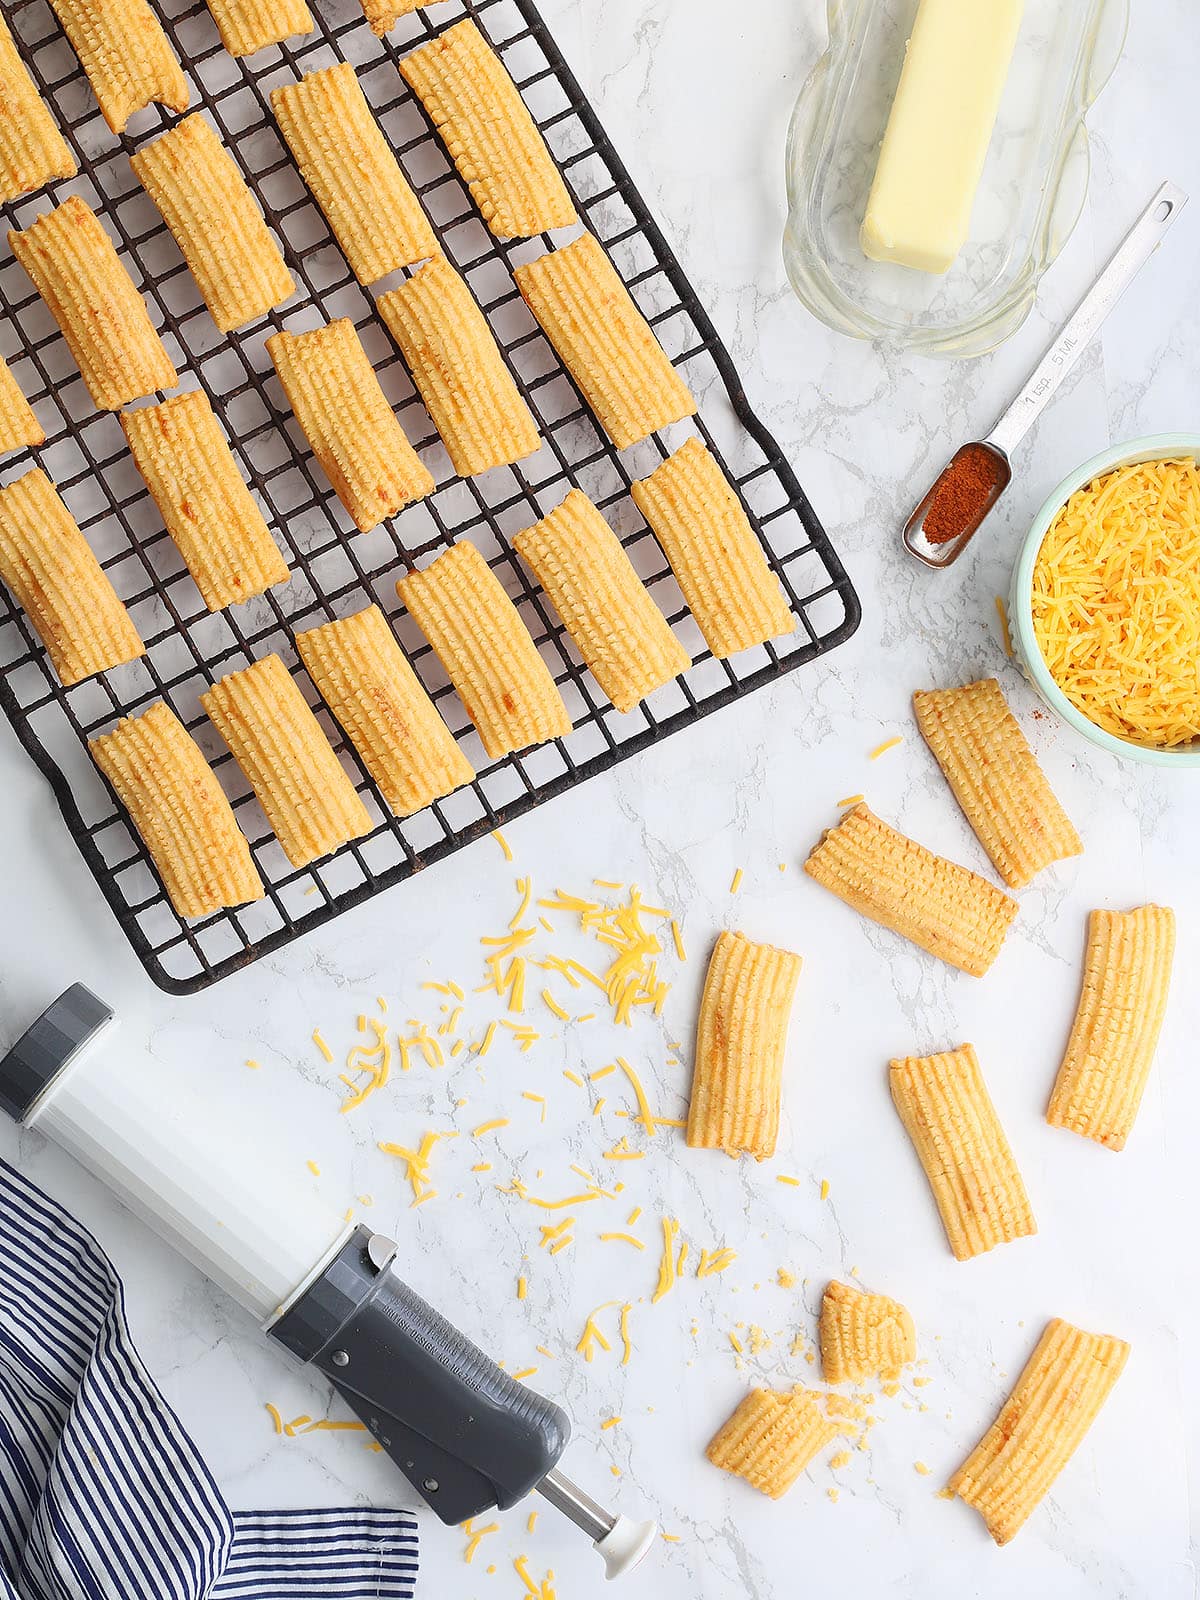
Ingredients and tools you’ll need
This homemade version is everything you want in a classic cheese straw—crisp edges, a tender bite, sharp cheddar flavor, and just the right hit of cayenne pepper. They’re perfect for gifting, snacking, holiday grazing boards, or setting out with cocktails. To make these delicious cheese straws, you will need:

See the recipe card for full information on ingredients and quantities.
- Unsalted Butter – Adds richness and creates that tender, melt-in-your-mouth texture. Using unsalted butter gives you better control over the recipe’s overall saltiness.
- Sharp Cheddar Cheese – The main flavor component. Sharp cheddar provides bold, savory taste and helps the straws bake up crisp. Room-temperature cheese blends more smoothly into the dough.
- All-Purpose Flour – Gives the dough structure so the cheese straws hold their shape and bake into firm, crunchy bites.
- Salt – Enhances the cheddar’s natural flavor and balances the richness of the butter.
- Cayenne Pepper – Adds a classic Southern-style heat that makes cheese straws addictive without being overpowering.
Recommended tools
- Mixer (hand or stand mixer): Great for creaming together butter and cheese and ensuring the dough is evenly mixed and smooth.
- Cookie press: Ideal for forming uniform, ridged cheese straws quickly and easily. I recommend using the star tip or the zig zag disk.
Substitutions and variations
- Use a different cheese: Swap sharp cheddar for extra-sharp, white cheddar, Colby, or even pepper jack for a spicier kick.
- Milder heat: Reduce or omit the cayenne pepper if you prefer a less spicy straw.
- Extra spicy: Add an additional ½ teaspoon cayenne, a pinch of crushed red pepper flakes, or substitute smoked paprika for a deeper, smoky heat.
- Add herbs: Mix in 1–2 teaspoons of dried herbs like thyme, rosemary, or Italian seasoning for a more aromatic version.
- Add garlic: A ½ teaspoon of garlic powder or onion powder adds a savory twist.
- Try smoked cheese: Smoked cheddar or smoked gouda gives the straws a rich, smoky flavor.
- Make them crispier: Roll the dough slightly thinner for extra crunchy straws.
- Make them bite-sized: Instead of long straws, pipe or cut the dough into 1-inch pieces for cheese “bites.”
- Gluten-free option: Substitute a 1:1 gluten-free all-purpose flour blend for a gluten-free variation (texture may be slightly more delicate).
- No cookie press? Roll the dough with a rolling pin and cut into strips for a rustic, handmade version.
How to make cheese straws
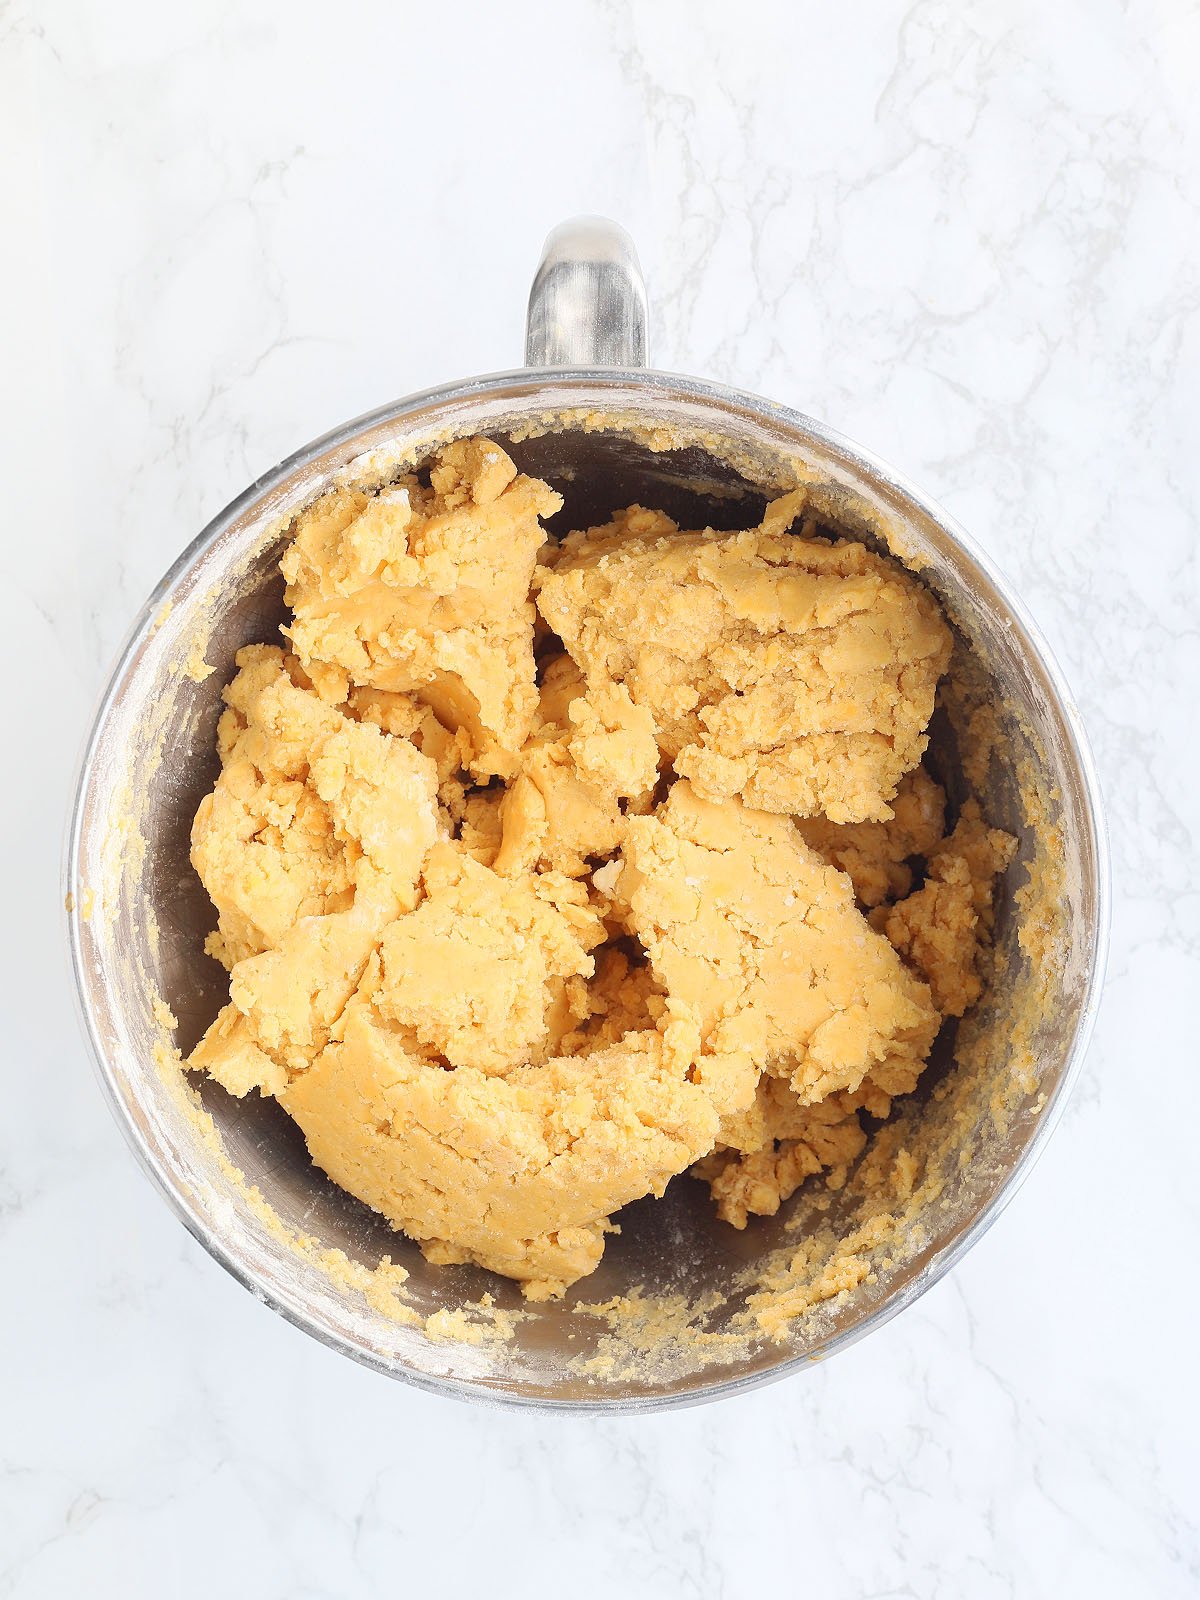
Step 1: Preheat your oven to 375°F. In a large mixing bowl, cream together the softened butter and shredded cheese at medium speed until fully combined. Add the flour, salt, and cayenne pepper. Mix on low until the flour is incorporated, then increase to medium and continue mixing until the dough comes together.
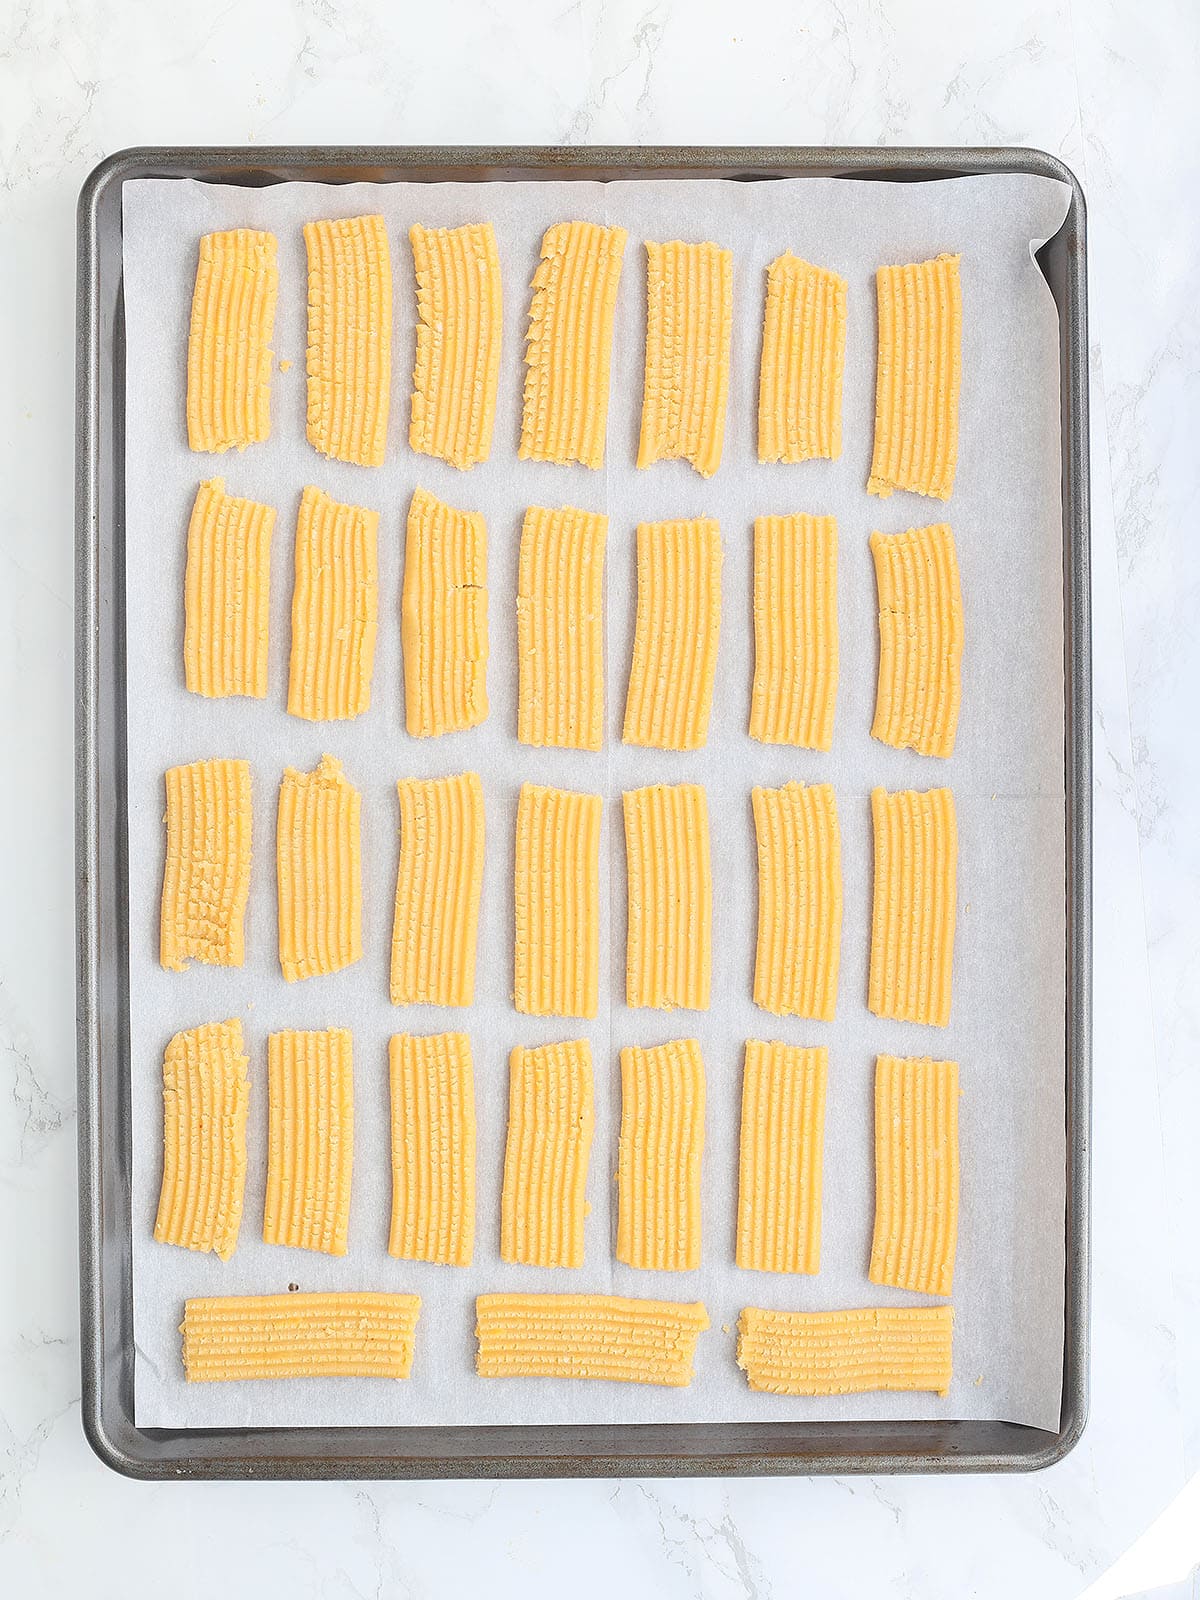
Step 2: Line a baking sheet with parchment paper or aluminum foil. Press dough into 2½–3-inch straws, spacing them about ¼ inch apart. If you don’t have a cookie press, roll the dough to ⅜ inch thick on a lightly floured surface. Cut into strips 1½ inches wide and 2½–3 inches long using a sharp knife, pizza cutter, or pastry cutter.
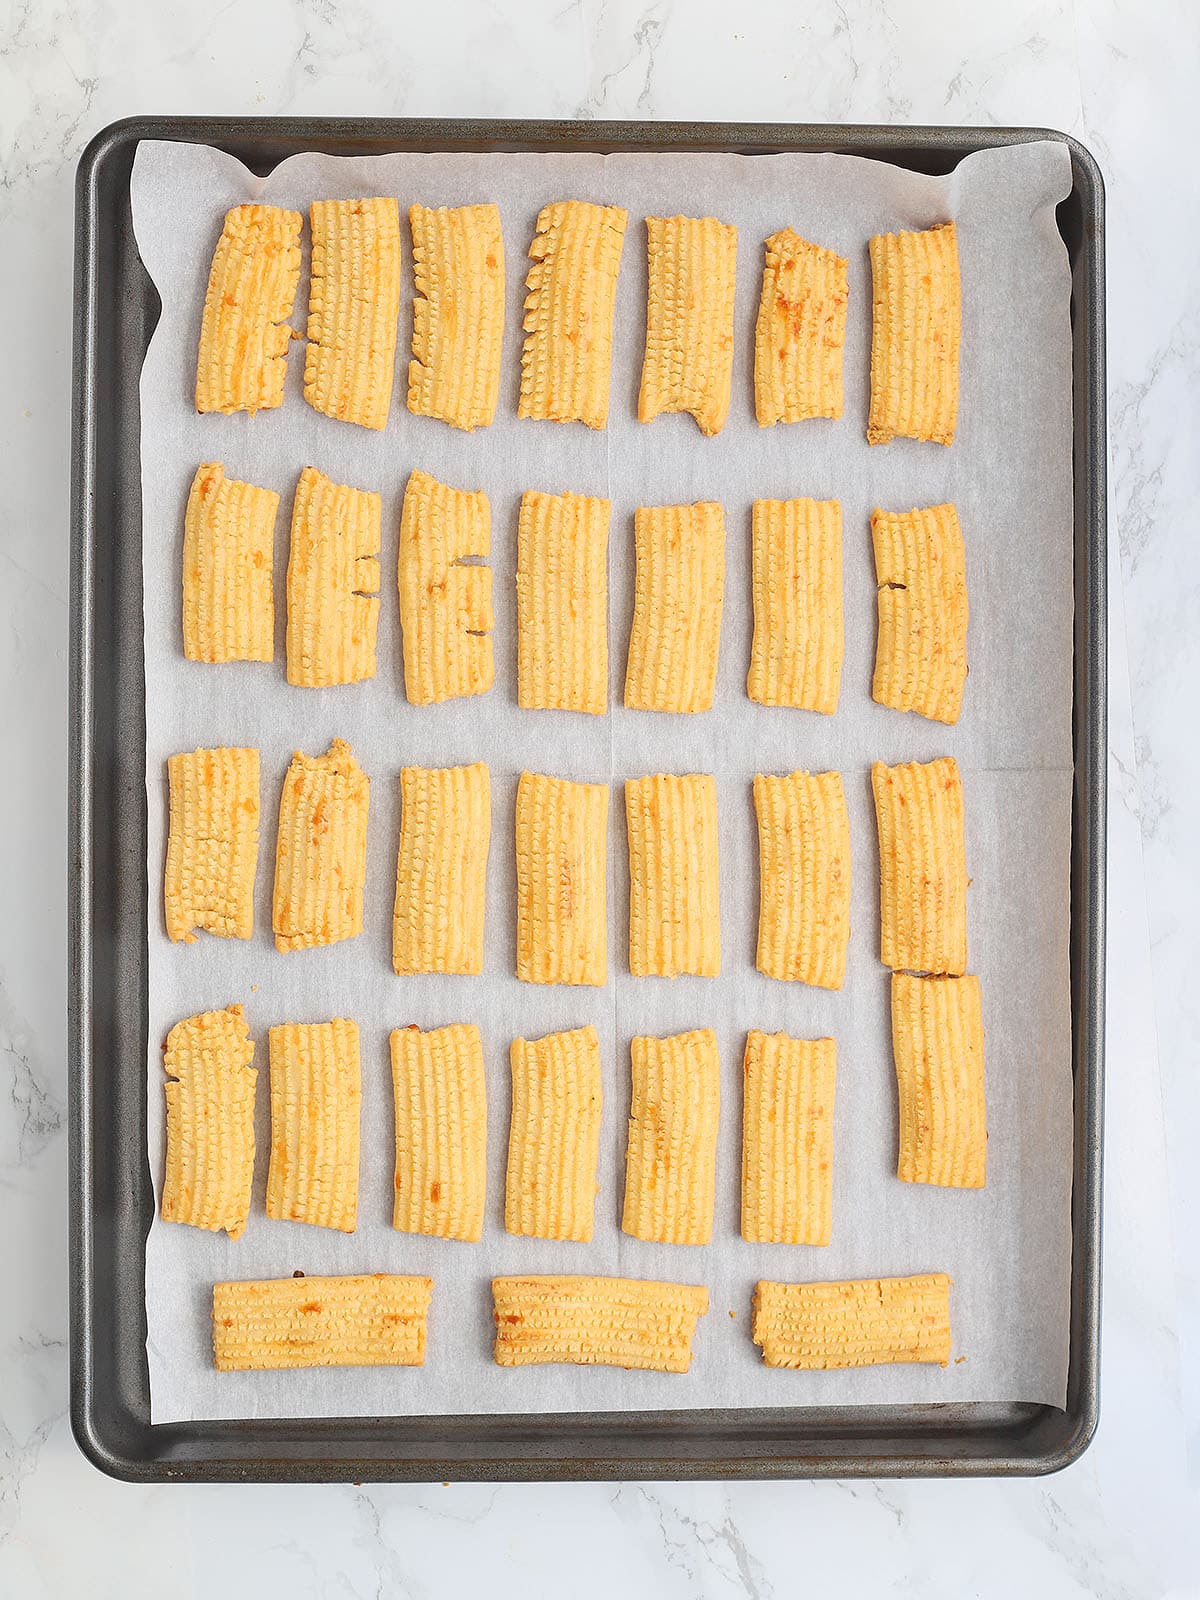
Step 4: Bake for 12 minutes, just until the edges begin to turn golden brown in a few spots. Let them cool on the baking sheet for 5 minutes, then transfer to a cooling rack to finish cooling.
Tips for Perfect Cheese Straws
- Use good cheddar. A sharp block of cheddar that you shred yourself melts and incorporates better than pre-shredded.
- Keep ingredients at room temp. Softer butter and cheese blend more easily into a smooth dough.
- Warm the dough. Pushing the dough through a cookie press can be a challenge. Warm the dough by rolling it in clean hands first to make it softer and easier to work with.
- Don’t overbake. They should be lightly golden, not brown.
- Adjust the heat. Add more cayenne if you like extra kick, or reduce it for a milder flavor.
Serving suggestions
- Add to a holiday appetizer board along with spicy pickled okra and crab deviled eggs
- Serve alongside tomato basil soup or cowboy chili
- Pair with wine or a cocktail, such as bourbon eggnog or Tuaca pineapple martini.
- Pack in tins for neighbor or teacher gifts
Storage and freezing instructions
Storage. The cheese straw dough can be made ahead of time. Wrap the dough in plastic wrap or seal it in a plastic freezer bag. Store the dough in the refrigerator and use it within four days. Once completely cooked, baked cheese straws can be stored in an airtight container at room temperature for up to one week.
Freezing. I don’t recommend freezing baked cheese straws. Because of their delicate texture, they break apart easily and could turn into crumbs from being jostled around in the freezer. Cheese straw dough, on the other hand, can be frozen. Wrap the dough in a layer of plastic wrap followed by a layer of aluminum foil. Freeze for up to three months. Allow the dough to Each one of my cheese straws was between 2 ½ and 3 inches long. before baking.
Cheese straws frequently asked questions
I used the disk that looks like a zigzag. Some people have also used the star-shaped disk.
Yes! You can make the dough up to 2–3 days in advance. Keep it tightly wrapped in the refrigerator. Let it soften slightly at room temperature before piping or rolling.
The dough was likely too warm. Chilling the dough for 20–30 minutes before baking helps the straws hold their shape.
Yes, it doubles beautifully. Just be sure to mix in a large bowl and bake in batches.

Tried This Recipe? Let Me Know!
⭐️⭐️⭐️⭐️⭐️
If you made homemade cheese straws, I’d love to hear how it turned out! Your ratings and reviews help others find the recipe and give me great feedback too.
Homemade Cheese Straws
Ingredients
- 1 ½ cups unsalted butter softened
- 16 ounces sharp shredded cheddar cheese room temperature
- 4 cups all-purpose flour
- 2 teaspoons salt
- 1 teaspoon cayenne pepper
Instructions
- Preheat the oven to 375 degrees.
- In a large mixing bowl, cream together the butter and cheese until the cheese is evenly mixed throughout.
- Add the flour, salt, and cayenne pepper.
- With the mixer on low, mix the dough until the flour is completely incorporated. Then turn the mixer up to medium and continue to mix until the dough comes together.
- Line a baking sheet with parchment paper or aluminum foil.
- Using a cookie press, form the dough into 2 ½ – 3-inch straws leaving ¼-inch of space between each straw.
- If you don’t have a cookie press, roll the dough out to ⅜-inch thick. Cut the strips 1 ½ inches wide and 2 ½ to 3 inches long.
- Bake the straws for 12 minutes until they start to turn golden brown in some places.
- Allow the straws to cool on the baking sheet for about five minutes before transferring them to a cooling rack.
Video
Notes
- Use freshly shredded cheese: Pre-shredded cheese contains anti-caking agents that can prevent the dough from coming together smoothly. Shredding from a block gives the best texture and flavor.
- Room-temperature ingredients matter: Softened butter and room-temp cheese blend more easily and help the dough form without crumbling.
- Don’t overbake: Cheese straws should be lightly golden, not browned. Overbaking can make them bitter.
- Spacing is important: Because they don’t spread much, you only need about ¼ inch between each straw—great for baking large batches at once.
- Let them cool before moving: Cheese straws firm up as they cool. Moving them too soon can cause breakage.
- Flavor develops over time: These taste even better the next day as the cheese and spices settle into the dough.
- Avoid humid storage: Moisture softens cheese straws. Store in an airtight container away from humidity to keep them crispy.


Thanks for bringing that to my attention, Buddy! I guess the manufacturer changed the accessories for the press I originally linked. I have updated the link with a press that does include the disk I used.
The press you put a link for does not have the straight / squiggly disk. Which press did you use?
Sorry Peggy, I have never added pecans to this recipe. I can’t give you an estimate on how much to add.
Everyone’s preferences are different, Barbara. Sorry the cheese straws were too salty for you.