Step-by-Step Guide to Lattice Pie Crust
This easy step-by-step guide (with pictures), will give you the confidence to make a beautiful lattice pie crust at home.
Lattice pie crust is like the epitome of homemade goodness. It makes for a beautiful pie, but can seem a little intimidating to make. With my simple step-by-step guide, you will be impressing your friends and family with your pie making skills in no time!
Setting up your Lattice Pie
To start, you’re going to need two pie crusts. You can use your favorite store brand or check out my homemade pie crust recipe. If using homemade, roll each pie crust out with a rolling pin until it’s about 10-11 inches across and roughly ⅛-inch thick. Place one pie crust in the fridge.
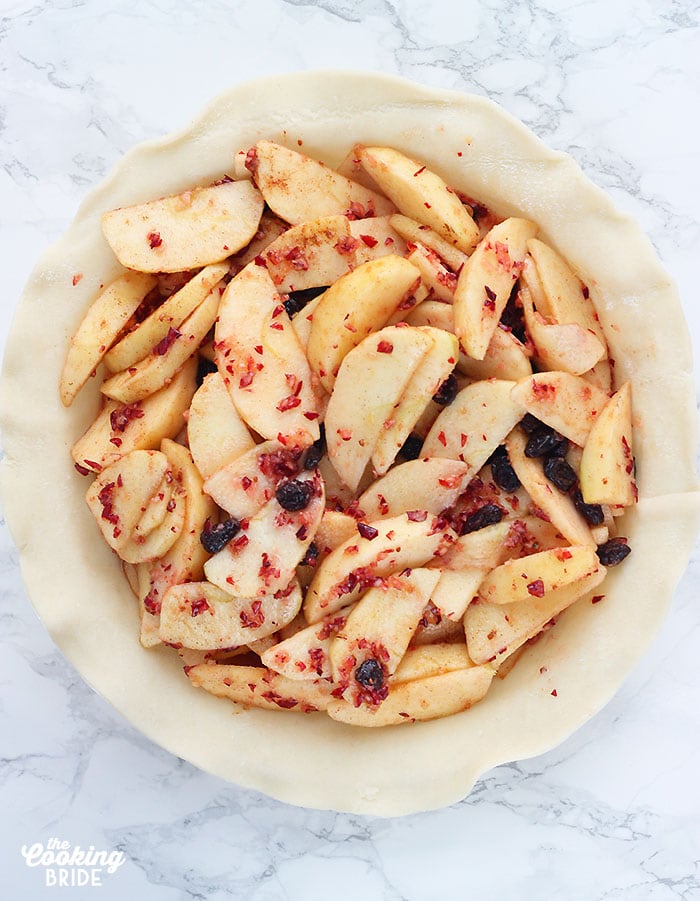
Carefully place the second pie crust into the bottom of a 9-inch pie plate. Don’t trim the edges just yet. Fill your pie crust with your pie filling (the filling you see above is for Cranberry Apple Pie). Place the pie in the fridge to keep cool while you work and retrieve the second pie crust.
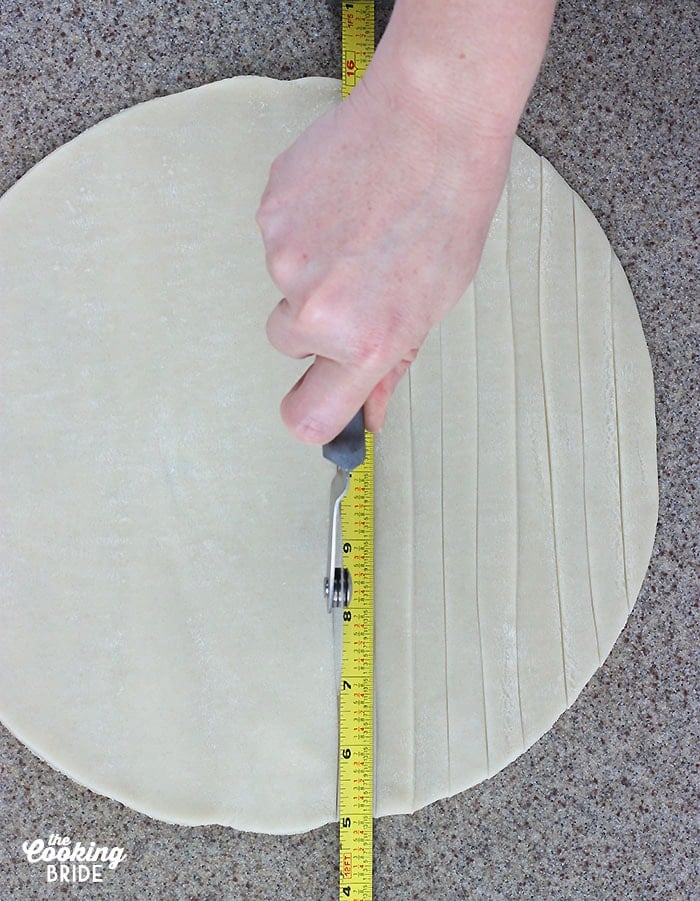
Next, we are going to cut out lattice strips. Lay your second pie crust out on a flat surface, such as a large cutting board. I like to use something with a straight-edge as a guide to ensure all my lattice strips are the same width. As you can see here, I used a measuring tape. Simply lay down your straight edge, then carefully cut along the edge using a sharp knife or even a pizza cutter. Move the straight edge over and repeat. Keep cutting until you’ve cut lattice strips all the way across.
Braiding the Pie Lattice
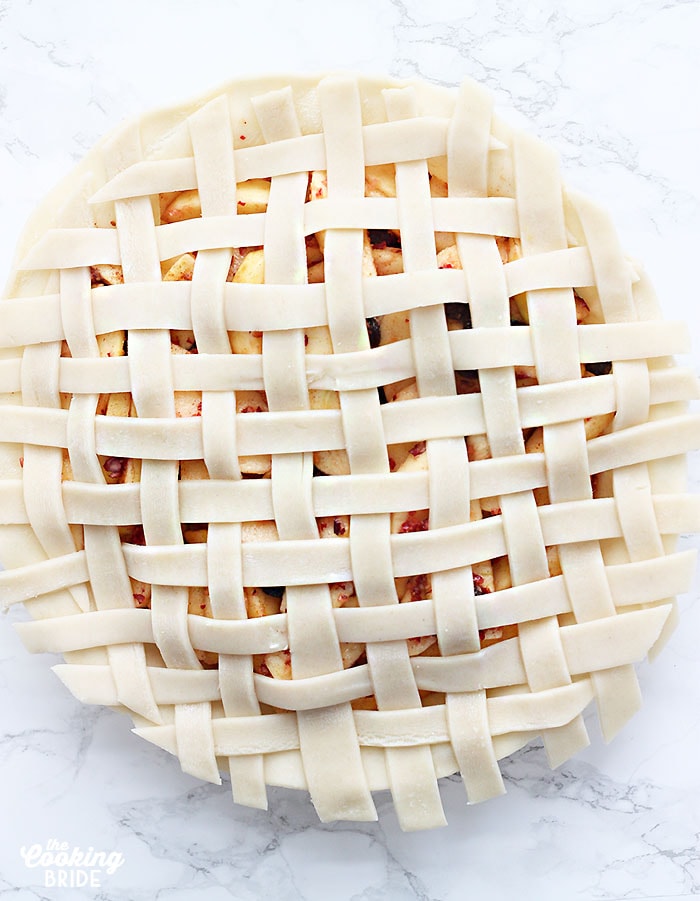
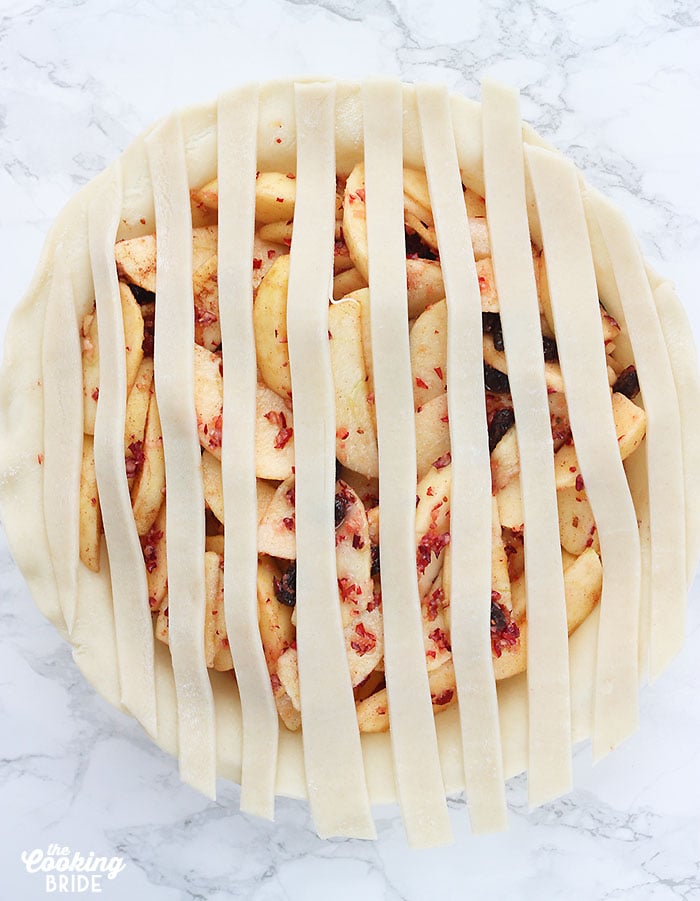
Here comes the fun part – making the lattice! Take your pie out of the fridge. Arrange half of the pie dough strips you just cut over the top of the pie. You want to leave a little room between each strip.
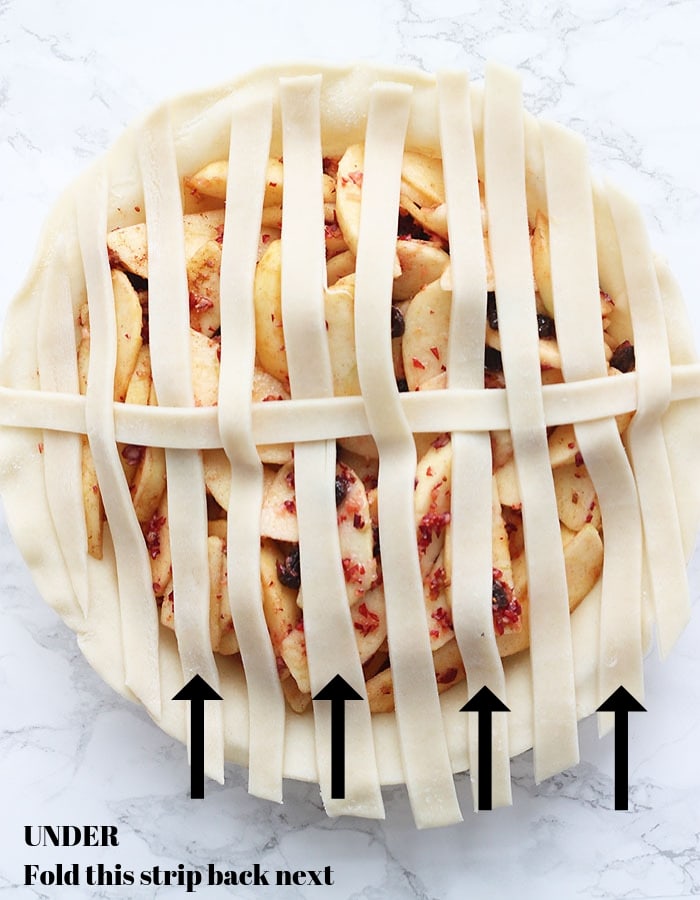
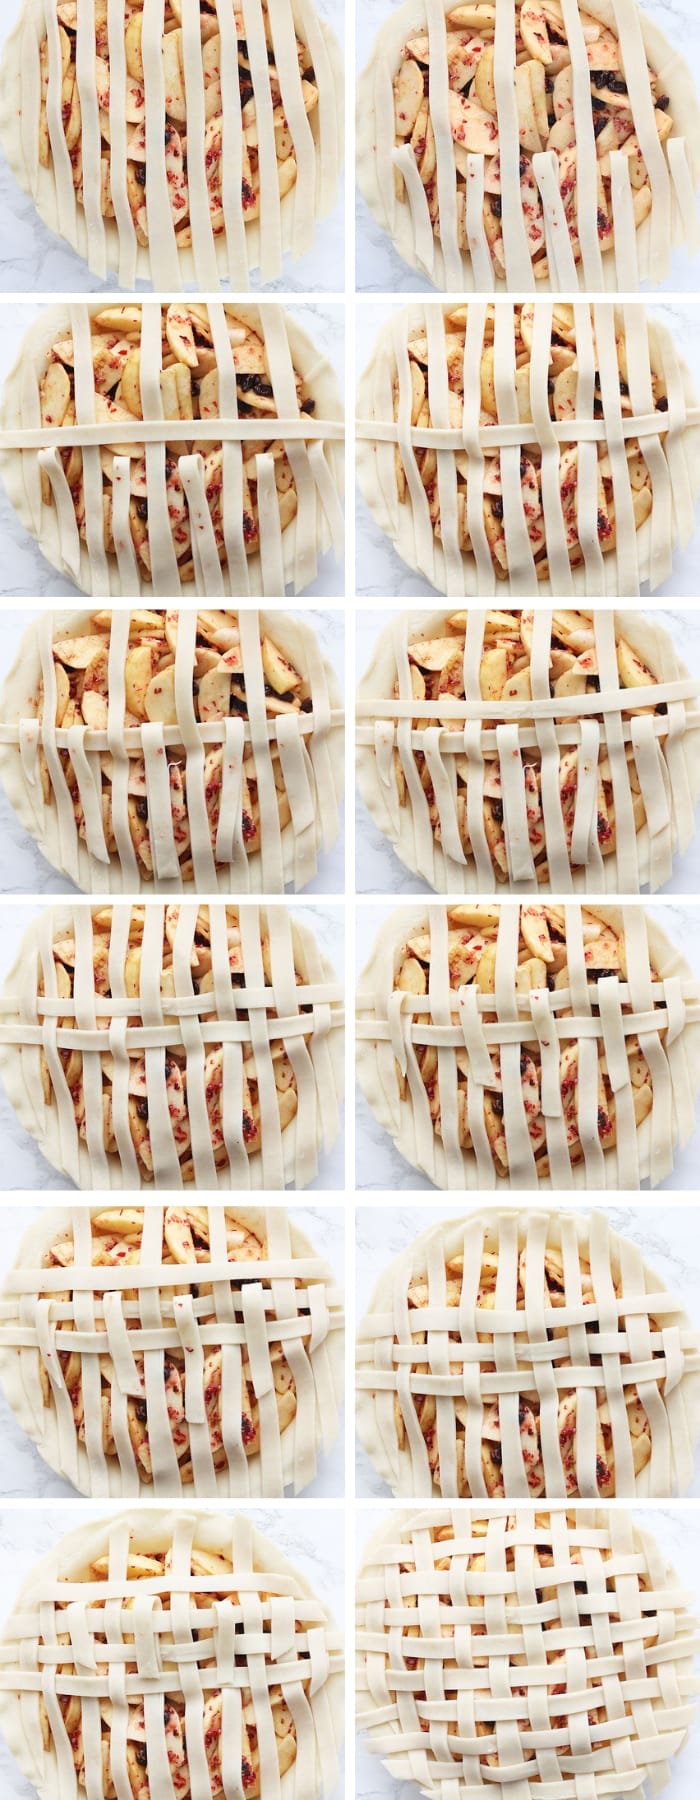
Carefully fold back every other pie strip to the middle of the pie. Take another pie strip and lay it across the remaining pie strips. Fold the pie strips back down. You’ve just weaved your first line. Keep going!
Now, fold back every pie strip that is under the horizontal pie strip you just laid down. Lay another pie strip across. Fold the pie strips back down.

To keep myself from getting confused as to which pie strips I’m supposed to fold back next, I focus on the strips that are under. If it’s under the strip you just laid down, that’s the one you need to fold back next. Repeat until you’ve covered the entire pie. Take your time. Don’t rush. And if you mess up, it’s not like you can’t start over again.
How to crimp pie lattice crust
Congratulations, you just made your first pie lattice crust! Give yourself a big pat on the back.
But what do we do with all those uneven edges? Trim the edges so that they only hang about two inches out from the edge of the pie plate. You can use the same knife you used to cut the pie strips. A pair of kitchen shears works great for this too.
Fold the overhang until it meets with the edge of the pie plate. We will need to seal, or crimp, the edges so all our filling doesn’t run out and over the sides. There are several ways you can crimp the edges. Press the tines of a fork dipped in flour all the way around the perimeter of the pie. You can use the tip of a spoon or your thumb to create a scalloped edge. For a fluted edge, pinch the edge of the pie crust between your thumb and forefinger.
Tips for a golden brown pie crust
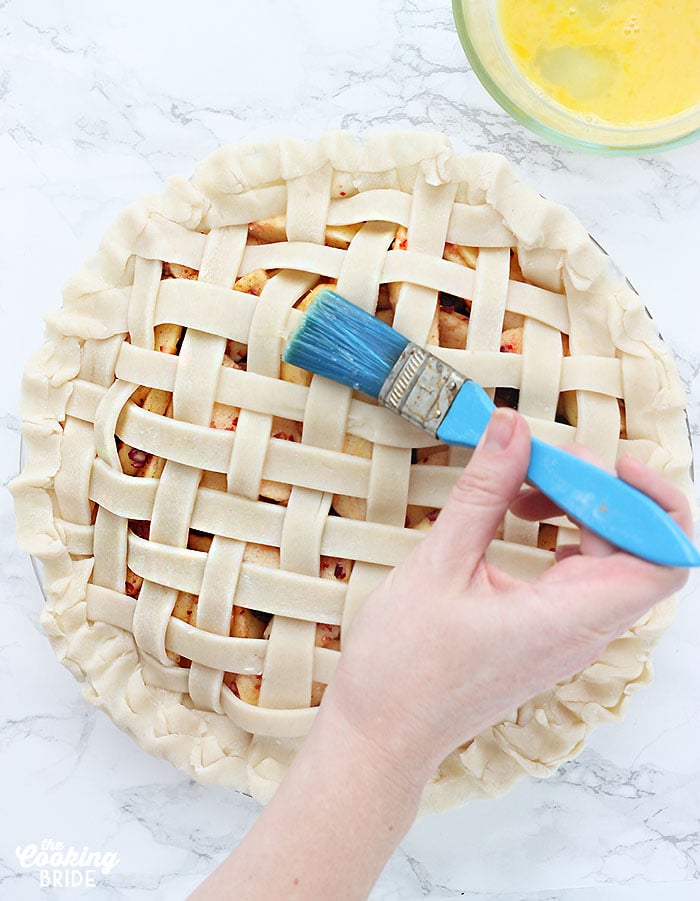
Before baking, I like to brush a little egg wash over the top to give the crust a shiny, golden brown sheen. Simply beat and egg with a tablespoon of water or milk. Then gently brush a thin layer of the egg wash over the top using a pastry brush. Make sure not to glob it on too thick. The egg wash can pool and give the crust a splotchy appearance.
Bake your pie according to your recipe directions. But do check on the pie periodically to make sure the crust isn’t browning too quickly. This is quite common and an easy fix. If the crust completely brown, but you still have quite a bit of baking time left, loosely cover the top of the pie with aluminum foil for the duration.
Related recipes:
- Lattice Cranberry Apple Pie
- Homemade Blueberry Pie Filling
- Granny Smith Apple Pie with Cheddar Cheese Crust
- 5 Tips for Making the Flakiest Homemade Pie Crust from Scratch
- 5 Best Apples for Baking
Share your pie lattice crust success in the comments below or share and picture on Facebook or Instagram and be sure to tag me!