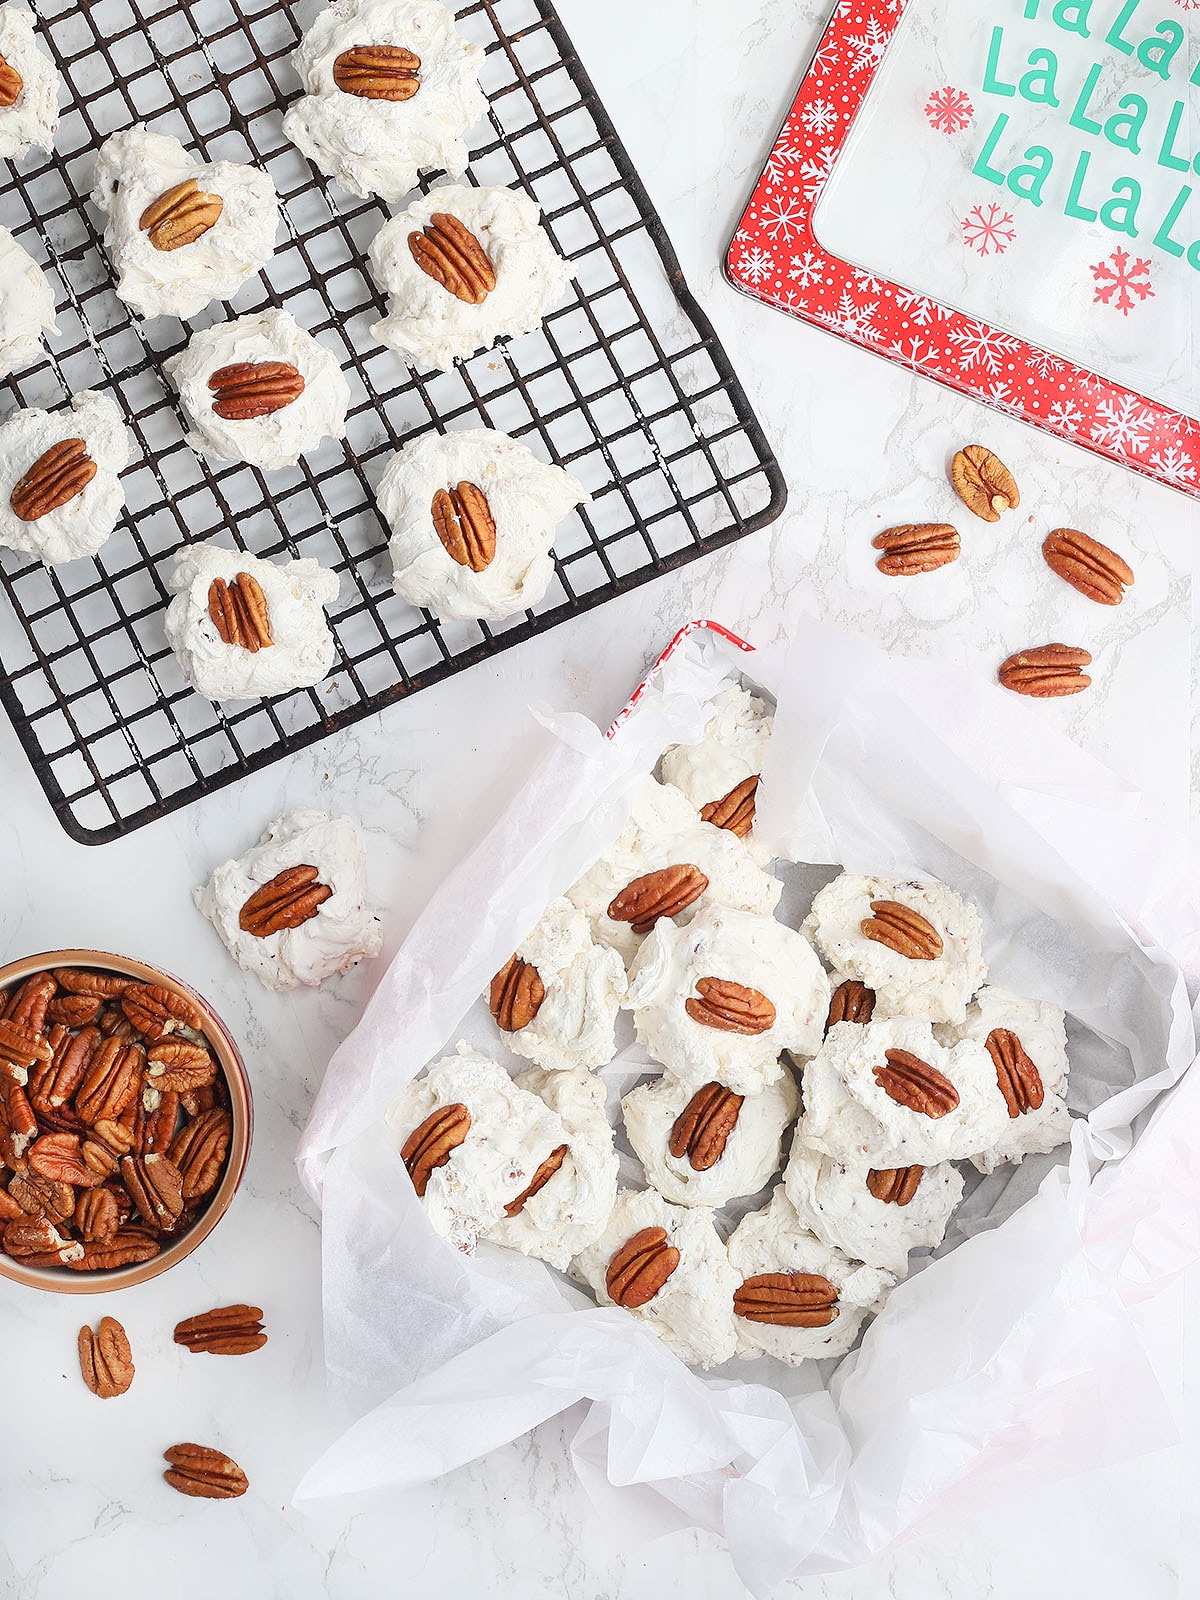
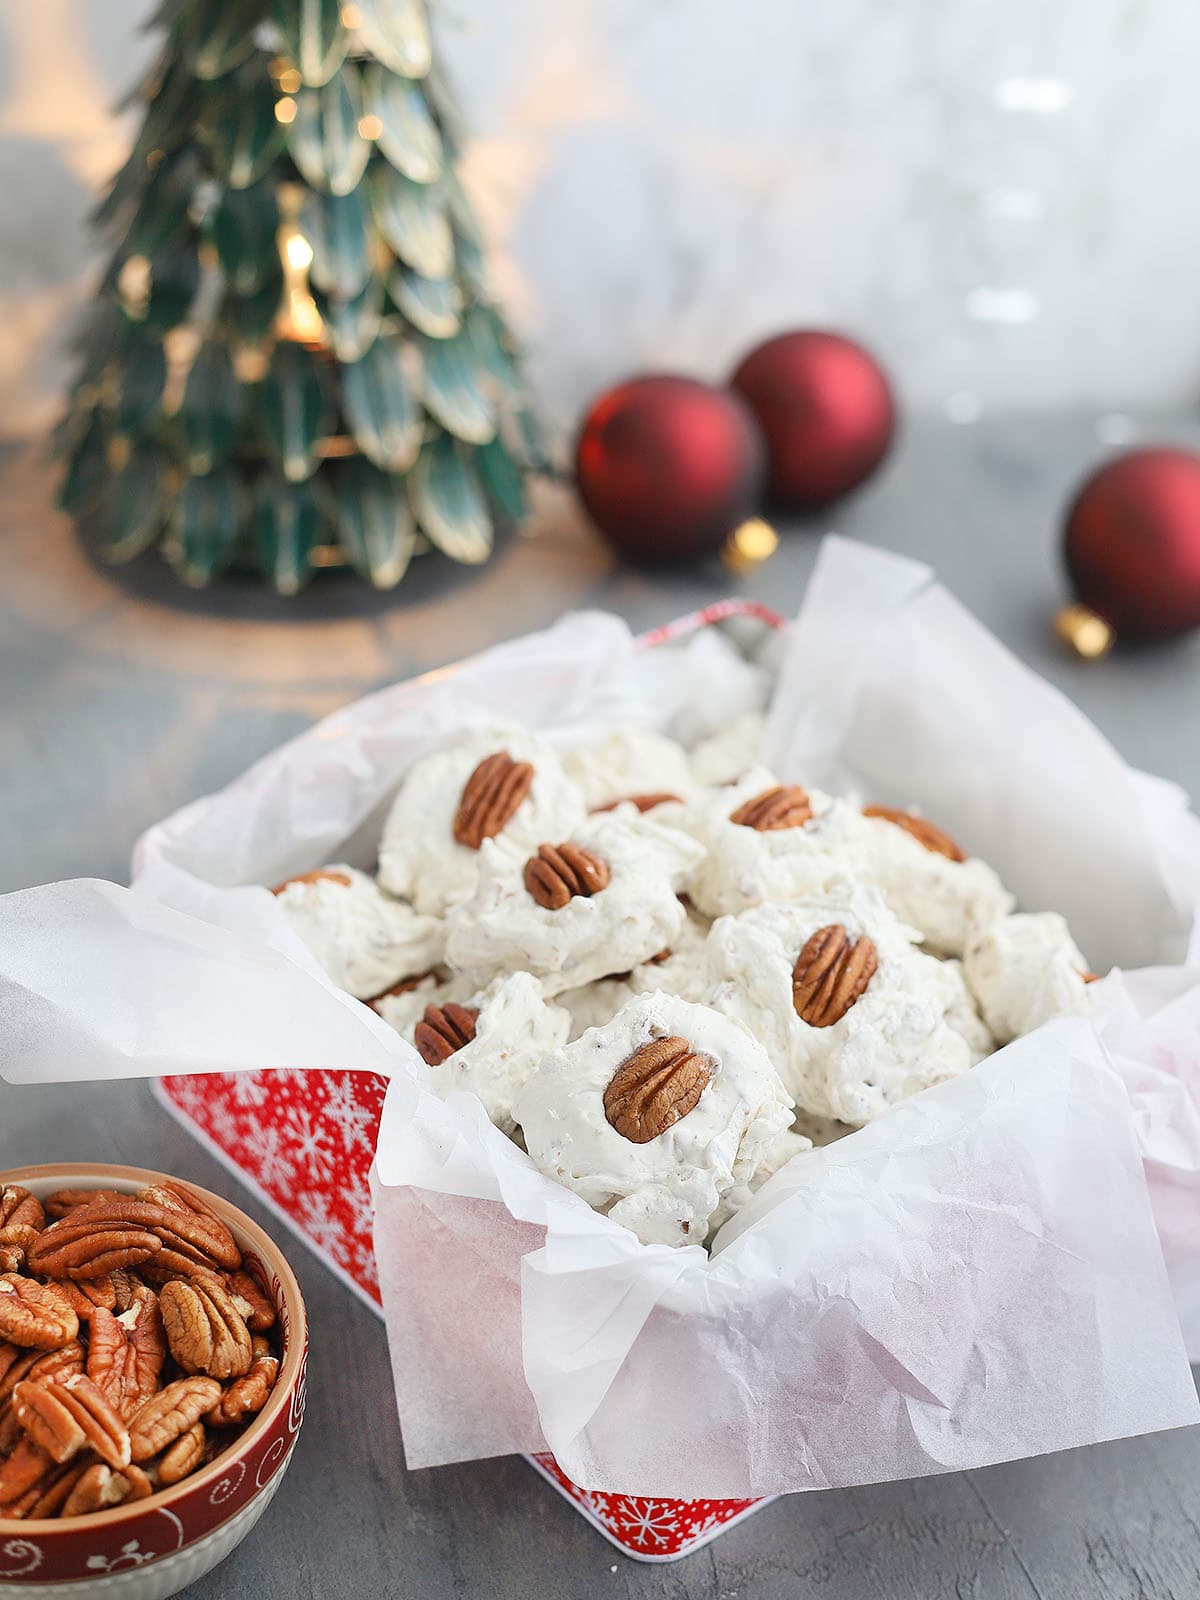
Homemade Divinity Candy

Satisfy your sweet tooth this holiday season with a batch (or two!) of pillowy soft homemade divinity candy.
There is a saying, “You know who your true friends are if they give you homemade divinity.” Actually, no. I just made that up.
But if you’ve ever made homemade divinity candy, you know what I’m talking about. And if you’ve never made homemade divinity, a word of wisdom: If someone ever gives you homemade divinity candy, even if divinity is not your thing, thank them profusely. Because of the time it takes to make my divinity recipe, I only give mine away to people I really like.
Recipe at a glance
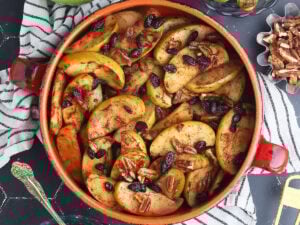
- Light and fluffy: Not heavy like fudge; think sweet clouds.
- Classic flavor: Vanilla, pecans, and pure sugary bliss.
- Holiday-perfect: Beautiful, nostalgic, and great for gifting.
- Foolproof method: Clear instructions + temperature guidelines mean success.
Summarize and save this content on
Jump to:
Ingredients and tools you will need
Soft, cloud-like, melt-in-your-mouth perfection, divinity candy has been a Southern tradition for generations. To make this easy divinity candy recipe, you will need:
See the recipe card for full information on ingredients and quantities.
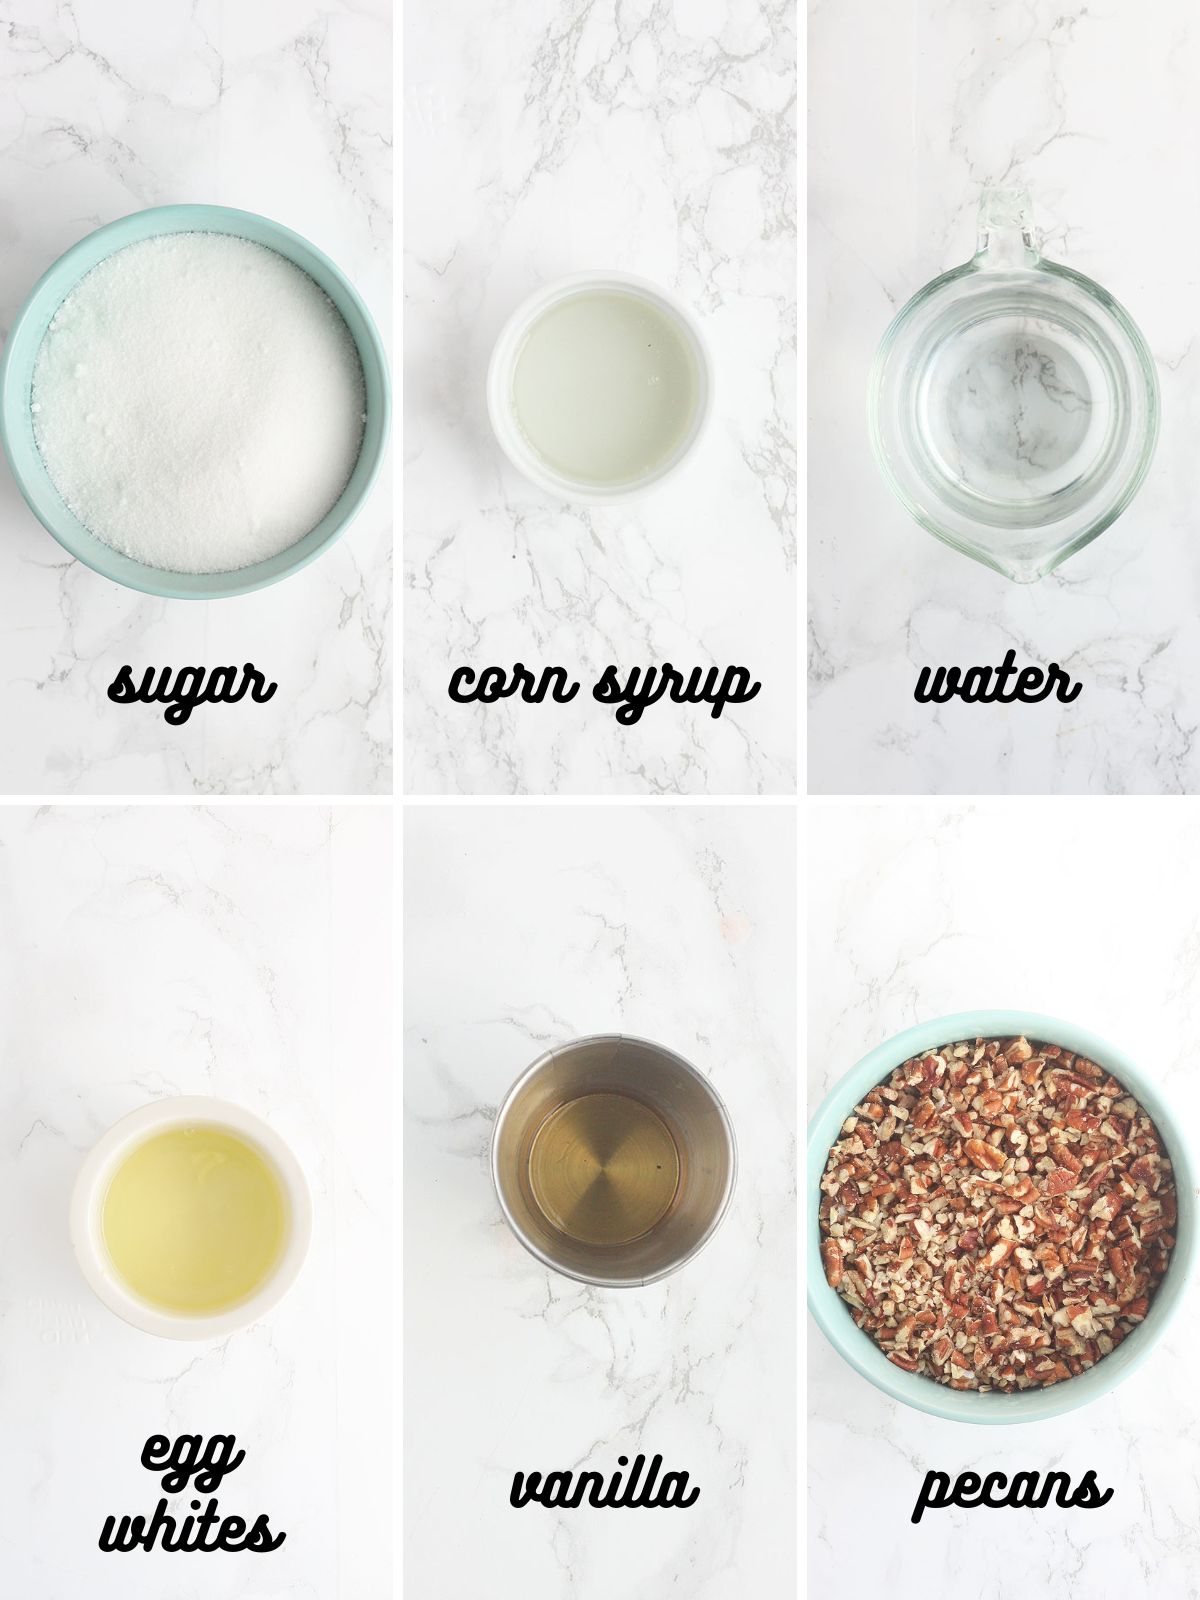
- White sugar — Provides the structure and sweetness.
- Light corn syrup — Prevents crystallization, ensuring smooth candy.
- Water — Helps dissolve the sugar before boiling.
- Room temperature egg whites — Whip into stiff peaks for signature fluffiness.
- Vanilla extract — Adds warm, classic flavor.
- Chopped pecans — For texture and nuttiness throughout.
- Pecan halves for garnish (optional) — Makes each candy look beautiful and finished.
Tools:
- Candy thermometer — we need to heat the sugar and corn syrup until the mixture reaches 260 degrees F, also known as hard ball stage. The most foolproof way to ensure your hot sugar mixture has been heated to the appropriate temperature is with a good candy thermometer.
- Stand mixer with whisk and paddle attachments — I know some of y’all probably have mamas and grandmamas who beat their divinity by hand with a wooden spoon back in the day or with a handheld electric mixer. I don’t recommend it. At one point, the divinity candy needs to beat for 10-15 minutes and it gets very thick. I don’t know anybody who can beat something nonstop for 15 minutes. I’ve also heard trying to use a hand mixer can burn out the motor.
Substitutions and variations
- Corn syrup substitute:If you prefer not to use corn syrup, you can swap in light agave syrup or golden syrup. Keep in mind these can slightly change flavor and texture.
- Nut-free version: Simply leave out the pecans. The candy will still set beautifully. You can also add mini chocolate chips or dried fruit instead (stir in quickly so they don’t melt!).
- Vanilla extract: Replace with almond extract, maple extract, or peppermint extract for a holiday twist. Start with ½ teaspoon—these flavors can be strong.
Variations
- Chocolate Drizzle Divinity: Once the candy sets, drizzle with melted chocolate for a pretty and delicious finish.
- Cherry Almond Divinity: Fold in chopped maraschino cherries (well drained and patted dry!) and almond extract. Beautifully pink and festive.
- Peppermint Divinity: Add ½ teaspoon peppermint extract and top each candy with a crushed peppermint sprinkle instead of pecans.
- Toasted Pecan Divinity: Toast chopped pecans in a dry skillet for 5 minutes before adding. This deepens the nutty flavor and adds extra crunch.
- Coconut Divinity: Skip the pecans and fold in ½–1 cup shredded coconut for a tropical spin.
- Snowball Divinity: After spooning the candy onto parchment, roll each piece in powdered sugar for a soft, snowy coating.
- Colored Divinity: Add food coloring or colored gelatin. Keep in mind that if using gelatin, the divinity will taste like the flavor of the gelatin. Add the food coloring or gelatin after your egg whites reach stiff peaks but before you add the hot sugar.
How to make homemade divinity candy
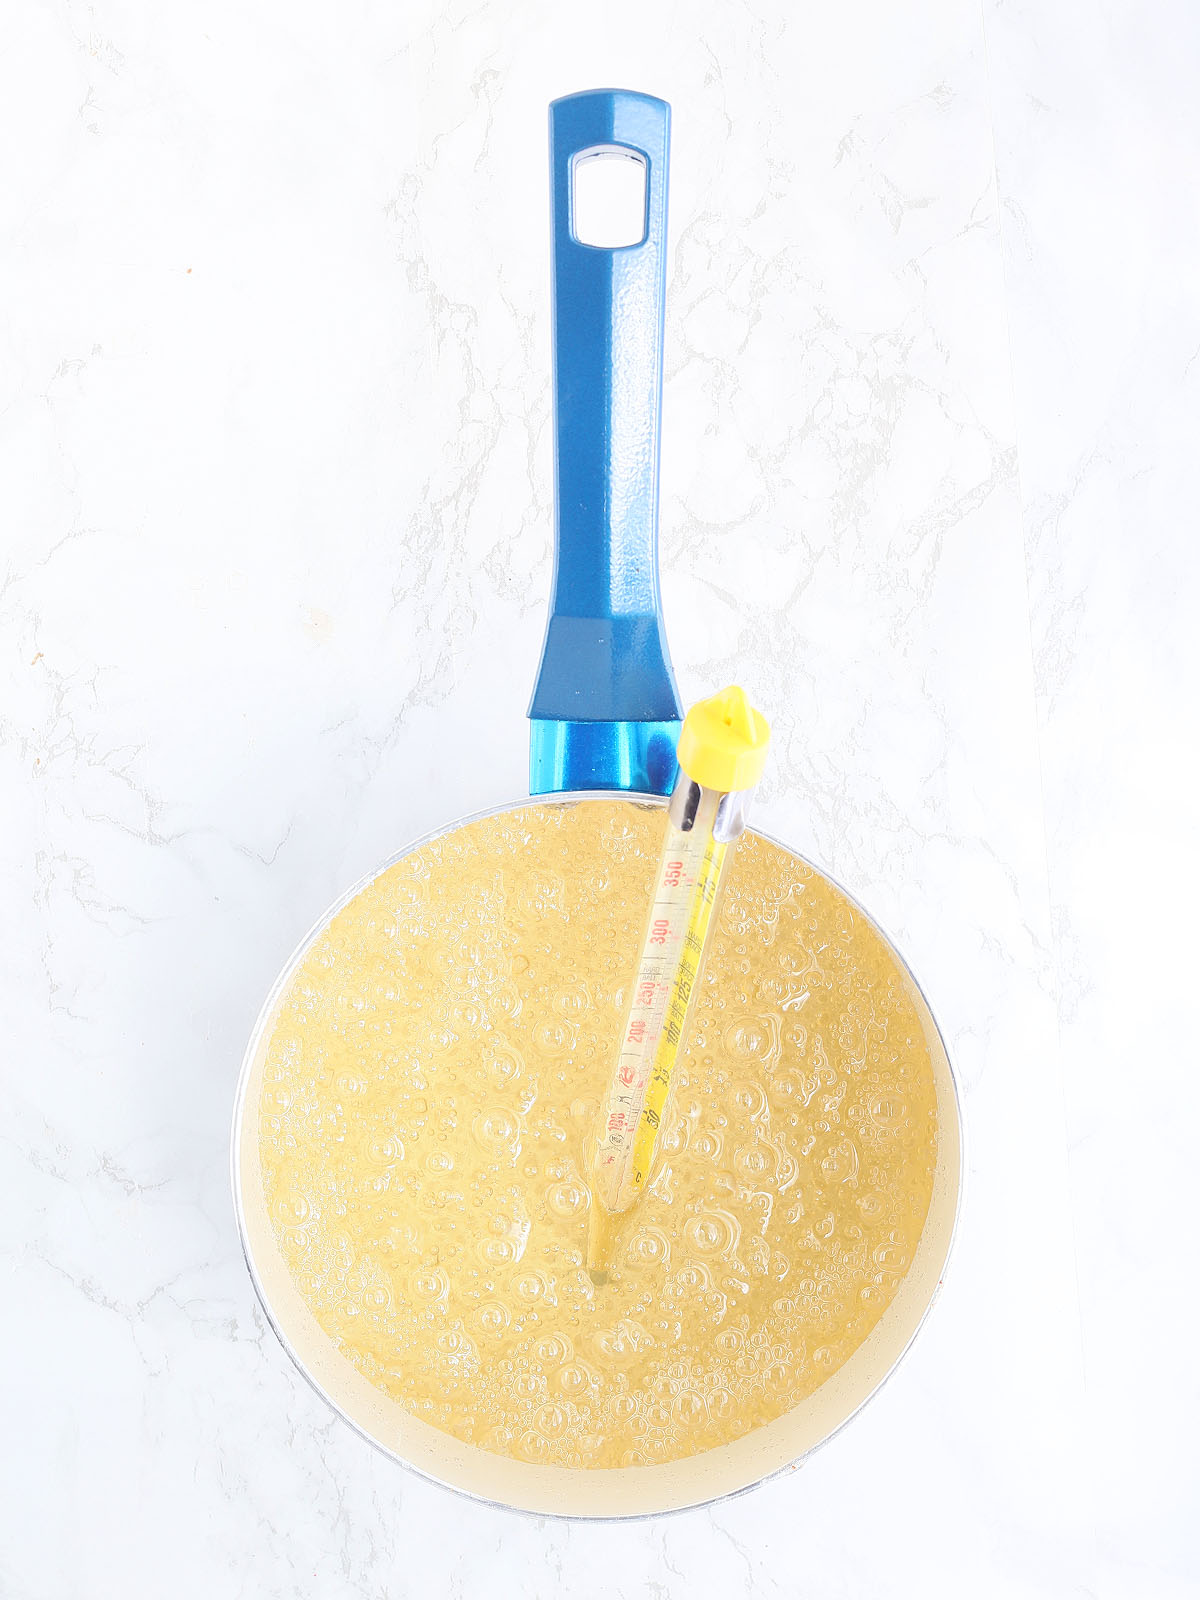
Step 1: Combine sugar, corn syrup, and water in a medium heavy bottomed saucepan. Heat over low heat, stirring often until the sugar dissolves. Raise the heat to medium and bring to a boil without stirring. Continue boiling until the mixture reaches 260°F (hard-ball stage) on a candy thermometer. Remove from heat.
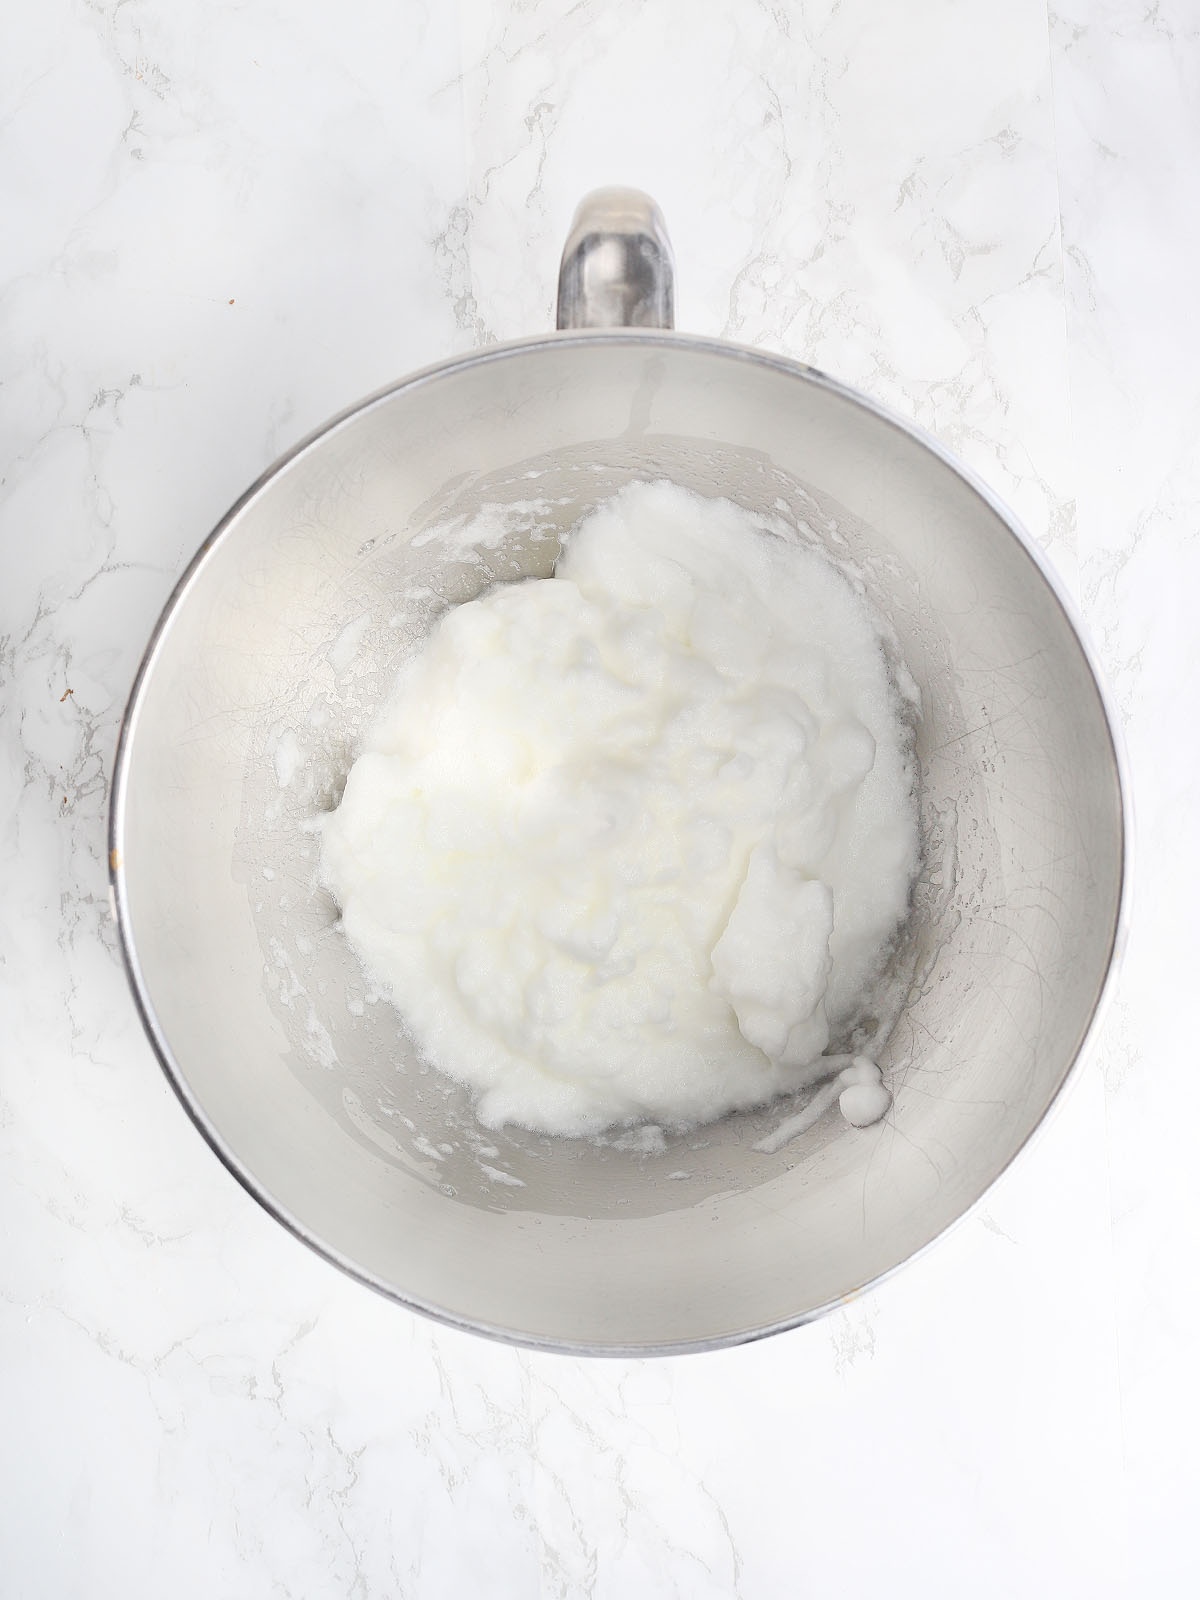
Step 2: While the syrup cooks, beat the egg whites on medium high speed with an electric mixer using the whisk attachment until stiff peaks form.
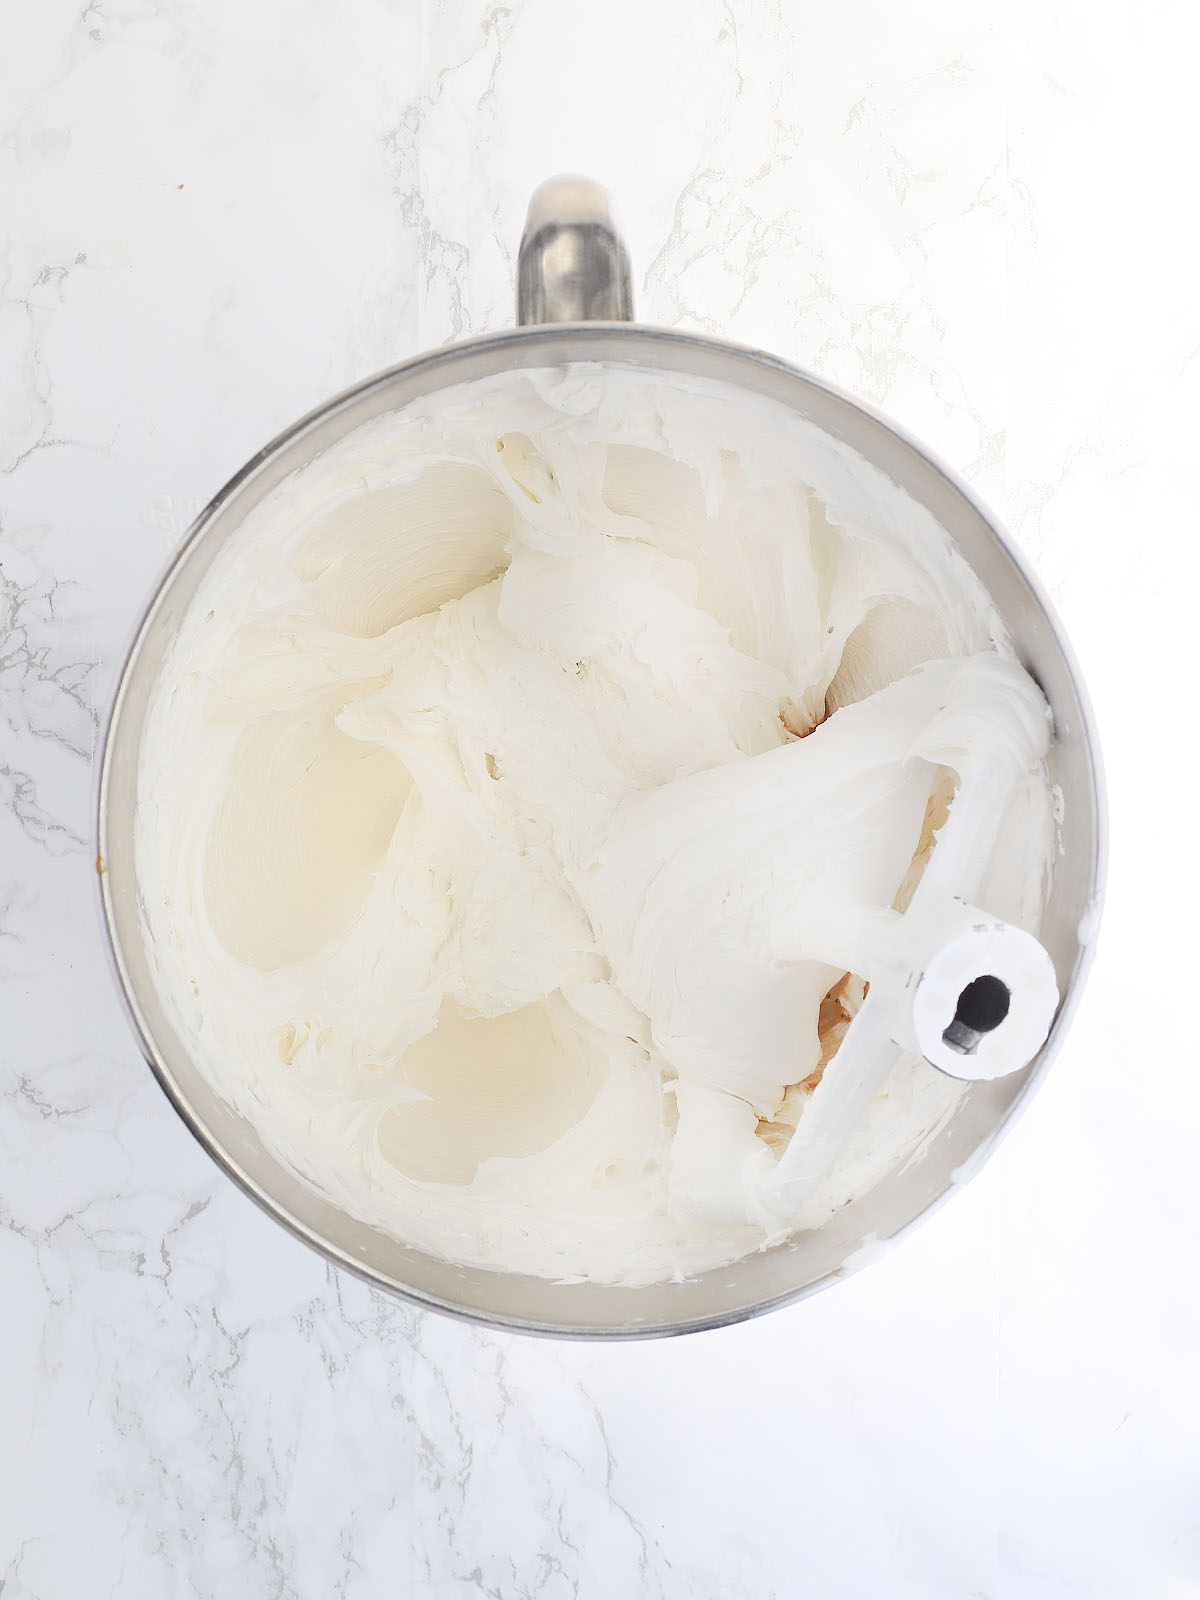
Step 3: Switch your mixer to the paddle attachment. With the mixer running, pour the hot sugar syrup in a slow, thin stream into the beaten egg whites. Continue beating 10–15 minutes, or until the mixture thickens, holds its shape, and loses its glossy appearance.
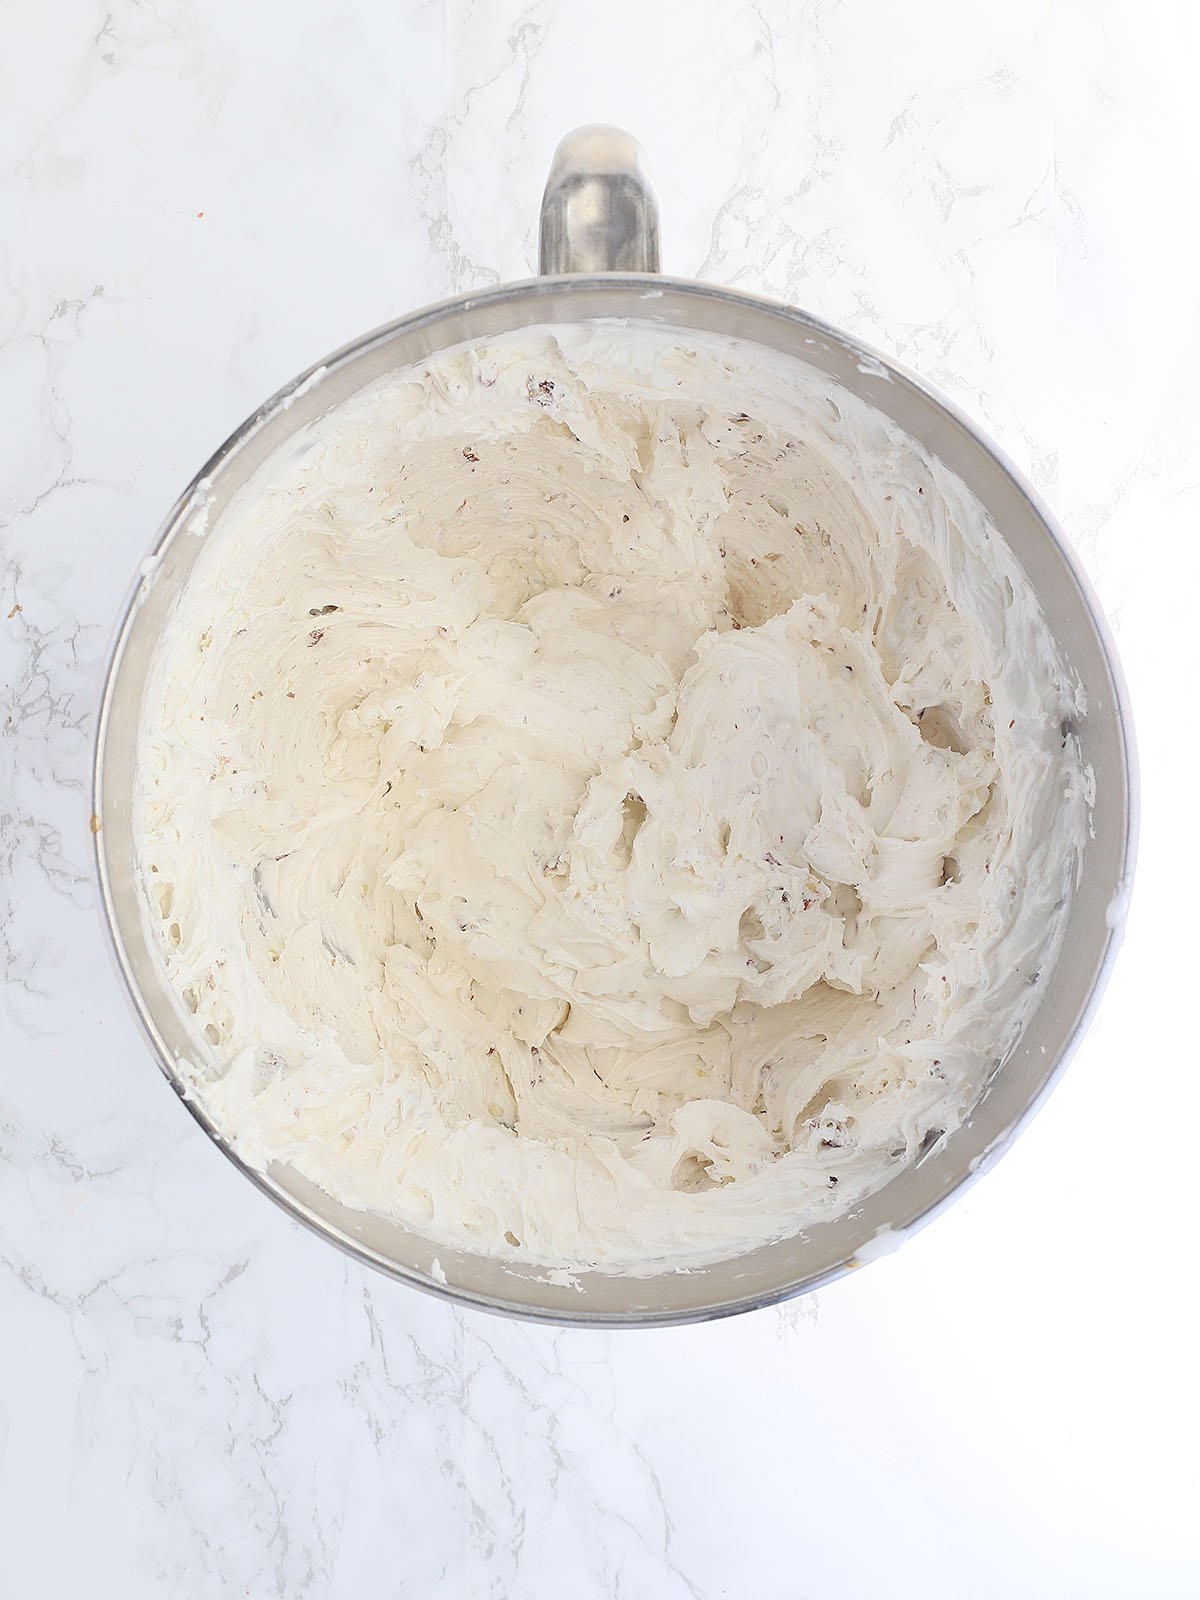
Step 4: Beat in the vanilla, then add chopped pecans on low speed until evenly distributed.
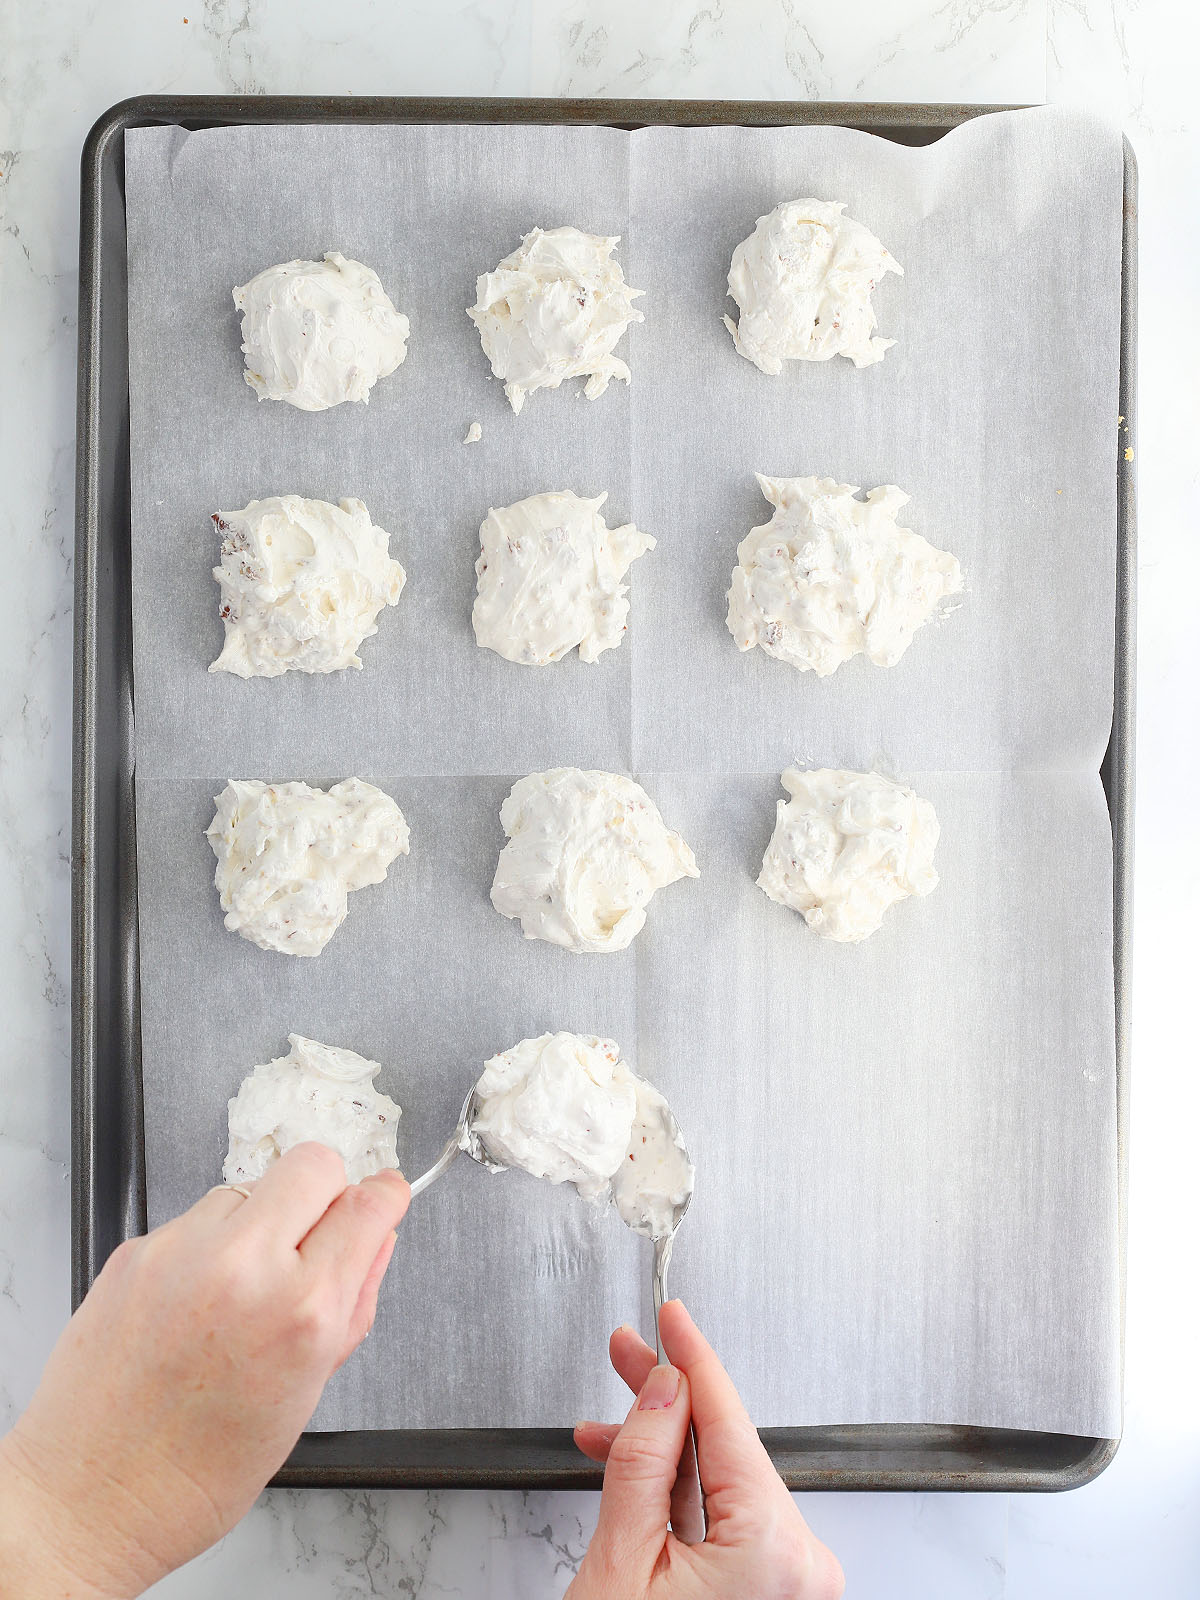
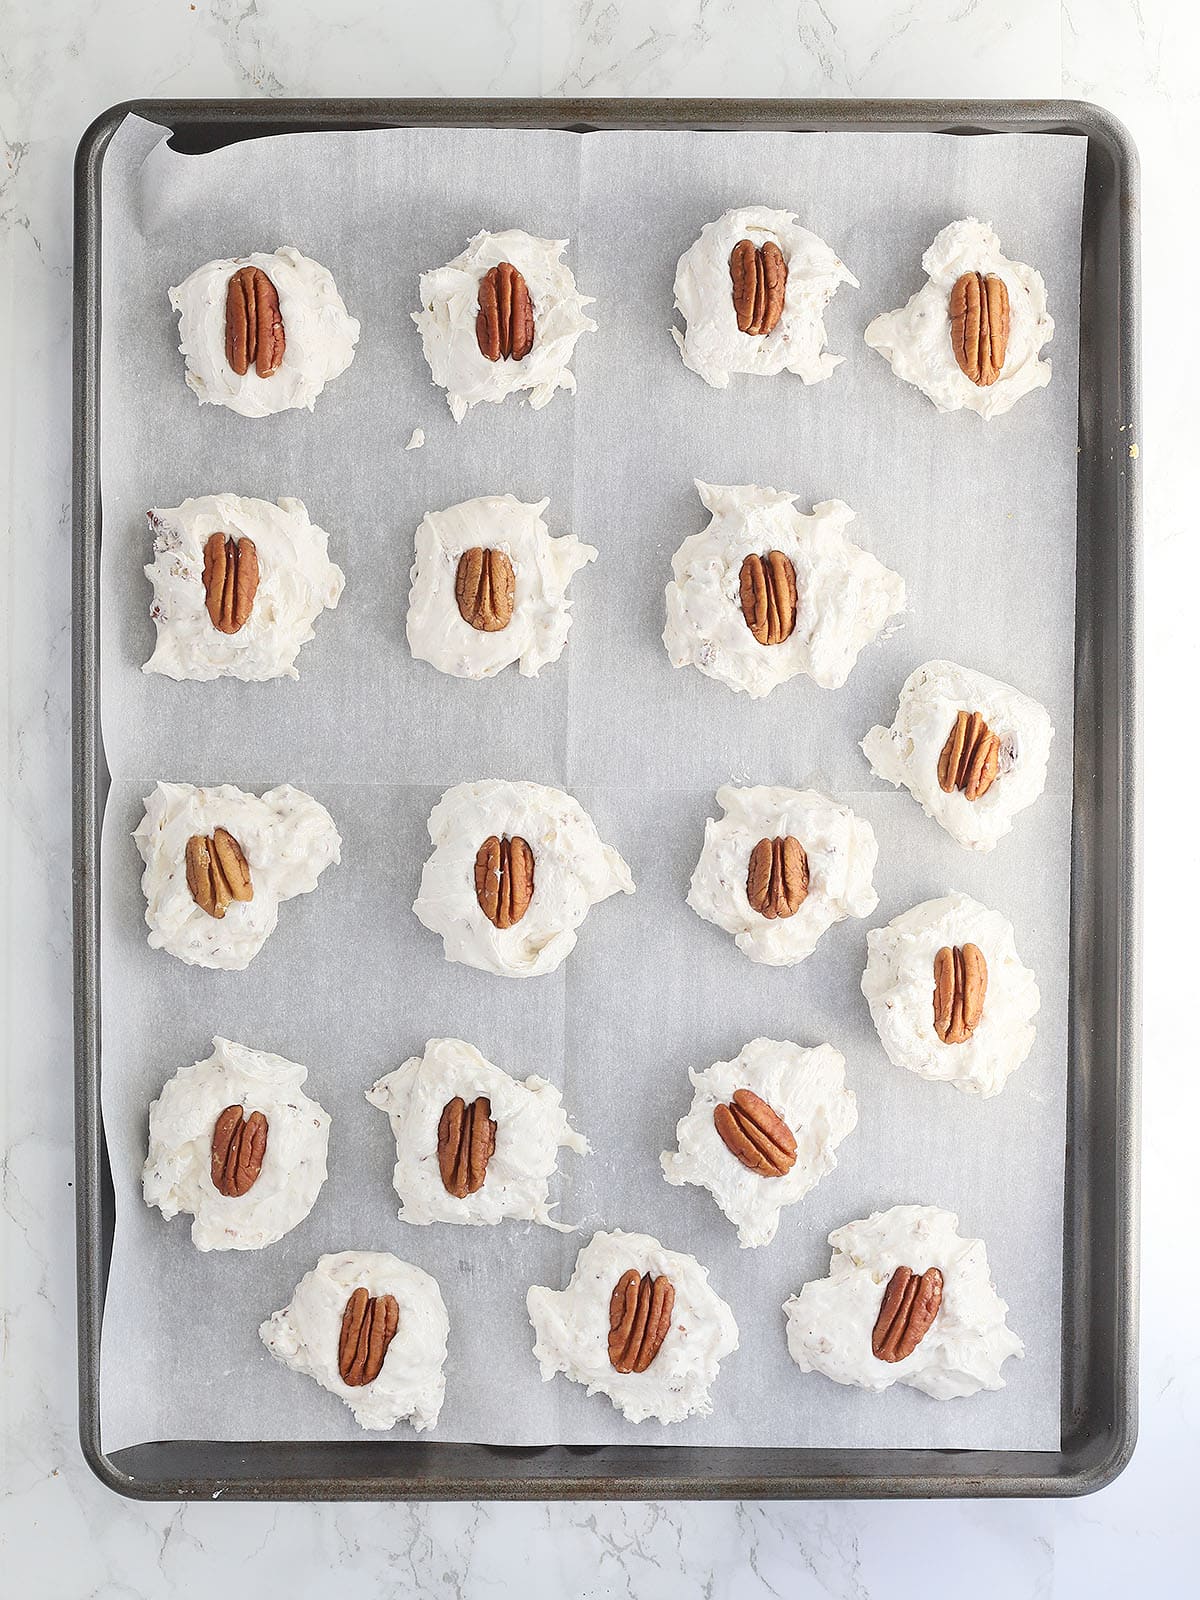
Step 5: Drop heaping tablespoons into little mounds onto a cookie sheet lined with a piece of wax paper or parchment paper. Press a pecan half onto each piece if desired.
Step 6: Let the candy sit in a dry place at room temperature 2 to 24 hours, depending on humidity, until fully set.
Tips for perfect divinity
- Humidity matters: Divinity sets best on a cool dry day. A humid day can make it sticky. If it is a rainy day or the humidity level is more than 50%, plan to make the candy on another day.
- Don’t rush the hot syrup: Temperature accuracy is key—use a good candy thermometer.
- Room-temperature egg whites whip best: Don’t skip this step!
- Work quickly: Divinity thickens fast once fully beaten.
Ways to serve or gift divinity
- Pack in decorative tins for holiday gifts
- Add to a Christmas dessert platter along with chocolate covered bourbon balls, saltine toffee, or pecan praline candy
- Wrap individually for party favors
- Enjoy with coffee, hot chocolate, or a Christmas cocktail such as bourbon eggnog or milk punch
This candy keeps beautifully at room temperature for several days—if it lasts that long!
Storage instructions
Divinity is a delicate candy, but it stores surprisingly well when kept in the right conditions. Store divinity in an airtight container at cool room temperature for up to 2 weeks.
Separate layers with waxed or parchment paper to prevent sticking. Do not refrigerate. Refrigerators are humid environments, and moisture can make divinity sticky, weepy, or lose its shape. Freezing is not recommended as the texture can change.
Homemade divinity FAQ’s
I don’t advise exchanging dark corn syrup for light corn syrup in this recipe like you can with my pecan pie. Dark corn syrup will affect the look and flavor of the finished product, so try to use light if possible.
I personally have not tried making this without corn syrup. But I have done some research on this topic and have found that you should be able to replace the corn syrup with agave nectar and still achieve the same color and flavor. Brown rice syrup, honey, golden syrup, blackstrap molasses, sorghum molasses, cane syrup, tapioca syrup or maple syrup can also be used as a substitute but may result in divinity that is a different color and has a different flavor.
It’s possible but more challenging. Drop a bit of syrup into cold water—if it forms a firm but pliable ball, it’s ready. A thermometer is much more reliable, especially for beginners.
Divinity is finicky, so it’s best to make one batch of divinity at a time. Large batches take longer to beat and may not set evenly.
Sugar crystals may have formed while boiling the syrup. Make sure to avoid stirring once it starts boiling, and use corn syrup to help prevent crystallization.
Traditionally, no — brown sugar won’t behave the same way as white sugar in this recipe. Brown sugar contains molasses, which adds moisture. The syrup will cook differently, making it harder to reach the correct candy stage, and the texture will be more fudgy than fluffy divinity.

Tried This Recipe? Let Me Know!
⭐️⭐️⭐️⭐️⭐️
If you made Homemade Divinity Candy, I’d love to hear how it turned out! Your ratings and reviews help others find the recipe and give me great feedback too.
Homemade Divinity Candy
Ingredients
- 4 cups sugar
- 1 cup light corn syrup
- ¾ cup water
- 3 egg whites room temperature
- 1 teaspoon vanilla extract
- 1 cup chopped pecans
- Additional pecan halves for garnish optional
Instructions
- Combine the sugar, corn syrup and water in a medium saucepan. Heat over low heat, stirring frequently, until the sugar is dissolved.
- Bring the sugar mixture to a boil over medium heat. Continue to boil without stirring until the sugar reaches hard ball stage, or 260 degrees F, on a candy thermometer. You may need to adjust the heat a little to reach the correct temperature. Remove the saucepan from the heat.
- While the sugar is boiling, beat the egg whites at medium speed until stiff peaks form.
- Switch to the paddle attachment on your mixer. With the mixer running, add the sugar mixture in a slow and steady stream.
- Once all the sugar has been added, continue to beat the egg whites until the whites have lost their glossy sheen and the mixture holds a shape, about 10-15 minutes.
- Add the vanilla and chopped pecans. Mix on low speed until the pecans are evenly incorporated throughout the divinity.
- Spoon heaping tablespoons of divinity candy onto waxed or parchment paper.
- Top each piece of candy with a pecan half.
- Allow the divinity to dry at room temperature for a minimum of two hours, up to 24 hours.
Video
Notes
- Humidity matters: Divinity sets best on cool, dry days. High humidity can make the candy soft or sticky no matter how well you follow the recipe.
- Use a reliable candy thermometer: Reaching 260°F (hard-ball stage) is essential for the candy to firm up properly.
- Don’t stir once the syrup starts boiling: Stirring can cause sugar crystals to form, leading to a grainy texture.
- Room-temperature egg whites whip better: Cold egg whites won’t reach full volume and may affect the candy’s light, fluffy texture.
- Work quickly: Once the mixture thickens and loses its shine, it will begin to set fast. Have your parchment-lined surface ready before you start.
- Switch to the paddle attachment: The mixture becomes very thick. The paddle prevents over-aeration and helps mix the pecans more evenly.
- To prevent sticking: Lightly spray your spoons or cookie scoop with cooking spray before dropping the candy.
- Small batches only: Divinity doesn’t scale well. For best results, make one batch at a time.
- Let it dry fully: Depending on humidity, drying can take anywhere from 2 to 24 hours. Don’t rush it—storing too soon can trap moisture.


I have never done this myself so I can’t speak from personal experience. But I have heard that you can do this, it just may alter the texture a bit.
About the drying time, like with making meringues, can you do the oven at 250° and turn it off trick. It’s my first time trying to make a successful divinity. And it’s raining today!
Hi, Holly! Yes, it really is as simple as leaving out the pecans. However, you might want to cut the amount of pecans the recipe calls for in half so you don’t have double the amount pecans in the half that includes nuts. Good luck!
Hello thank you for your recipe. I remember my mom making divinity and she would make half without pecans and half with. Is it just as simple as leaving out the pecans or do you need to compensate somehow ? Thank you!
Thank you for your kind words, Ingrid. I’m afraid I can’t answer your questions, though. I have heard of divinity frosting. However, his recipe was written with the intent of making candy, not frosting. Without knowing the differences between divinity the candy and divinity the frosting, I really can’t say with confidence that this will work.
I have never tried to make this recipe with cream of tartar instead of corn syrup. So again, I really can’t say if you would achieve the same results. Sorry!
Thank you for your wonderful recipe. I want to make this recipes to frost a cake. My mother used to make my birthday cake and she always used divinity to frost my cake with. Will it be okay to use your recipe for divinity and use it as frosting on a cake? I am 100% certain that she used divinity for my cake. This is why I ask you that question. It was delicious and the frosting was chunky like divinity is. Can I still make the divinity without the corn syrup ?Can cream of tartar be used instead? Anyways, what are your thoughts? Getting advice from you will be so sincerely appreciated. Thank you so much.