The Basics of Water Bath Canning
What is water bath canning and how can you get started? My complete guide to water bath canning for beginners will tell you everything you need to know!
This post may contain affiliate links. Click here to learn more about how affiliate links are used on this site.
Have you ever wanted to preserve your own food through canning, but weren’t sure where to start? Water bath canning is an excellent place to begin. It requires only a few pieces of basic equipment and is a great way to preserve the bounty from a home garden. This easy-to-follow tutorial will help you get started.
What is water bath canning?
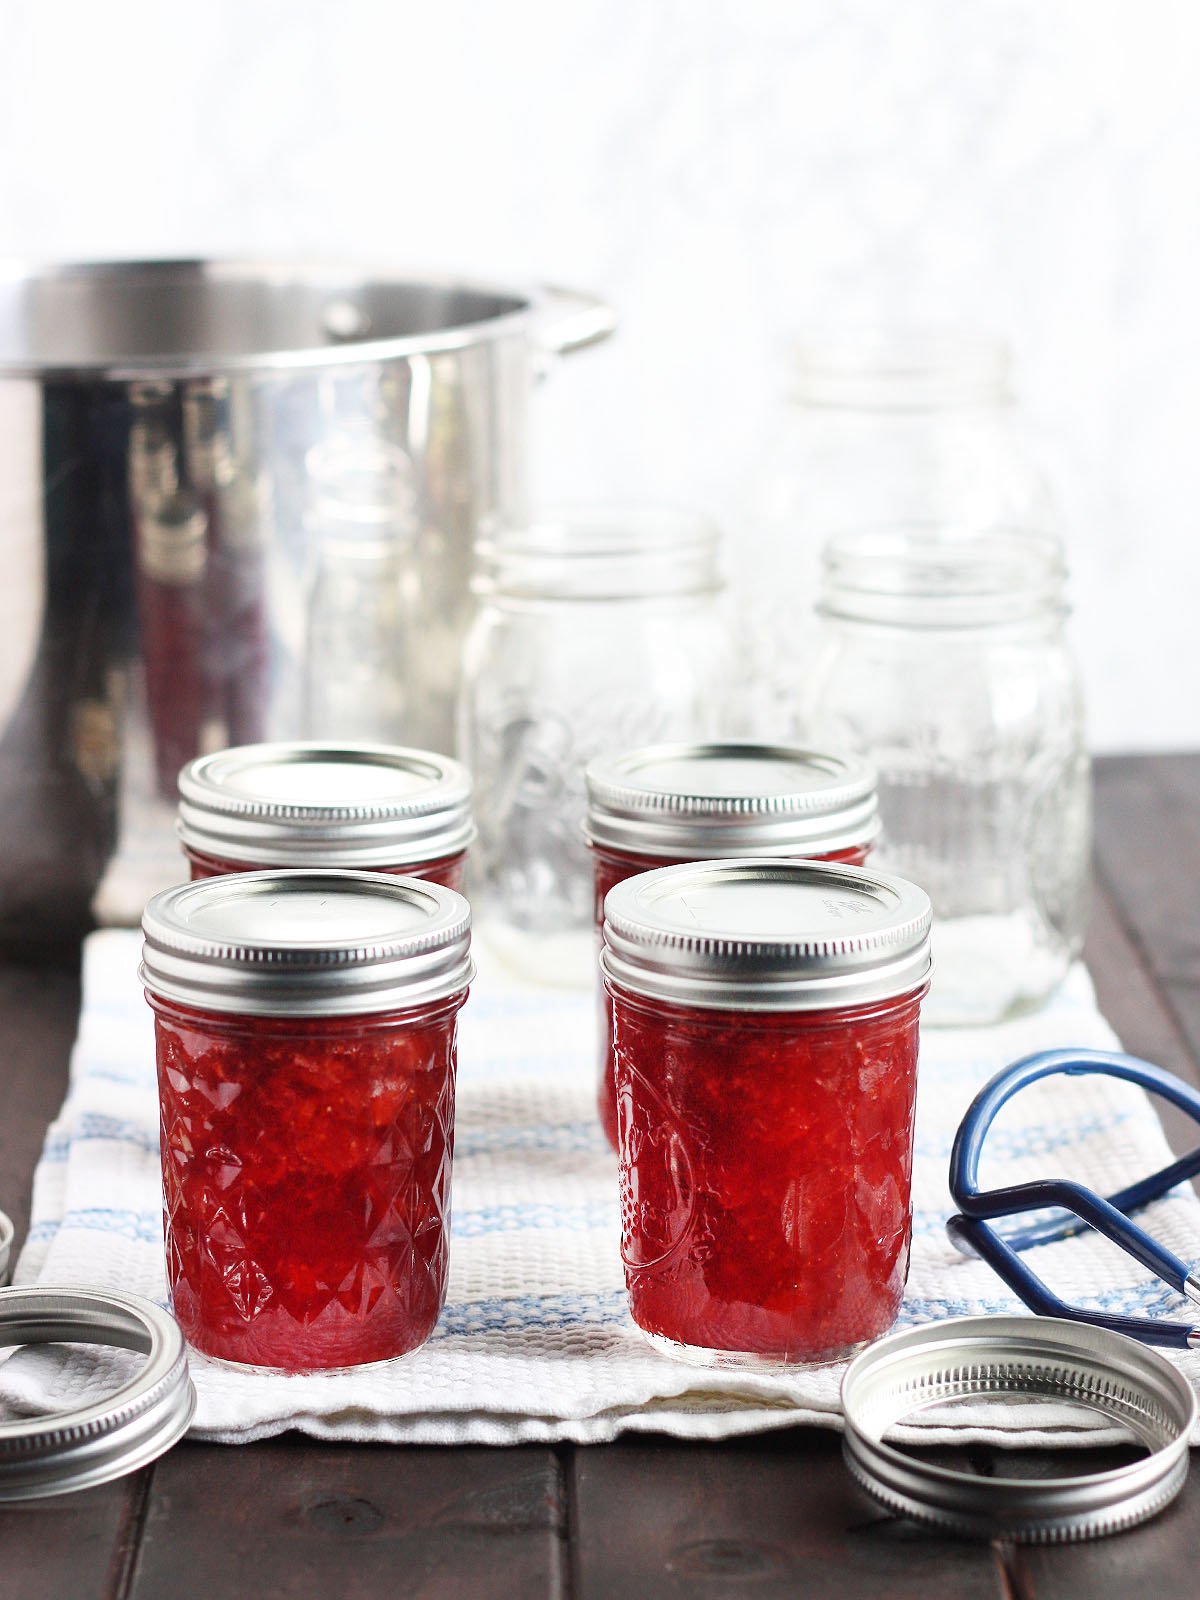
Water bath canning is a method of preserving food for long-term shelf-stable storage. Glass jars are filled with food, then fitted with metal lids coated with adhesive. Metal bands hold the lids in place. The jars are completely submerged in boiling water and are boiled, also known as processed, for an allotted amount of time, depending on the type of food and the size of the jars.
How does water bath canning work?
Water bath canning works two ways – the heat from the boiling water kills a bacteria known as Clostridium botulinum, aka botulism, which leads to spoilage and can cause food poisoning. Canning also works as a vacuum, sucking all the air out of the jar and preventing new bacteria from forming.
What is the difference between water bath canning and pressure canning?
Water bath canning is ideal for foods that contain a high amount of acid. The presence of acid further prevents the formation of bacteria and food spoilage. High acid foods only need to be heated to 212 degrees F to kill bacteria.
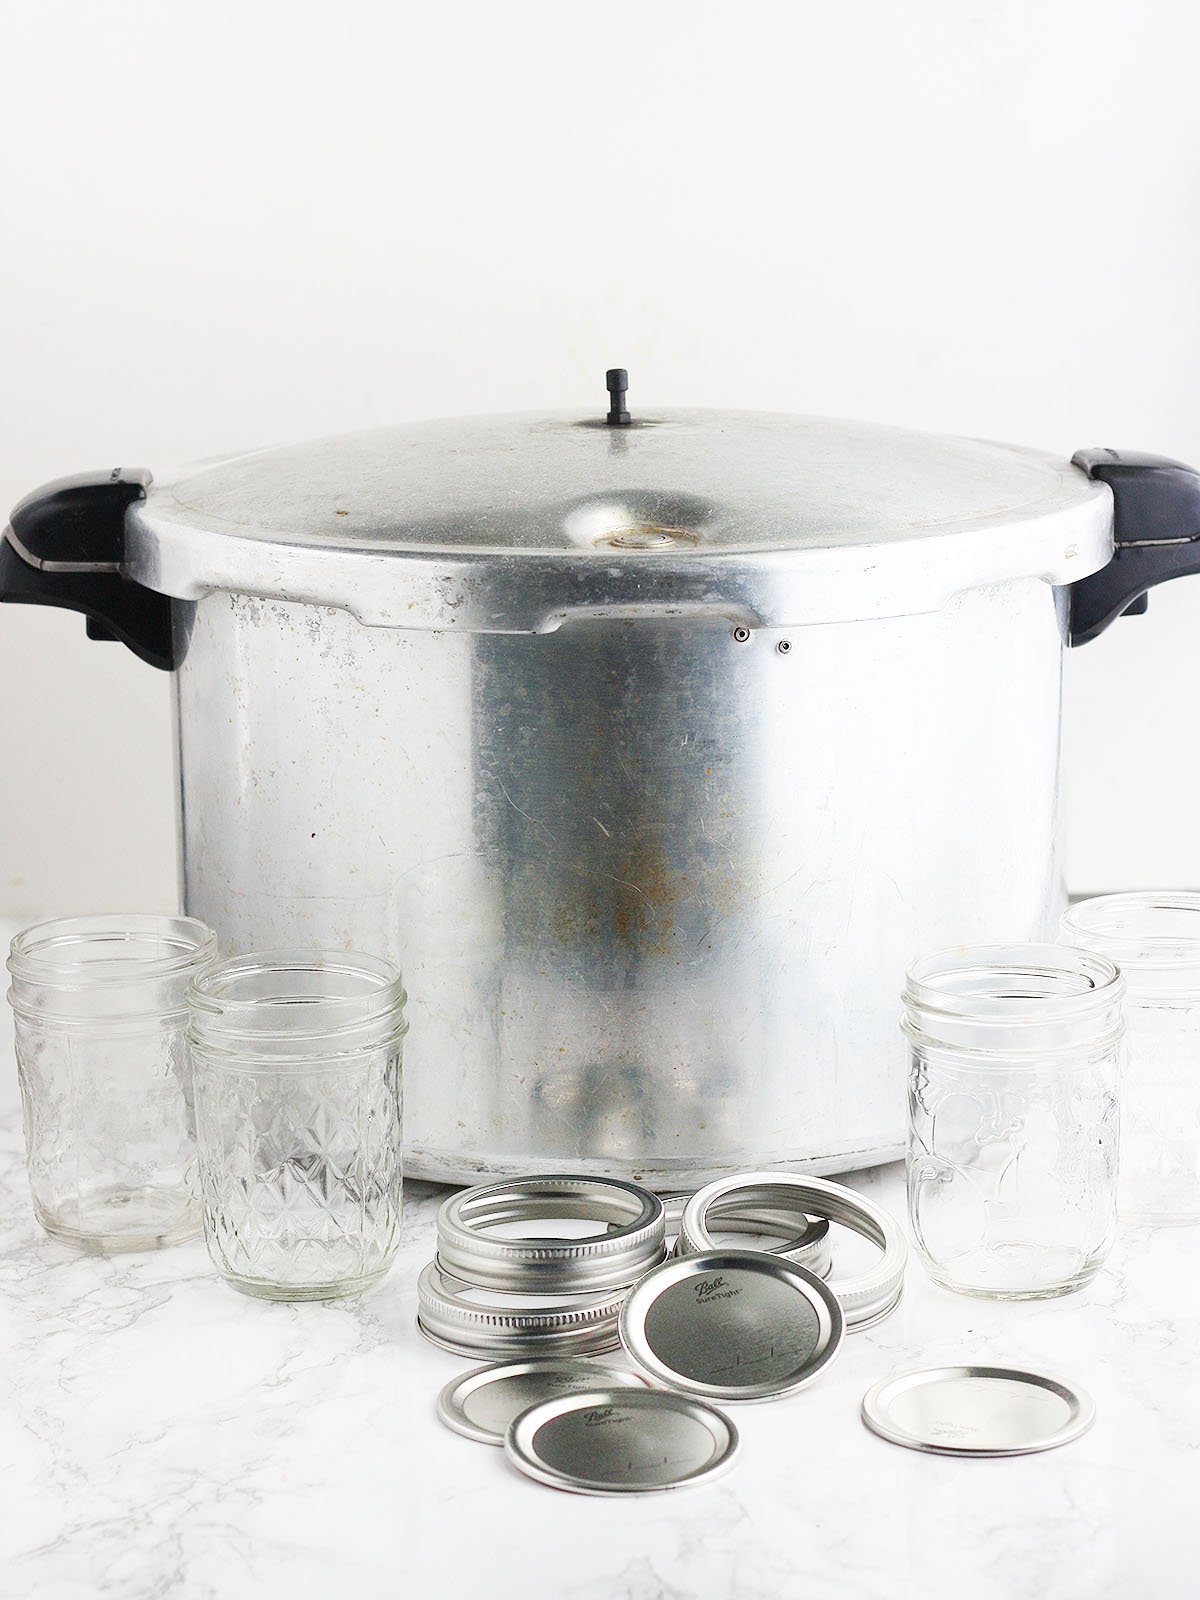
Pressure canning requires a pressure canner, a large stock pot fitted with a special lid and weights which allows pressure to build within the pot. As the pressure builds, the temperature within the pot increases. Pressure canning is required to preserve low acid foods. These foods must be heated to 250 degrees or above to not only kill botulism, but also its spores. This level of heat can not be achieved through water bath canning.
Foods you can safely can using the water bath canning method
- Jams and jellies.
- Naturally high acid fruits including apples, blackberries, cranberries, blueberries, peaches, pears, strawberries, and raspberries.
- Low acid fruits will need acid, such as lemon juice, added to them. These include figs, melons, Asian pears, bananas, dates, ripe pineapple, papaya, persimmons and tomatoes.
- Vegetables also need a little acid added to them. Vegetables that lend themselves well to canning are asparagus, beans, peas, cucumbers (pickles), corn, green beans, garlic, greens (spinach, kale, collards), onions, pumpkins and squash (summer and winter varieties).
Foods that can not be water bath canned
These low acid foods require a higher heating point to kill botulism and therefore should never be water bath canned:
- Meat
- Seafood
- Dairy
- Soup stock
- Beans
- Corn
Adding acid
Achieving the right amount of acidity in your jar is another crucial element to prevent food spoilage. For savory foods, any vinegar with at least 5% acidic concentration can be used. This includes most white and apple cider vinegars, but other types of vinegar such wine vinegars or malt vinegar can be safely substituted.
For jams, jellies, tomatoes and some vegetables, bottled lemon juice is used to increase the acidity within the jar. I don’t often recommend bottled lemon juice for a recipe, but in this case it’s a must. Acid levels vary from fruit to fruit. Bottled lemon juice has a consistent acidity level and is recommended over fresh when canning food.
Canning supplies:
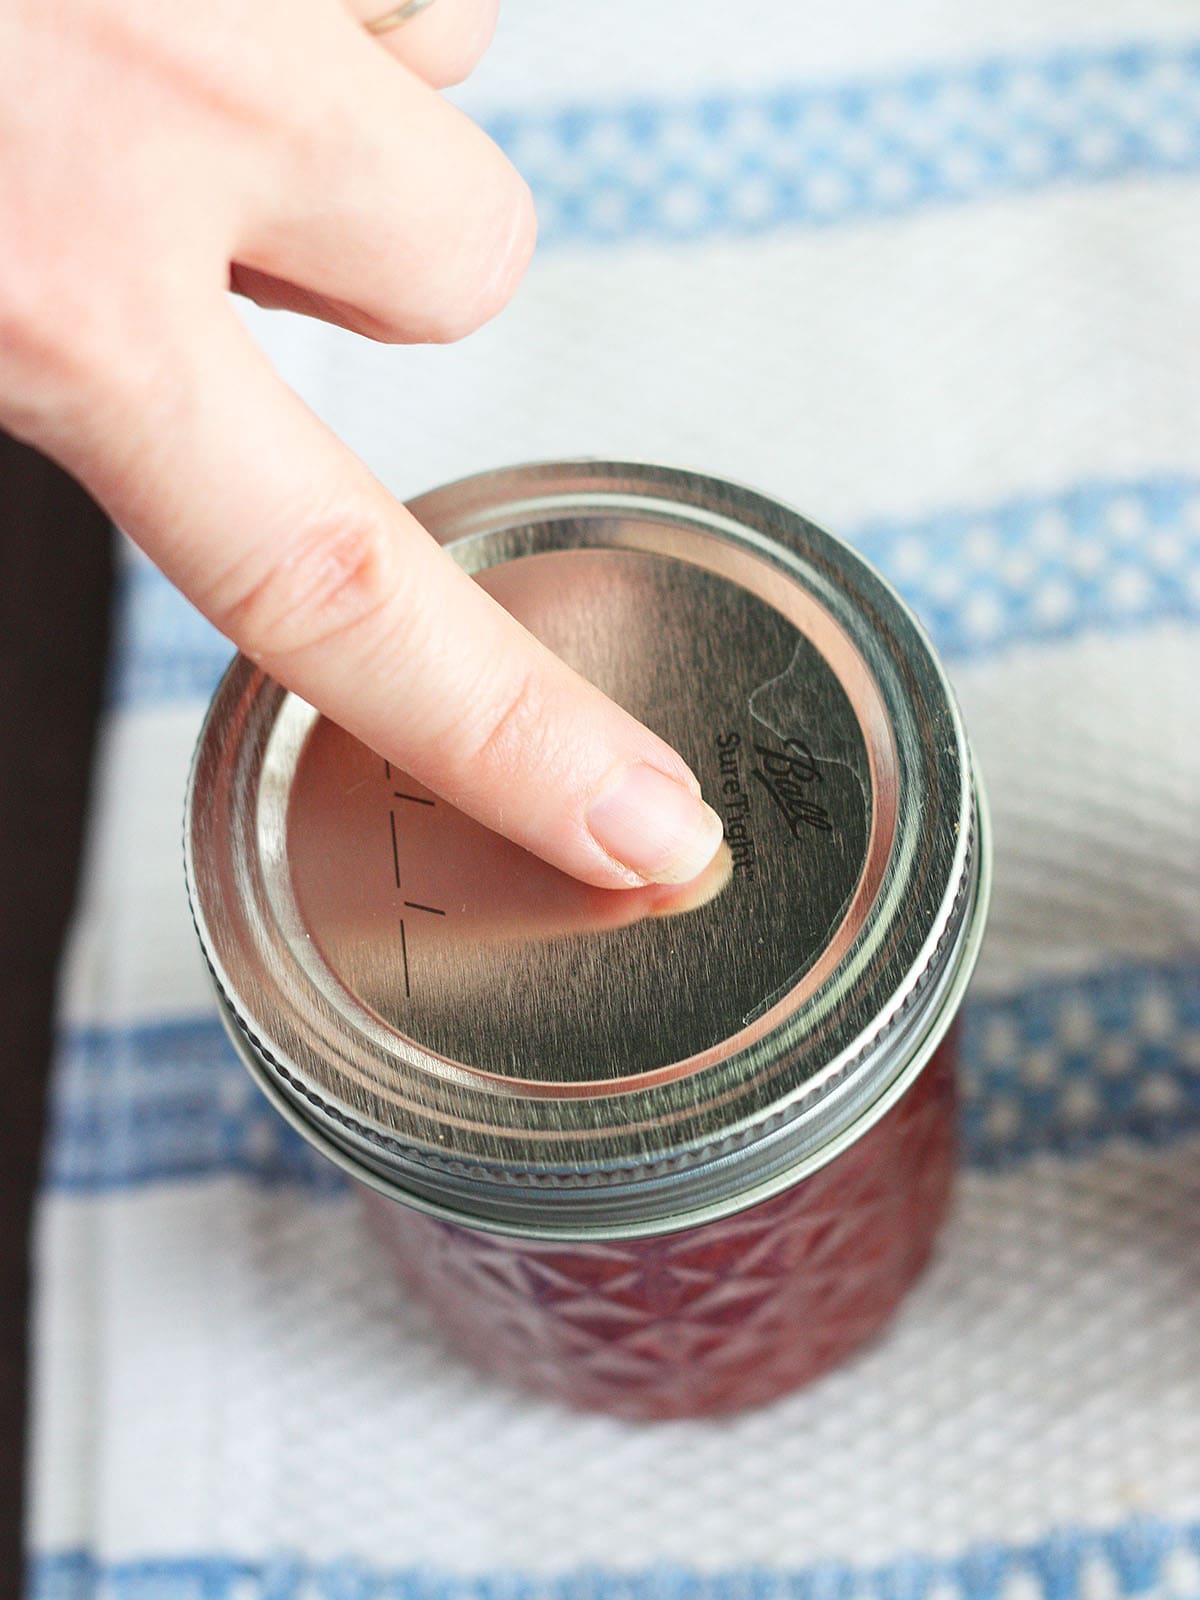
Canning Lids – Be sure to take note of whether you are using regular mouth or wide mouth jars and purchase lids accordingly. The underside of these lids are coated with a special adhesive that forms a bond to the outer rim of the jar, sealing the contents inside. As the vacuum is created inside the jar, the center of the lid bows in and creates a popping sound. When properly sealed, the center of the jar will be firm to the touch and should not have any give. If you are able to press the center of the lid and still hear the popping sound, the jar is not sealed and its contents should be stored in the refrigerator. Lids can not be reused and must be discarded after the jar is opened.
Rings – these are also referred to as bands. They also come in regular mouth or wide mouth, so pay attention. Rings screw over the top of the jar and hold the lid in place during the canning process. Rings should be removed once the jar is cooled and it has been confirmed that it is completely sealed. Do not store jars with the rings on as water can get trapped underneath and cause rust. Also, if a sealed jar should become unsealed for whatever reason, you want to know immediately before you eat the contents. A lid held in place by a band could create a false sense of food safety. Bands can be reused indefinitely as long as they do not contain any sign of rust or damage.
Glass Mason jars approved for use in home canning – Ball and Kerr are the only brands recommended by the USDA. Weck is another brand you may come across. This brand has not been approved by the USDA yet. You may also find glass jars at some big box stores labeled as canning jars without a brand name. I have used these successfully. Jars can be reused indefinitely as long as they are not chipped or cracked.
Glass jars for commercially packaged products, like mayonnaise, pickles, spaghetti sauce, etc., are not approved for canning. Sure, you could get lucky and they might work. But you run the risk of a higher spoilage rate because these jars have not been tested. Do you really want to take that risk? Also, I’ve seen mixed information on whether or not Weck jars
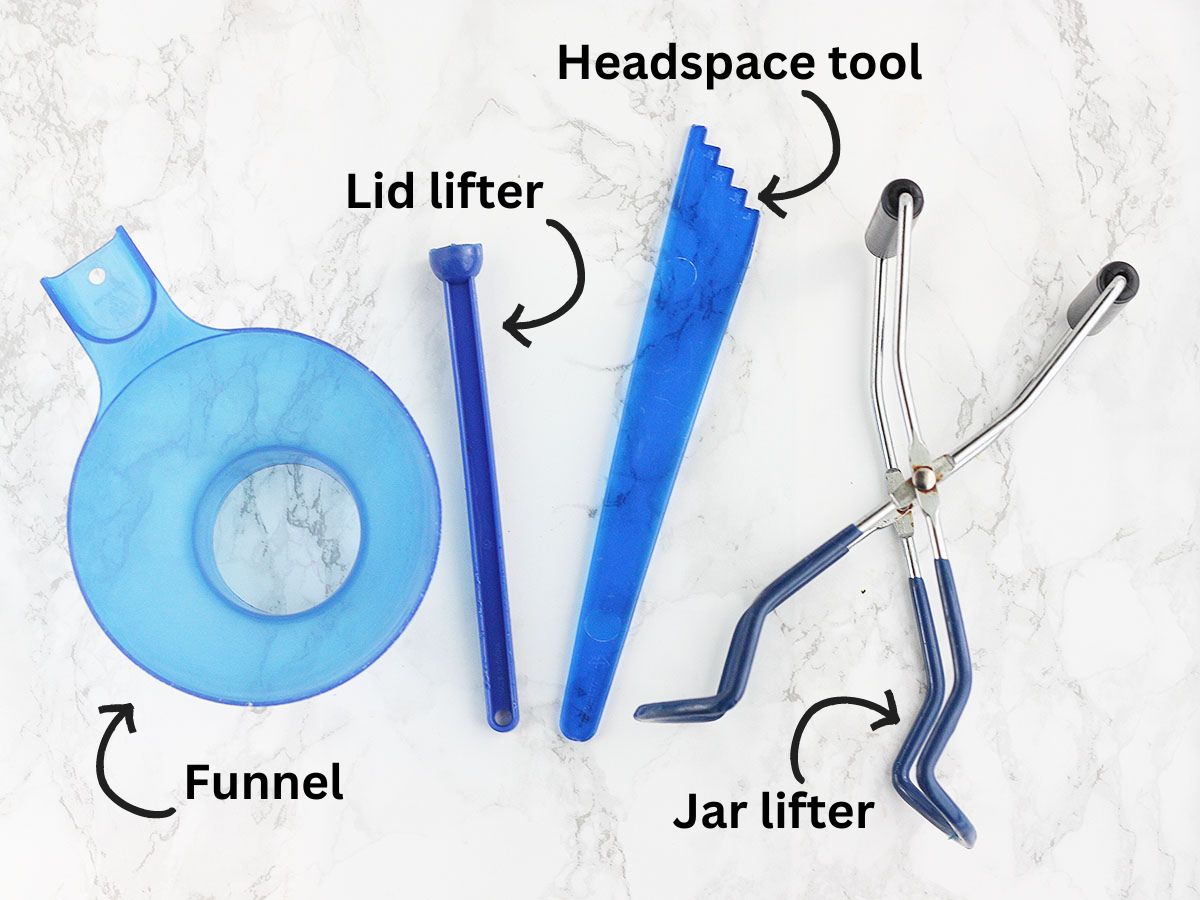
Canning kit – a basic canning kit contains four pieces:
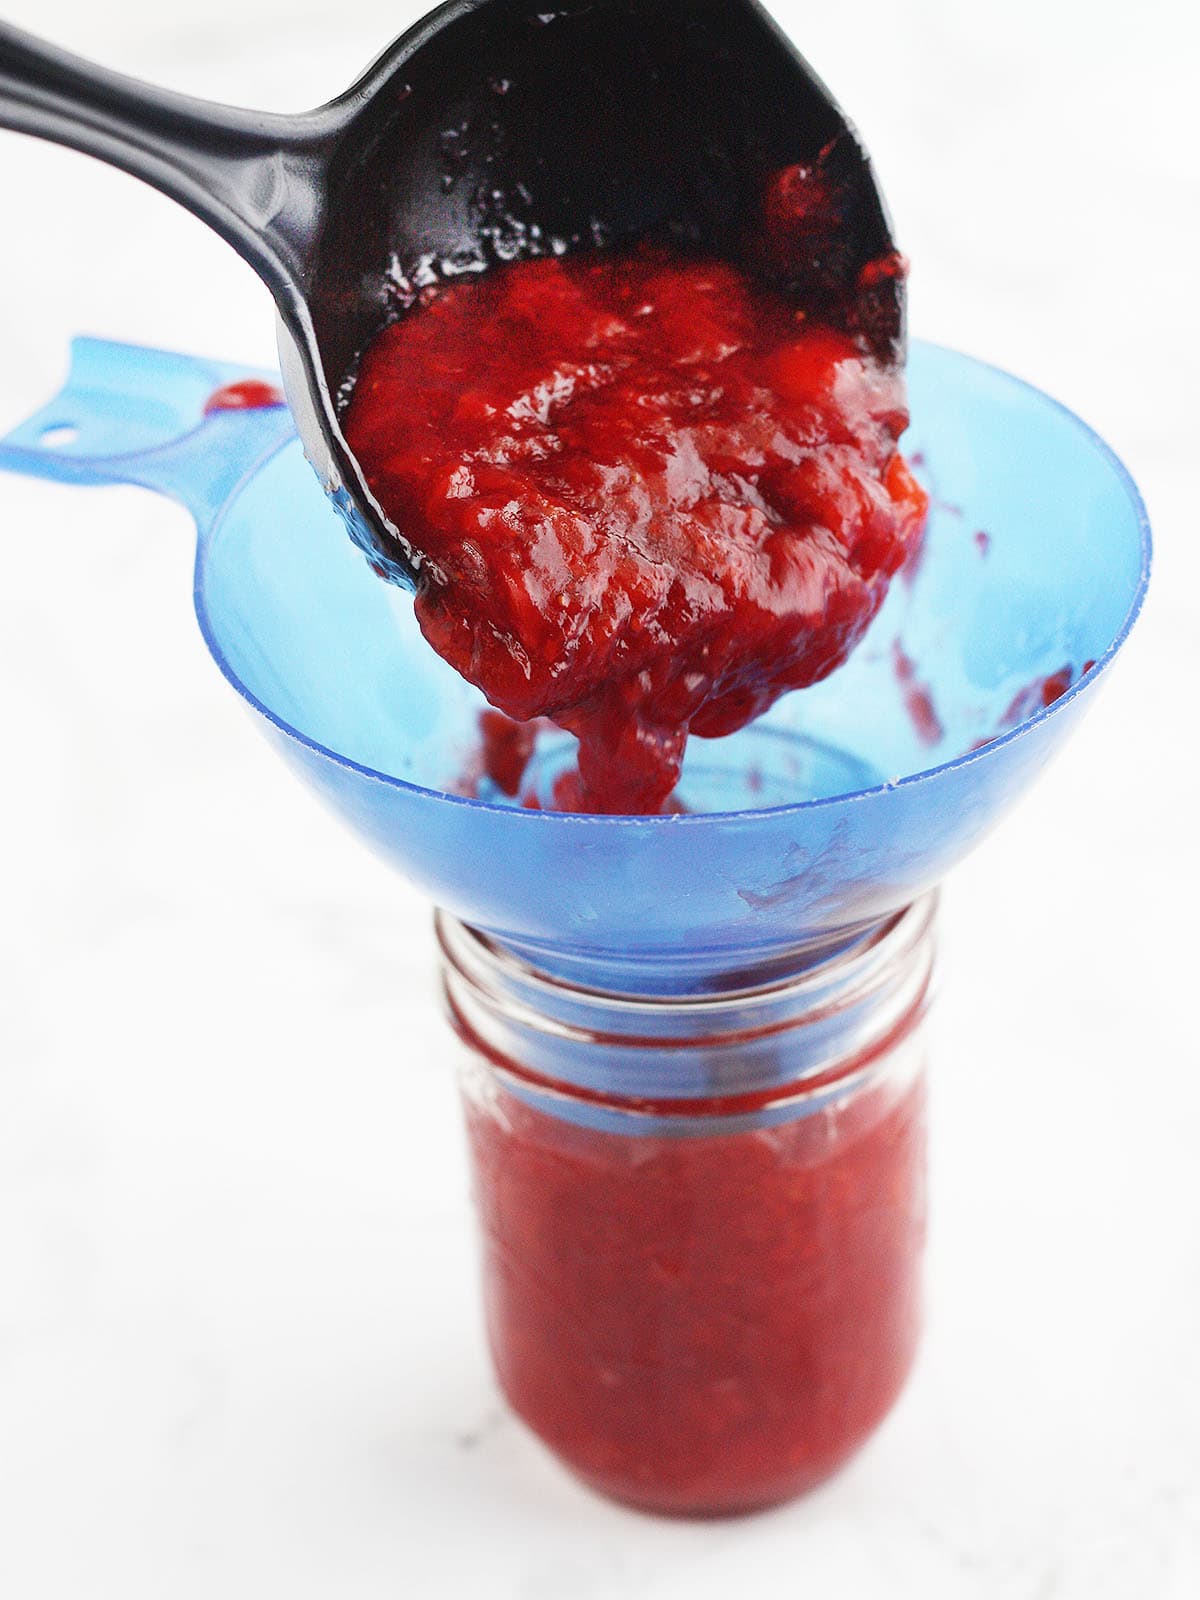
- Wide mouth funnel – will fit over both standard and wide mouth jars. It makes it easy to add food to jars without making a mess.
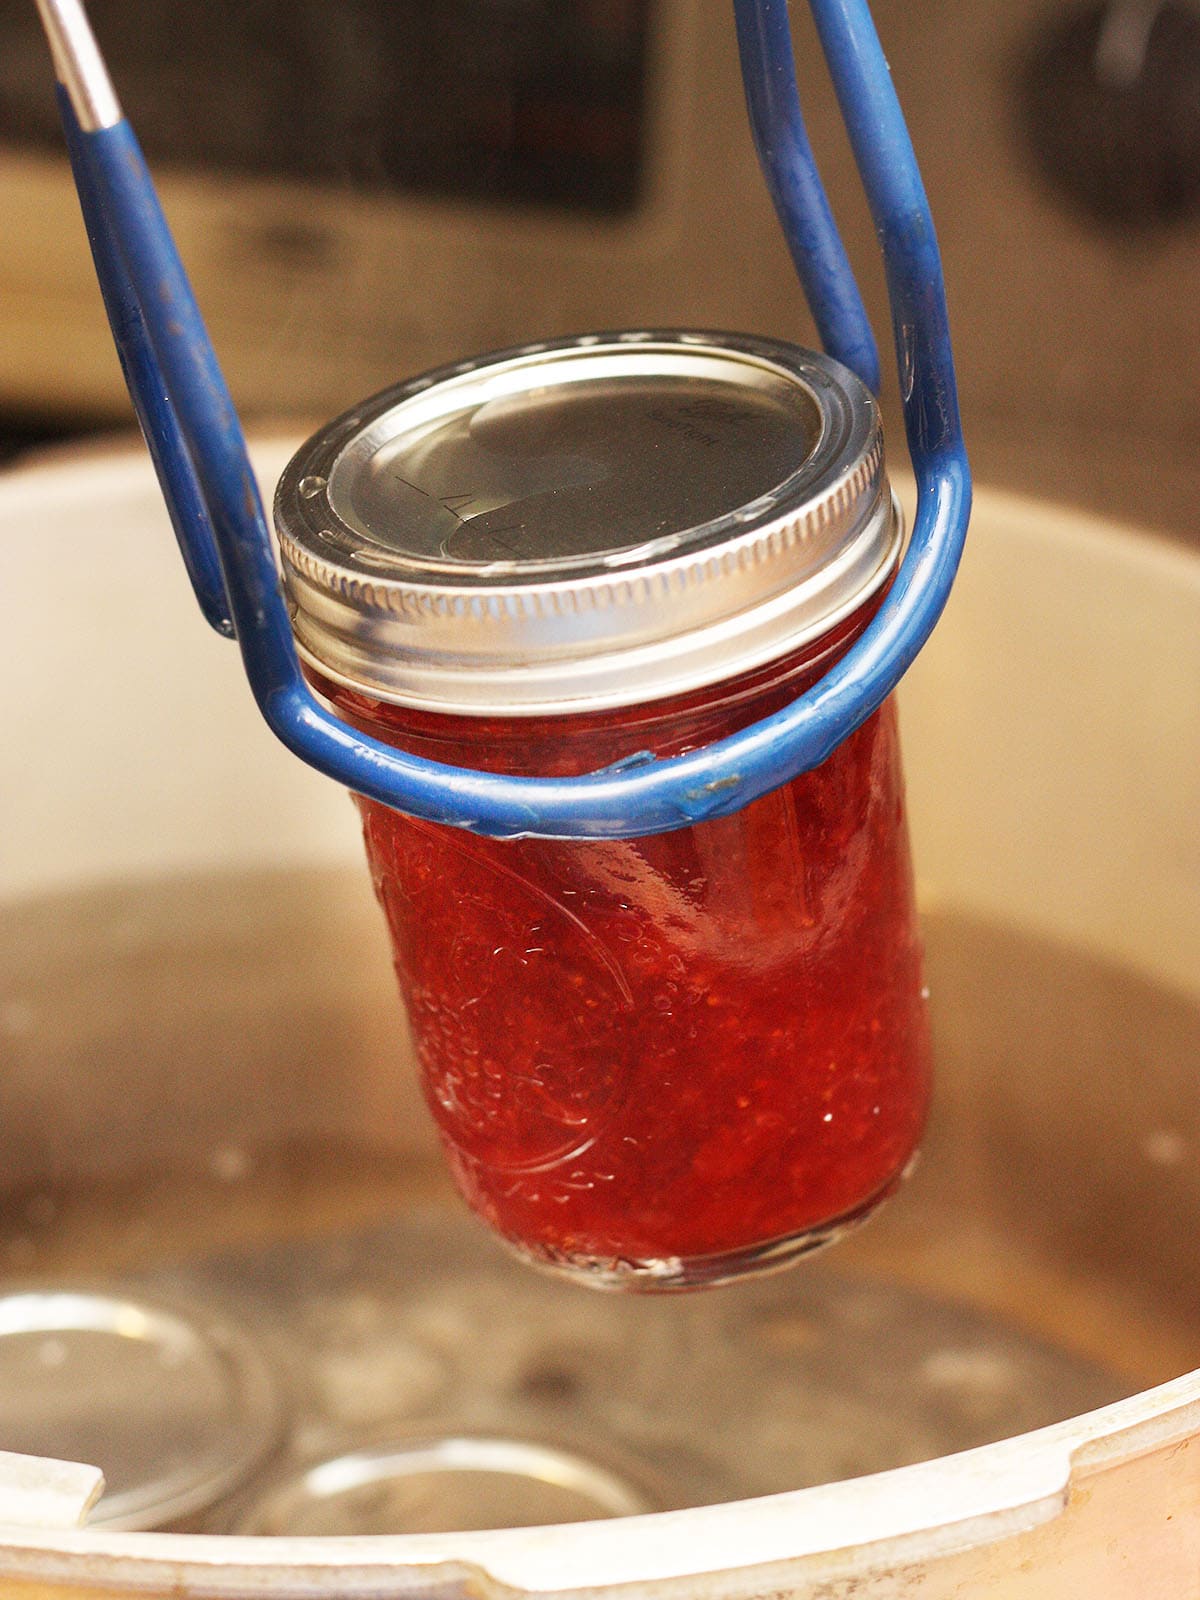
- Jar Lifter – lets you safely lift hot jars out of a canner without burning your hands. The handles are coated with vinyl for a more secure grip to prevent breakage.
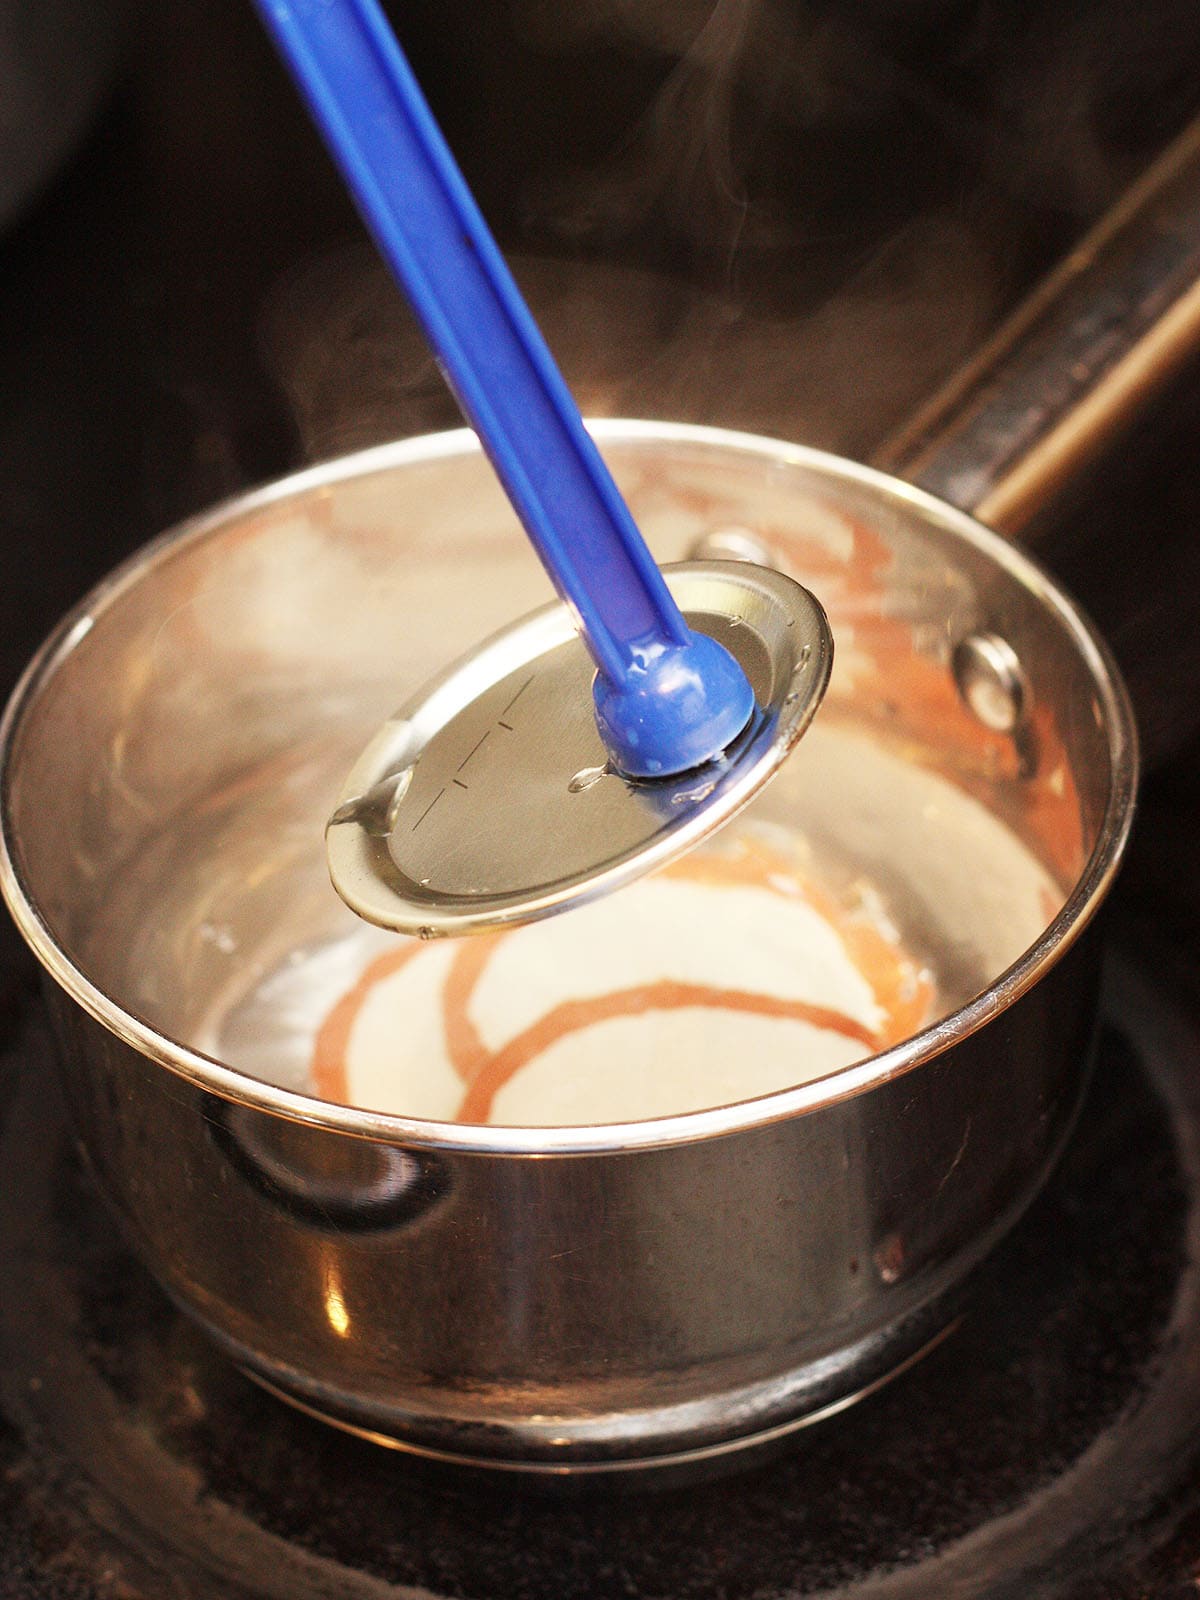
- Magnetic Lid Lifter – removes lids from hot water during the sterilization stage.
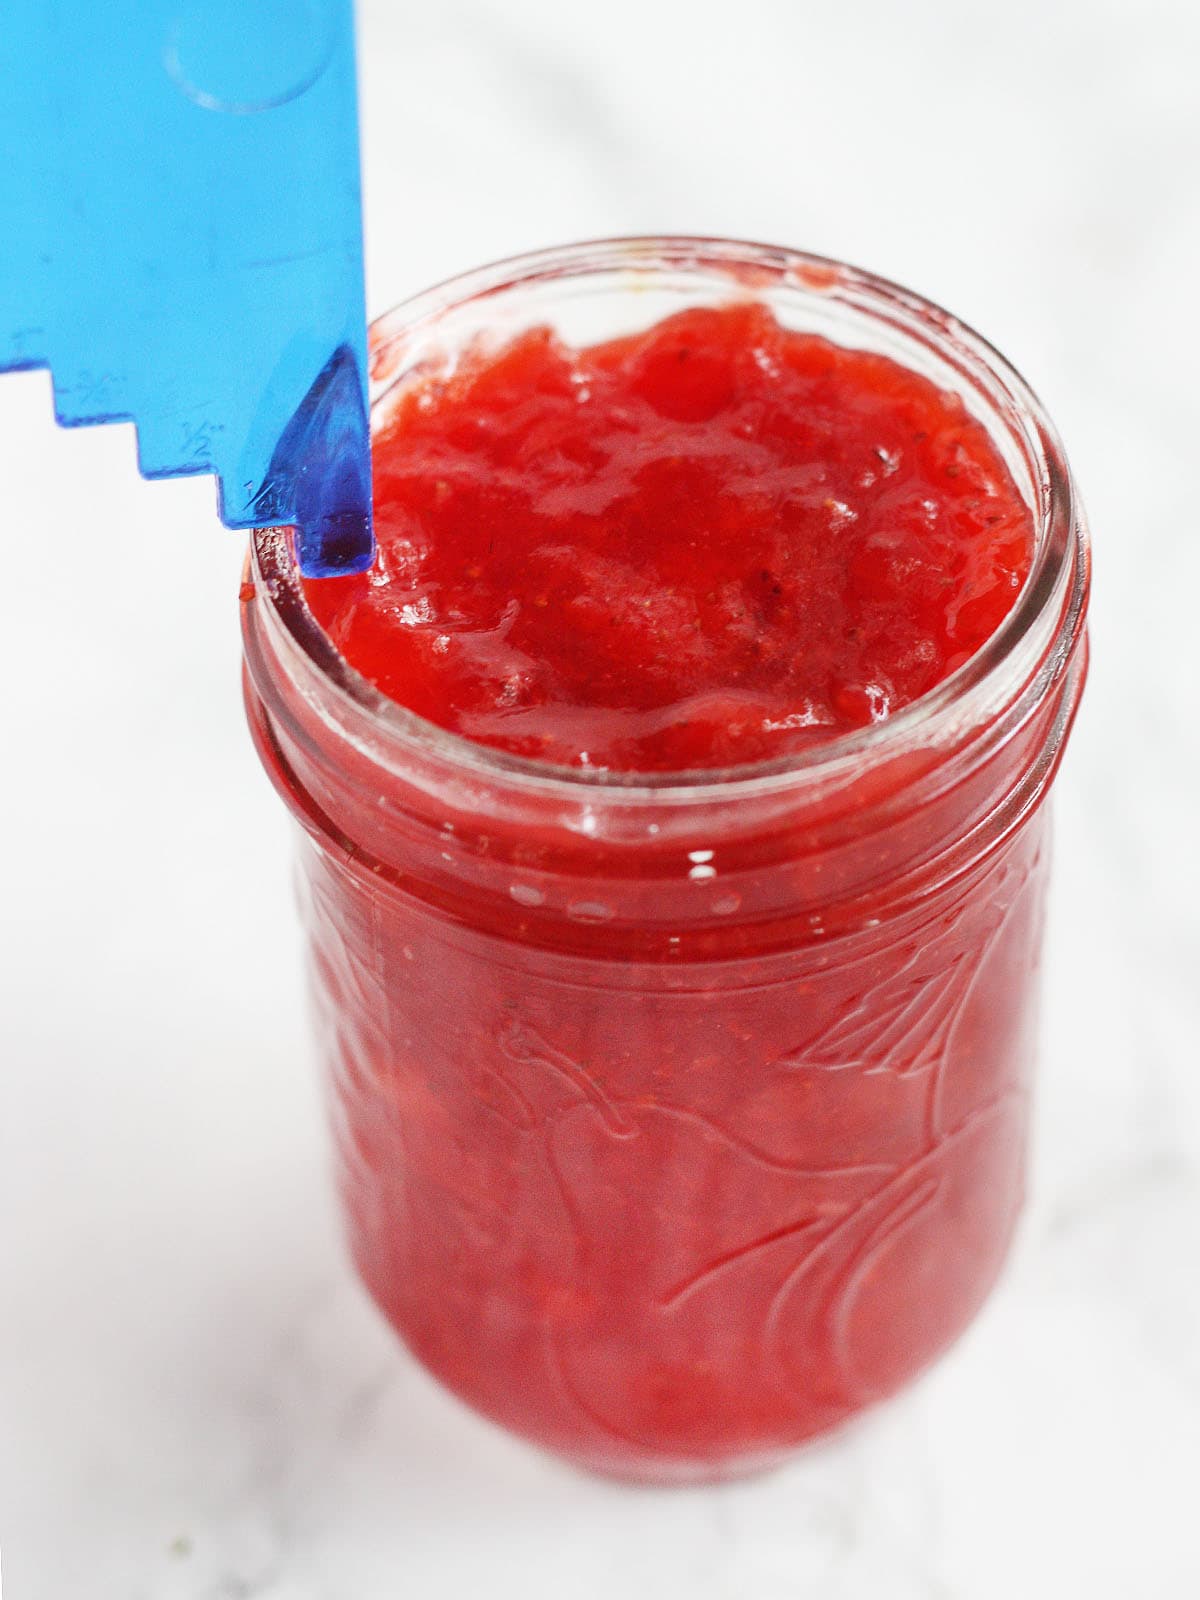
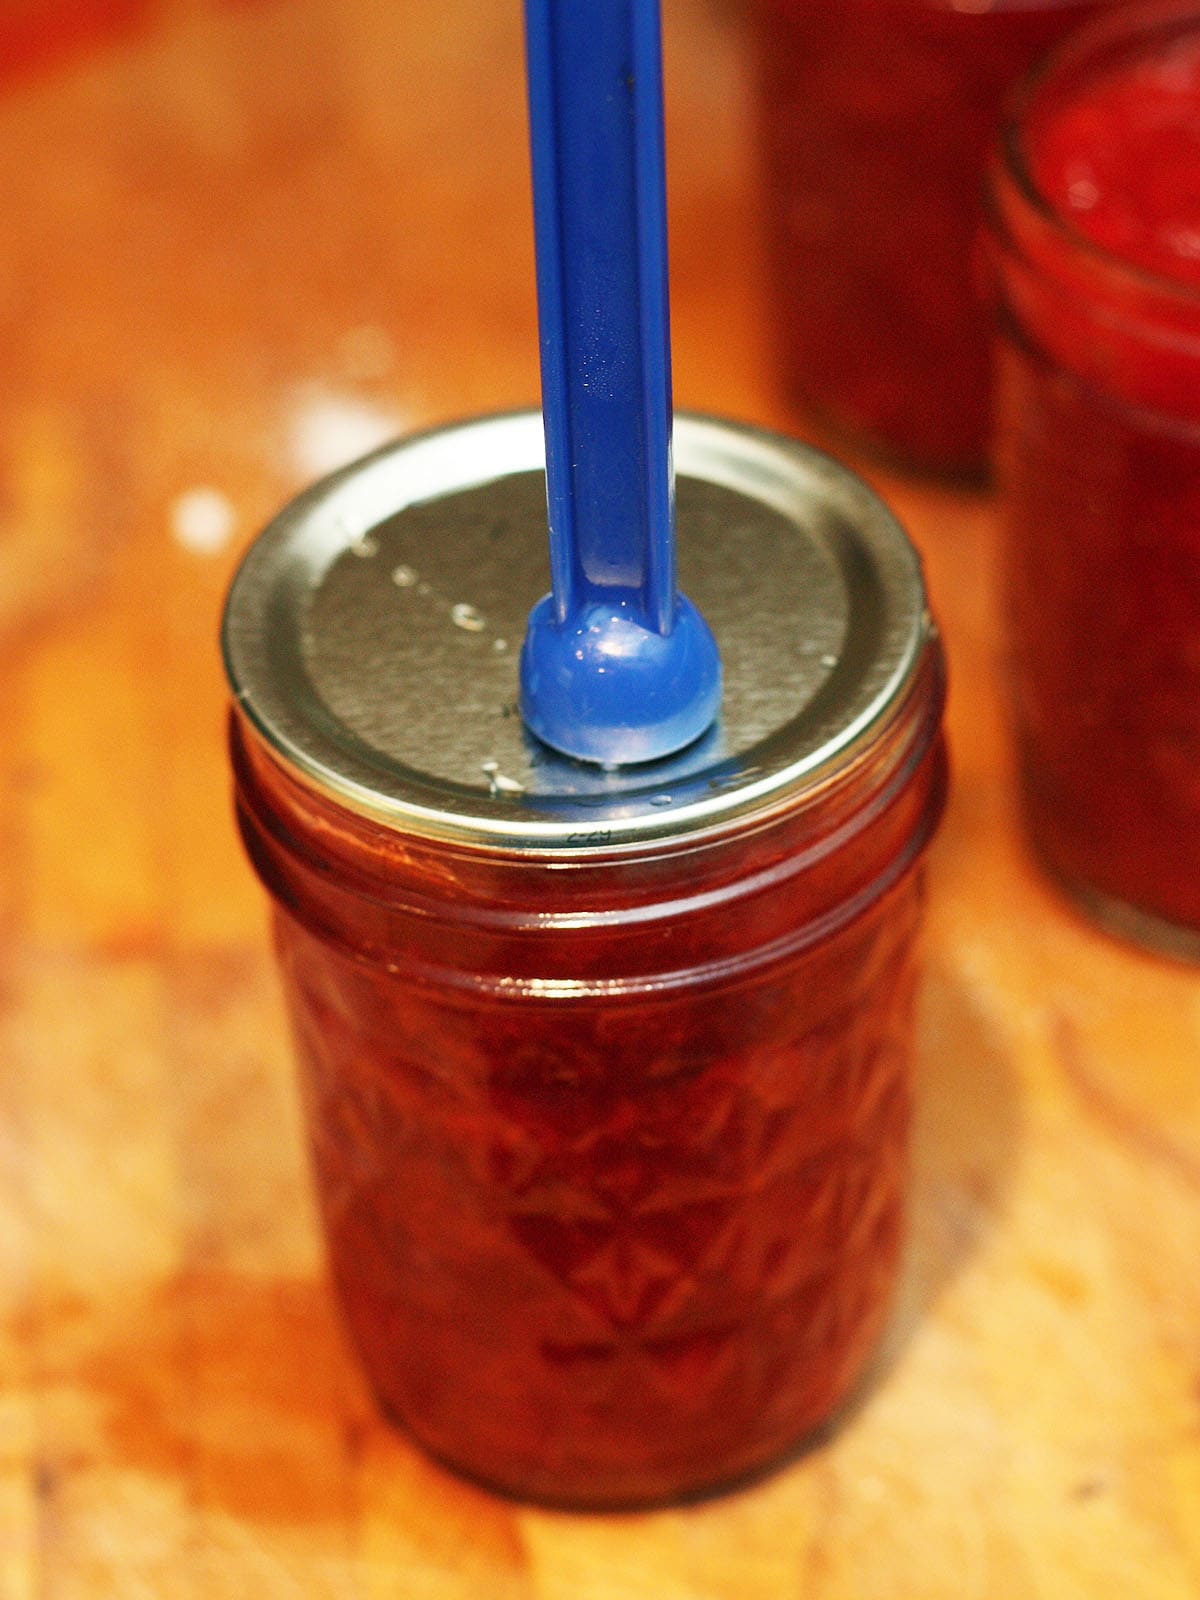
- Measuring Stick – this tool serves two purposes. It removes air bubbles from the jars. The notched end with numbers measures headspace.
Canning Pot – You don’t necessarily have to go out and buy something specific. Any stock pot deep enough to cover the jars with one inch of water will work.
Canning rack – this is a slightly raised platform placed in the bottom of the canner to set the jars on during canning. It keeps the jars from being in direct contact with the heat of the stove. It also ensures that the boiling water comes in contact with every surface of the jar.
Different types of canning jars and when to use them
Sizes
- Quart (32 ounce) – I use these for soups, broth and pickles. Can also be used for whole fruits and vegetables.
- Pint (16 ounce) – use for jam, homemade salsa, sauces, pie filling, or relishes.
- Jelly Jars (12 ounce) – use for jams, jellies and preserves.
- Half Pint (8 ounce) – use for jams, jellies and preserves.
- Jelly Jars (4 ounce) – use for jams, jellies and preserves.
Openings
- Wide mouth – great for storing whole fruits and vegetables such as pickles.
- Regular mouth – ideal for jams, jellies, salsas, sauces, pie fillings, diced fruits and vegetables.
Water bath canning: basic steps
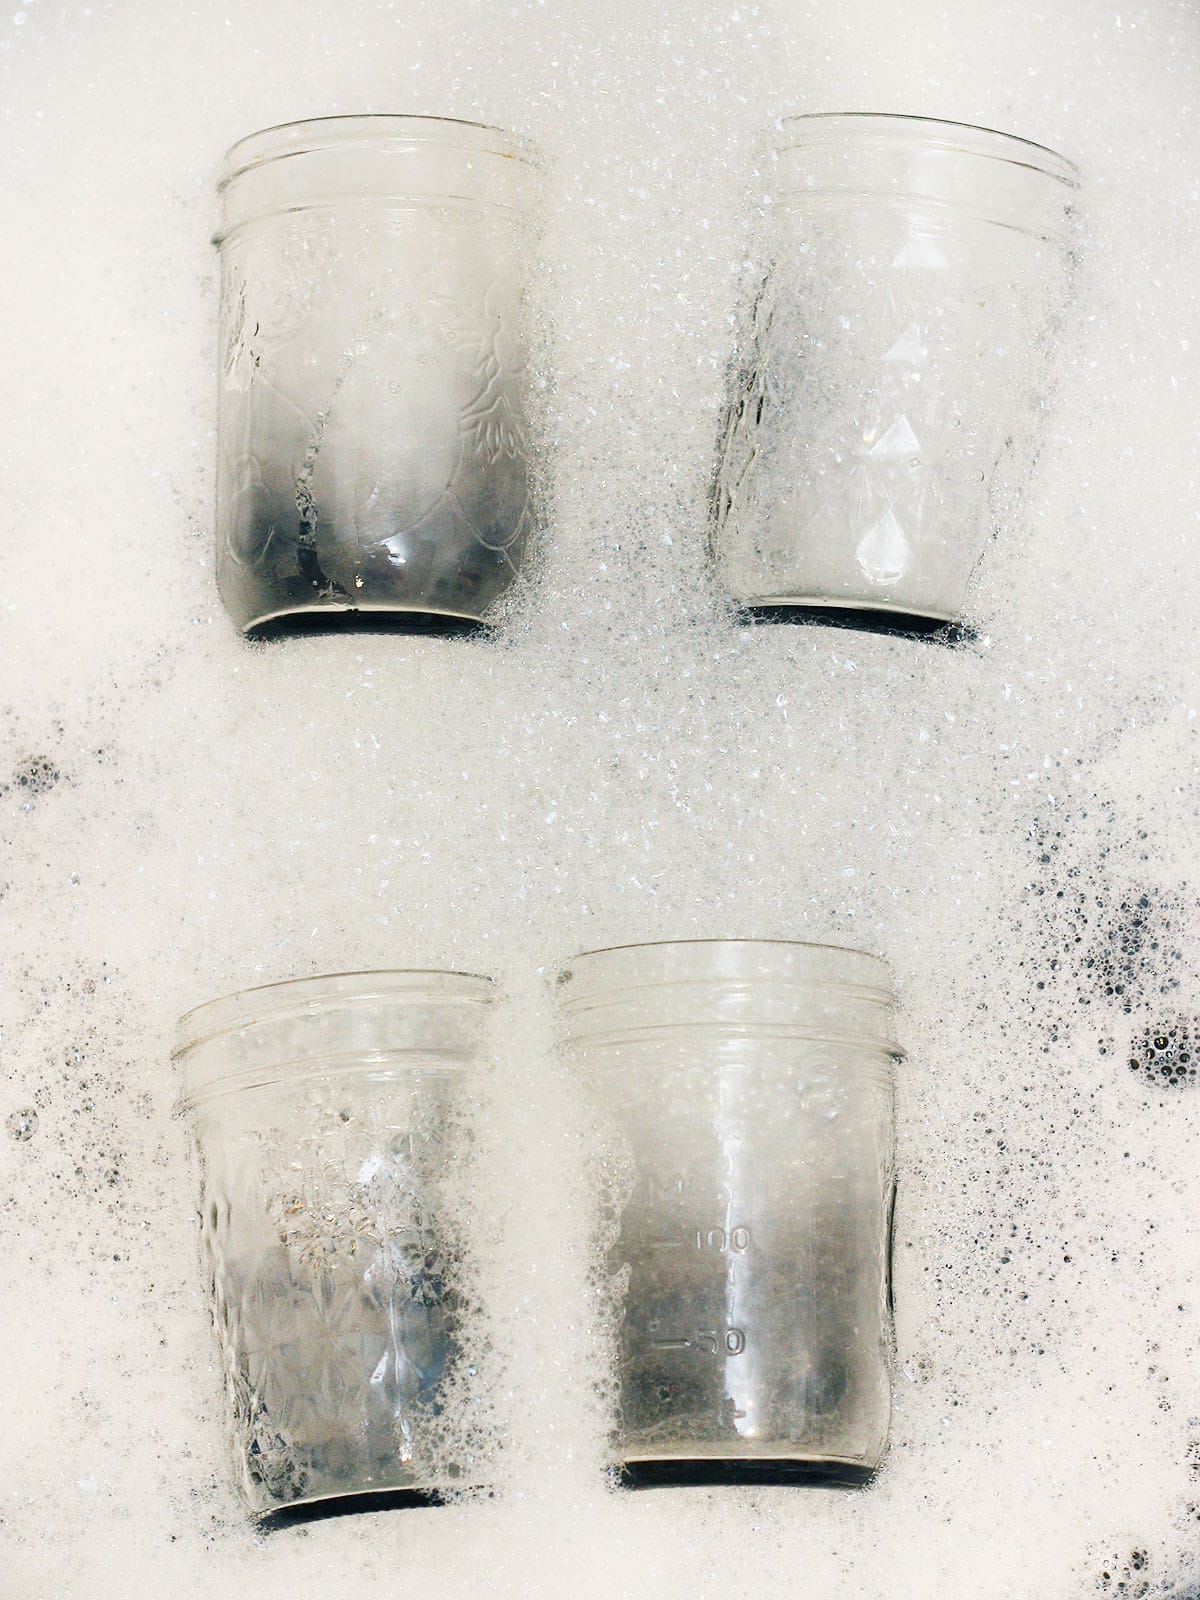
- Wash your jars in warm soapy water. Adding hot food to a cold jar could cause it to crack, so be sure to keep the jars warm until you are ready to use.
- Fill jars with food. Cold pack canning is the process of filling jars with uncooked or raw foods. Warm liquid does need to be added to the jar before sealing to remove air and ensure a proper vacuum seal. Hot pack canning is the process of filling jars with hot, cooked food. Hot food prevents the formation of air bubbles and kills off bacteria.
- Check headspace. Headspace is the amount of room in the jar between the top of the food and the bottom of the lid. Headspace allows for expansion. Too much headspace could affect the vacuum seal. Too little could cause the food to spill out and prevent a proper seal. Headspace varies by the contents of the jars, so check your recipe or a reliable canning resource. Headspace is measured using the measuring stick that came with your canning kit. Simply place the corresponding notch with the correct measurement on the rim of the jar and fill the jar until it reaches the bottom of the measuring stick.
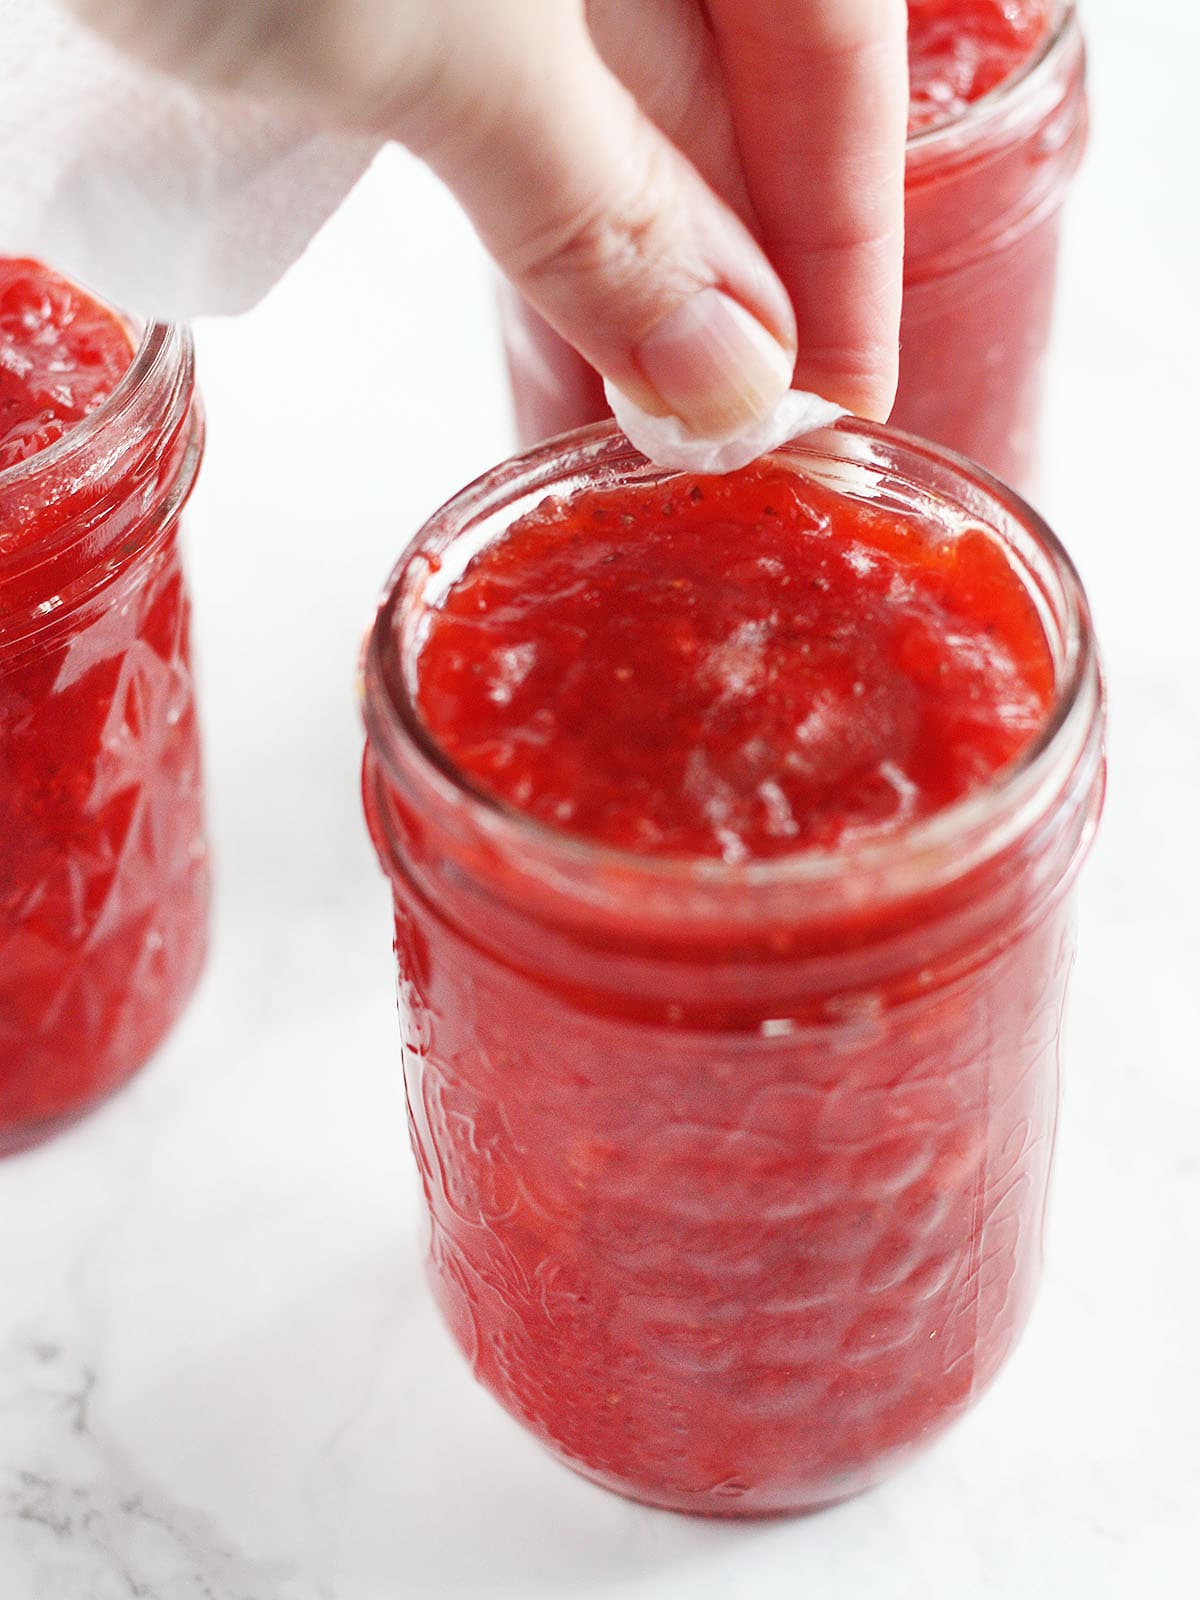
- Wipe rims. Once the jars are filled, you’ll want to wipe any bits of food or spills off the rims with a damp rag. Not wiping the rims could prevent the lids from sealing.
- Sanitize your lids. Some people argue that you no longer need to sanitize the lids, that the canning process is enough. But, if you want to take the extra step, simply place the lids in a small saucepan, cover with water, and heat the water on low. Do not allow the water to come to a boil or you could activate the adhesive and the lid will be useless.
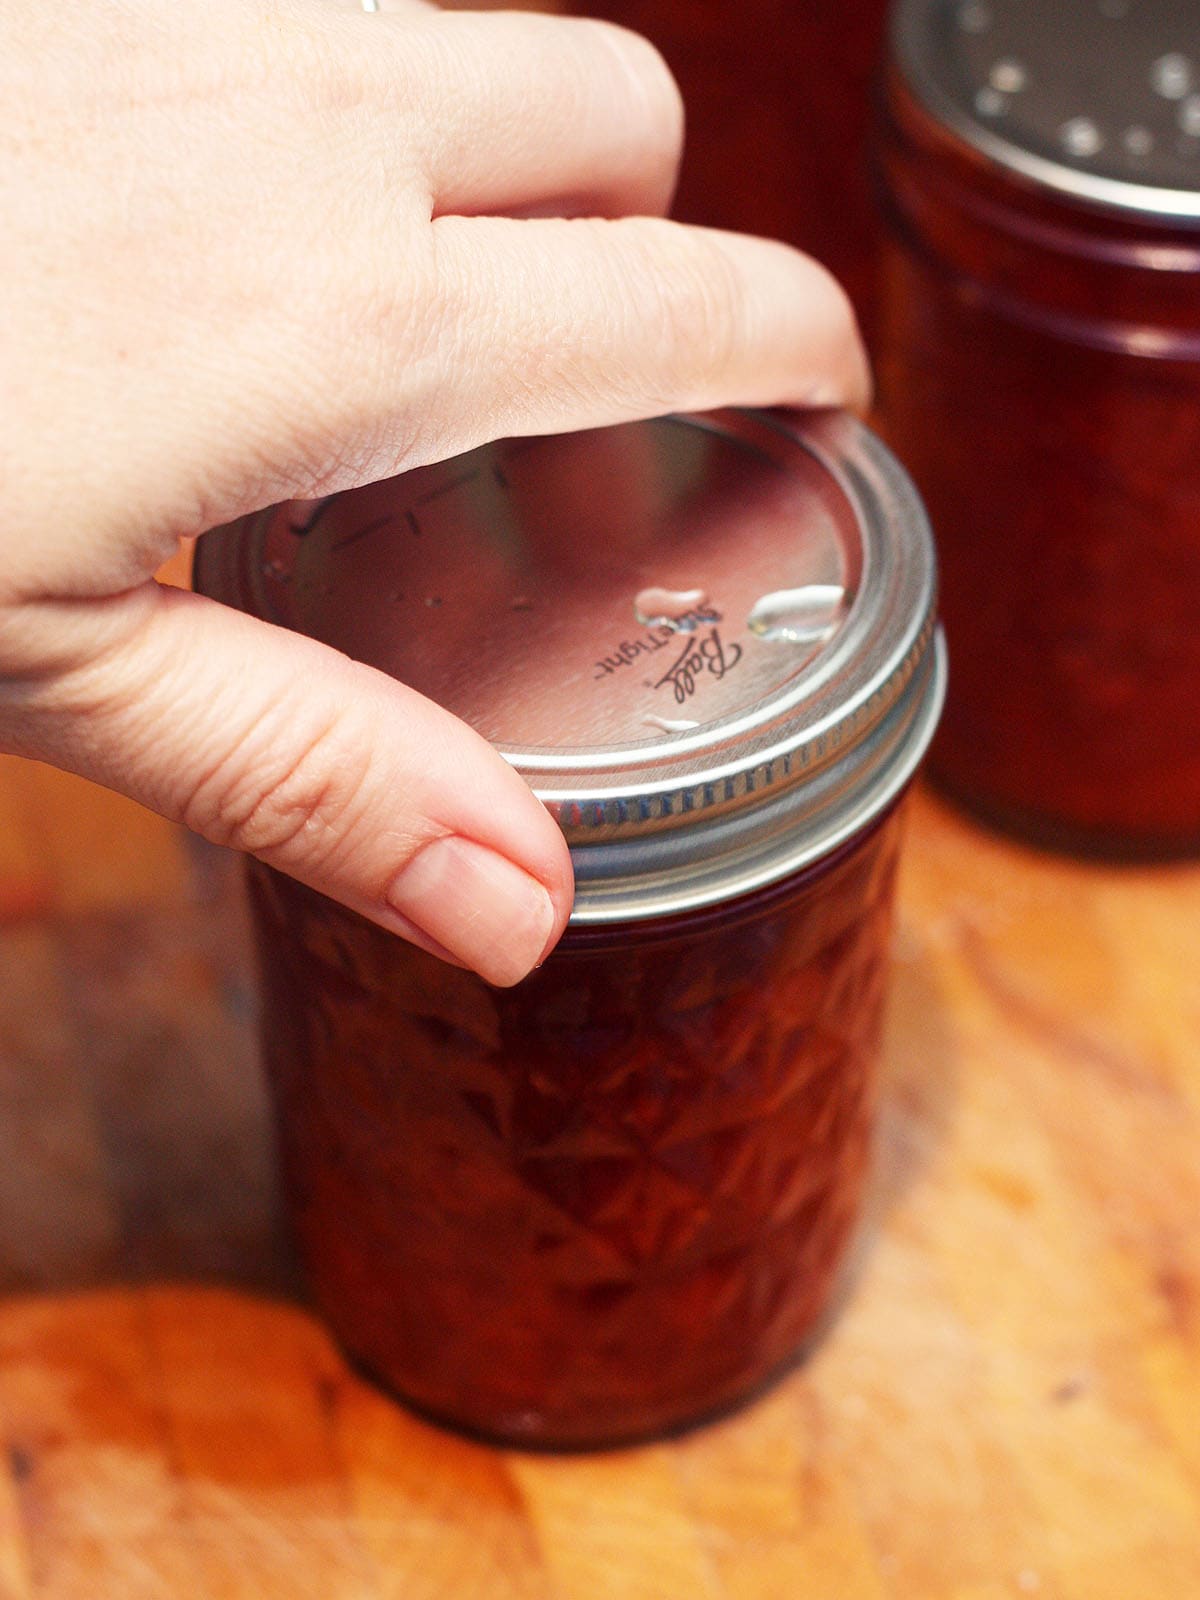
- Place the lid on top of each jar and secure with a ring. You don’t need to bear down on these rings with all your strength. Twist it just until it is finger tight.
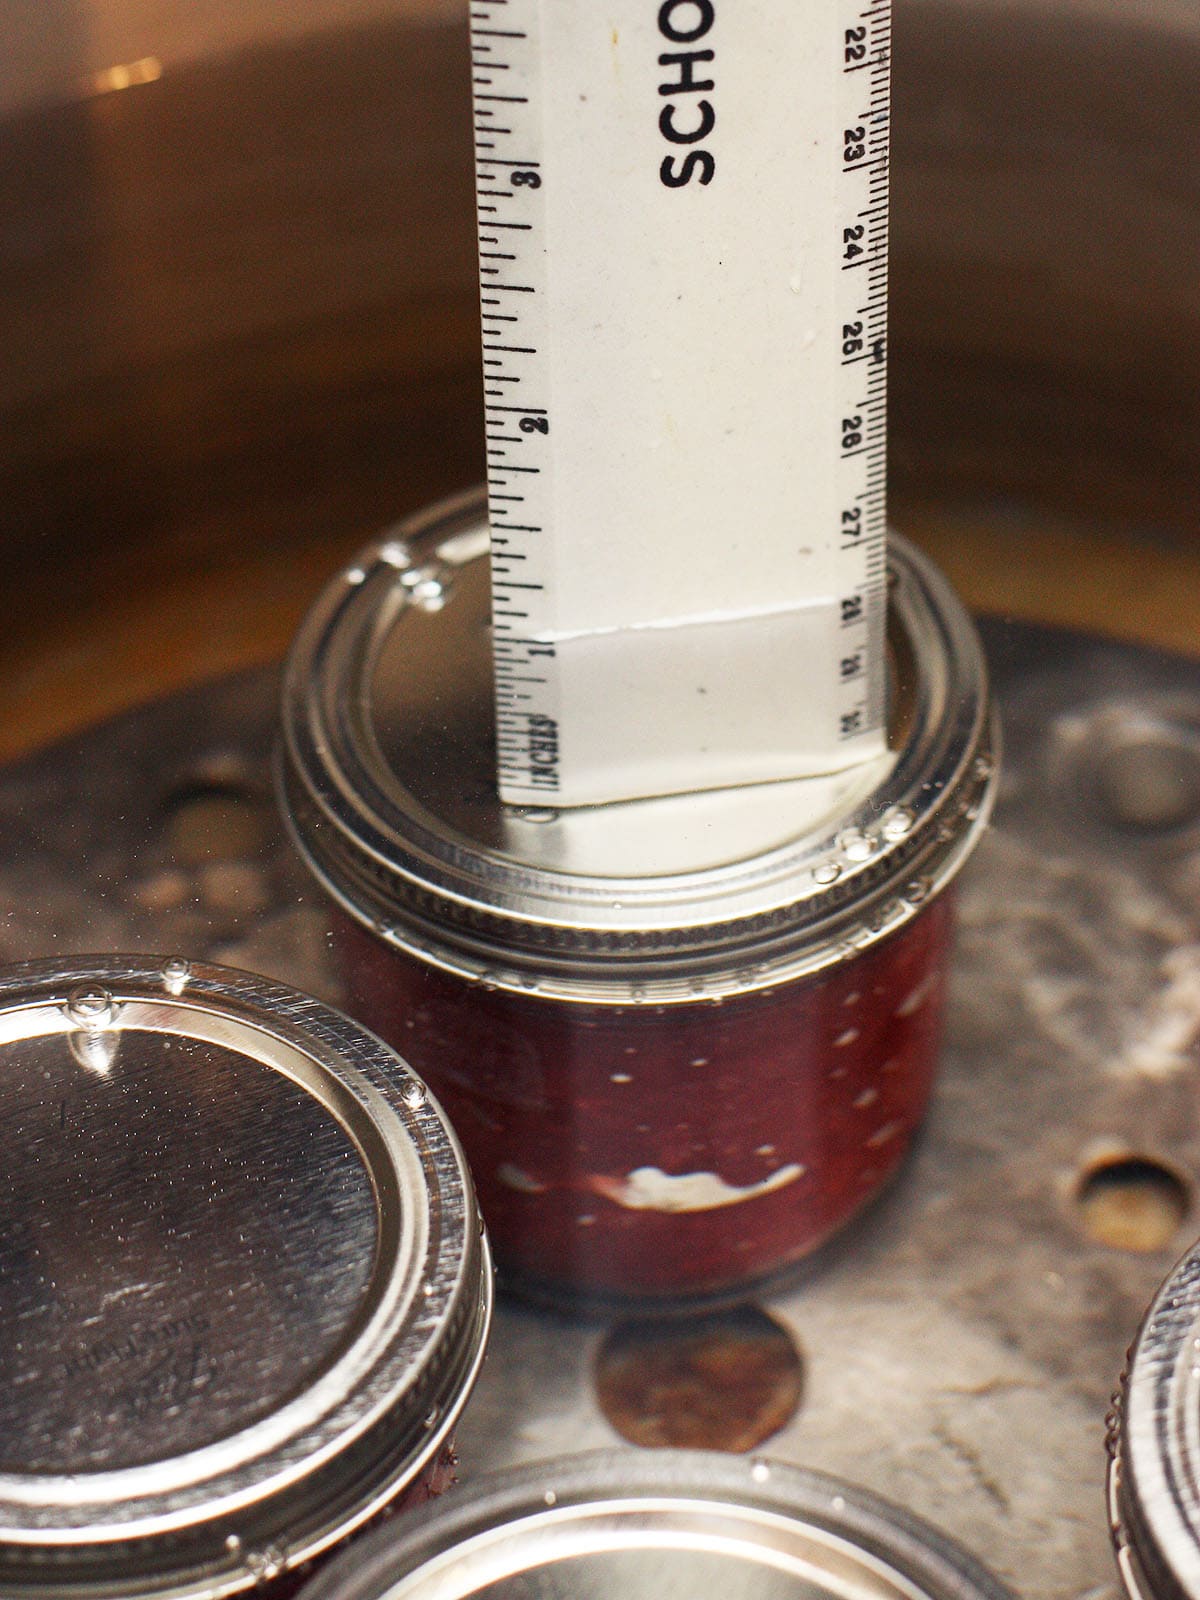
- Place the jars in the in pot on a canning rack. Fill the pot with enough water so that the tops of the jars are covered by one inch. Bring the water to a boil. Cover the pot with a lid and process your jars. Water bath canning times can vary, so always use a trusted recipe or canning resource guide.
Tips to ensure your jars seal
Once the timer is up, remove the lid of the canner and let your jars sit in the pot for five minutes. Using your jar lifter, remove the jars from the pot and set on a towel on your counter or somewhere out of the way to cool. It can take up to 24 hours for jars to completely seal. Do not touch the jars in the meantime. Remember to remove the rings before storing.
How to store canned food and how long will canned food last?
Canned food should be stored in a cool, dry place away from direct sunlight. Properly canned food will be safe to eat for years to come. However, after a year, taste and texture could diminish, so it’s recommended that you eat the food within 12 – 18 months.
Frequently asked questions
It depends on the food. Jams and jellies can be processed again if caught within 24 hours. For items where texture is important, such as pickles, I don’t recommend trying to process again. Prolonged exposure to heat will result in mushy food.
Back in the day, my mother/grandmother/distant relative used a different method to can. Can I do that instead?
No. There are several methods of canning that were employed by older generations. The open kettle method requires packing the jars with hot food or pouring boiling water over the top, then adding a lid and ring. The heat from the contents can create a seal. Another technique I’ve heard is to turn the jars upside down for several hours, which can also create a seal. However, a seal alone is not enough to prevent food spoilage. There is still bacteria trapped inside the jar. The only way to kill the bacteria is to heat the contents of the jar to 250 degrees F for several minutes.
Also, do not try to use a microwave or an oven to process jars. Glass canning jars are not designed to be used in this way and can explode. Do not set jars out in the sun, use the heat from a dishwasher or a slow cooker. Water bath canning and pressure canning are the only two approved methods for preserving food in jars.
Should I fill my canner with warm or cold water?
I use hot tap water to fill my canner. The water is not hot enough to shatter the glass jars and it does speed up the amount of time needed to bring the water to a boil.
I don’t have time to can my jars today. Can I do it later?
Yes, but I would plan on making time to can the jars within the next several days. Store your unsealed jars (with lids and rings) in the refrigerator. A few hours before you plan to can them, remove the jars from the refrigerator and let them come to room temperature. As mentioned above, the sudden fluctuation from cold to hot could crack or shatter the jars.
Can I can without the rack and just sit the jars on the bottom of the pot?
No, you really need a rack. It prevents the jars from being in direct contact with the heat and ensures that the hot water circulates freely around the jars. The boiling water can also cause the jars to bump around and chip or crack.
My favorite canning resources
- Food in Jars – I also own and recommend her cookbook by the same name.
- Ball Book of Canning and Preserving – every canner’s Bible.
- Pick Your Own -very in depth website that I reference a lot when I was first learning to can.
Air needs to be able to escape from the jars in order to create a vacuum. If the lid is too tight and the air can’t escape, the jar may not seal properly.
Do your jar lids only need to be finger tight so air can escape when boiling
I have some on now boiling that I cranked the rings down tight need advice pretty fast
Hi Kimmy, good question! I have added your question along with the answer to the FAQ section of the post.
Can do do water bath canning without the rack that the jars sit on in the pot?
Hi, Kathy! Yes, the amount of lemon juice needed will vary by recipe depending on how acidic the fruit is. The recipe should tell you how much you need.
Will a jelly recipe give instructions for the amount of lemon juice that should be used?
Hi, Bertha. I think you will be fine. Just keep a better eye on the timer next time. It is possible to overprocess. Jams and jellies will start to solidify if they are heated too long.
I’m new to this(water bath canning)if you miss the timer and go over 10 minutes have you ruined the batch? Thank you, Bertha
Hi Cindy,
Thank you for sharing the top on the rings! I will remember to do that the next time I can. I fill my canner with hot tap water after I fill the canner. It’s not hot enough to shock and break the jars, but it does speed up the time it takes to bring the canner to a boil.
This article is very well written and the pictures are very helpful. What temperature, cold, warm, hot?, do you recommend the water be when you fill the canner after you place the jars in it?
I would also like to add how important it is to wash your jars after you remove the rings and before storing your jars. I always wash my rings and dry them in a warm oven. I place the damp rings on a baking pan, turn the oven to 200°, shut it off and place the pan in the oven until cool. This prevents them from rusting and they last a long time.