How to Can Diced Tomatoes [Tutorial]
Interested in preserving tomatoes, but don’t know where to start? My how-to guide will tell you everything you need to know about how to can diced tomatoes.

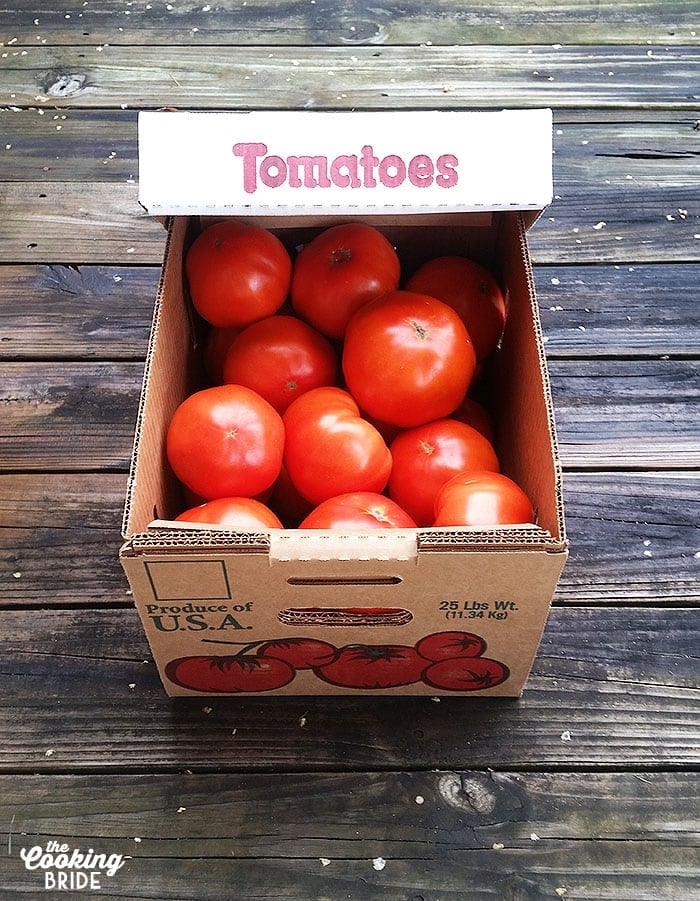
The summer I was pregnant with Little Brother, I bought 50 POUNDS of canning tomatoes. Yes, fifty. We’ll chalk it up to nesting. The Husband had grave concerns about me undertaking this process while in my condition, so he unwittingly offered to help just to get his barefoot and pregnant wife out of the kitchen and off her feet.
I’ll admit, processing 50 pounds of tomatoes in our little kitchen was a bit much and I think that first time overwhelmed him a bit. But it ignited that hunter/gatherer instinct in The Husband (the same way deer hunting does in the winter) and you know what? He’s been helping me can tomatoes every summer since!
Need an idea for all those canned tomatoes? Check out this yummy recipe for Tomato Curry Sauce or Cowboy Chili.
Tools You Need:
- Water-bath canner, or
- Pressure canner
- Canning kit
- 2 large stockpots
- 3 large mixing bowls
- Ice
- Clean and sterile quart or pint glass mason jars
- Jar lids
- Rings
Not a requirement, but nice to have:
Please note, a pressure canner is not the same as a pressure cooker. We’re not talking about an Instant Pot. A pressure canner can double as a pressure cooker, but you can not use an Instant Pot for pressure canning.
How to Quickly Peel Tomatoes
First, y’all give a shout out to The Husband for being my hand model.
I like to start by peeling the tomatoes. Some people skip this step, but I prefer to remove the skins because they don’t break down during cooking and can get tough. Before you spend an hour standing over a sink methodically peeling tomatoes, let me show you a little trick that will save you LOADS of work.
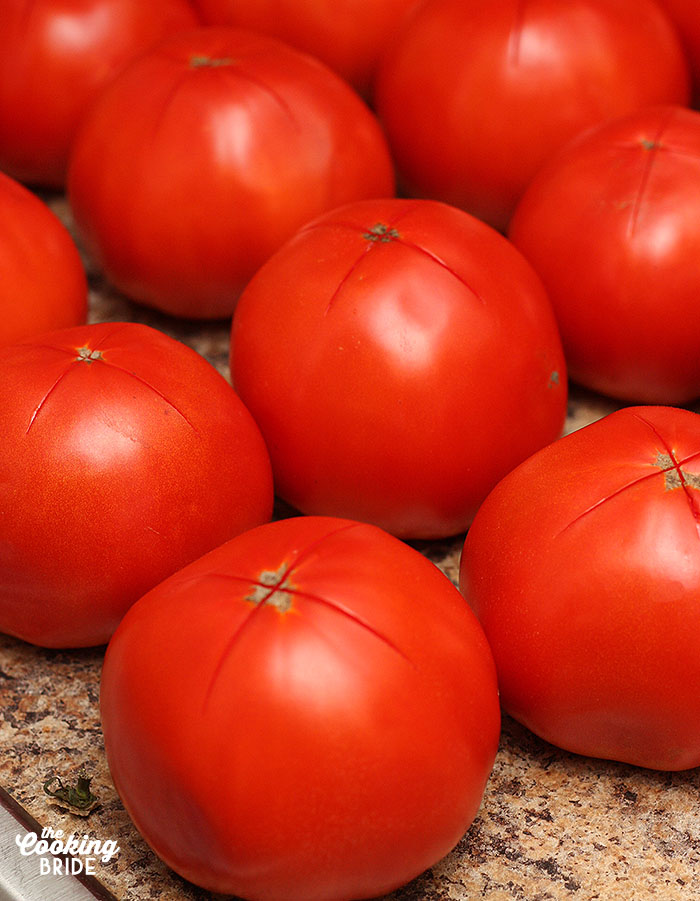
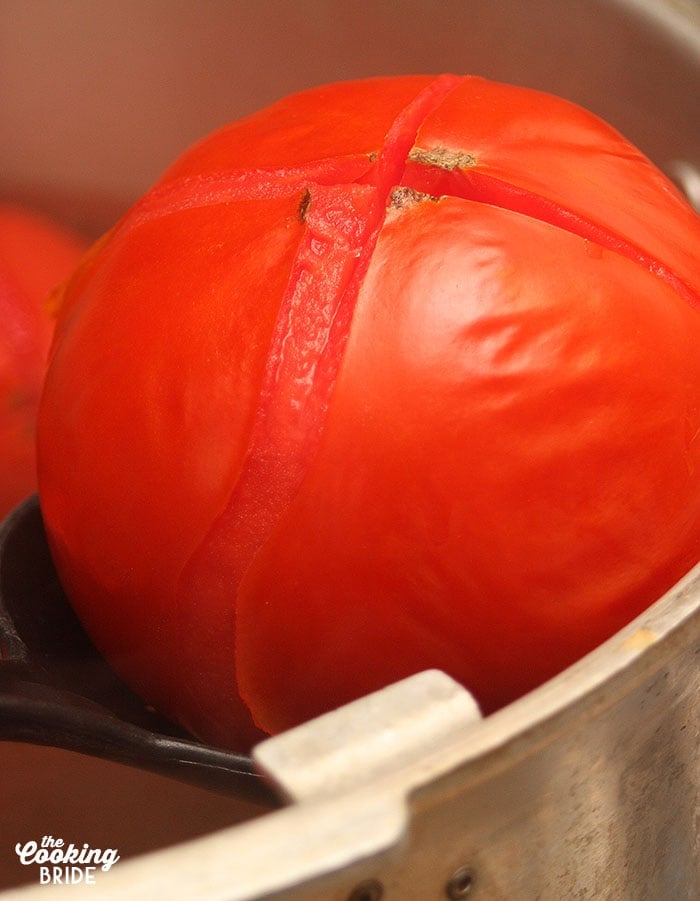
Start by bringing a large stock pot of water to a boil. Next to it, fill another stock pot or bucket with ice water. Take a sharp knife and cut cross marks on the bottom of each tomato. Once the water comes to a boil, add the tomatoes to the pot a few at a time. Don’t overcrowd them.
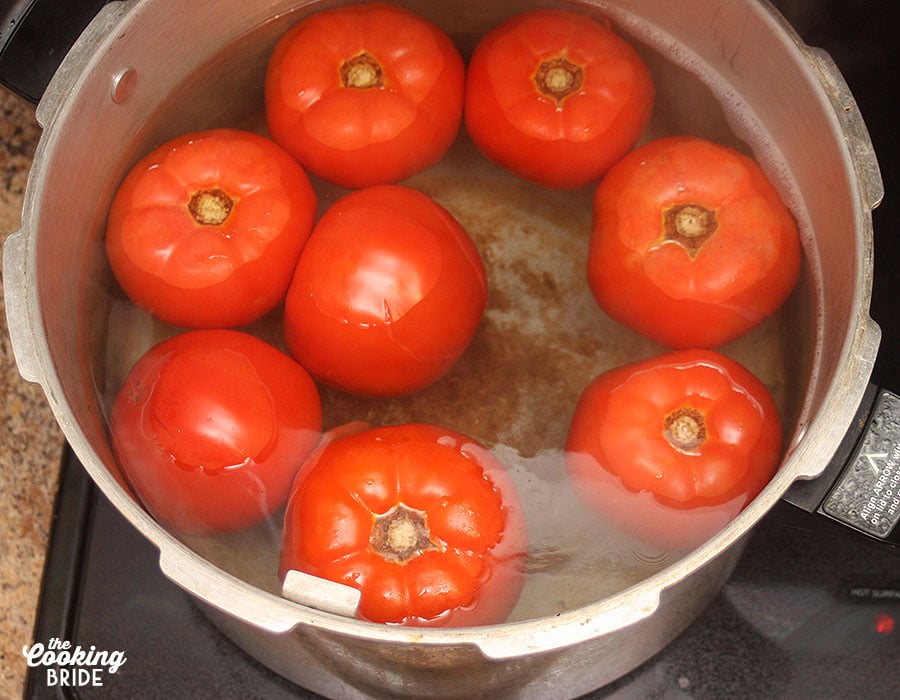
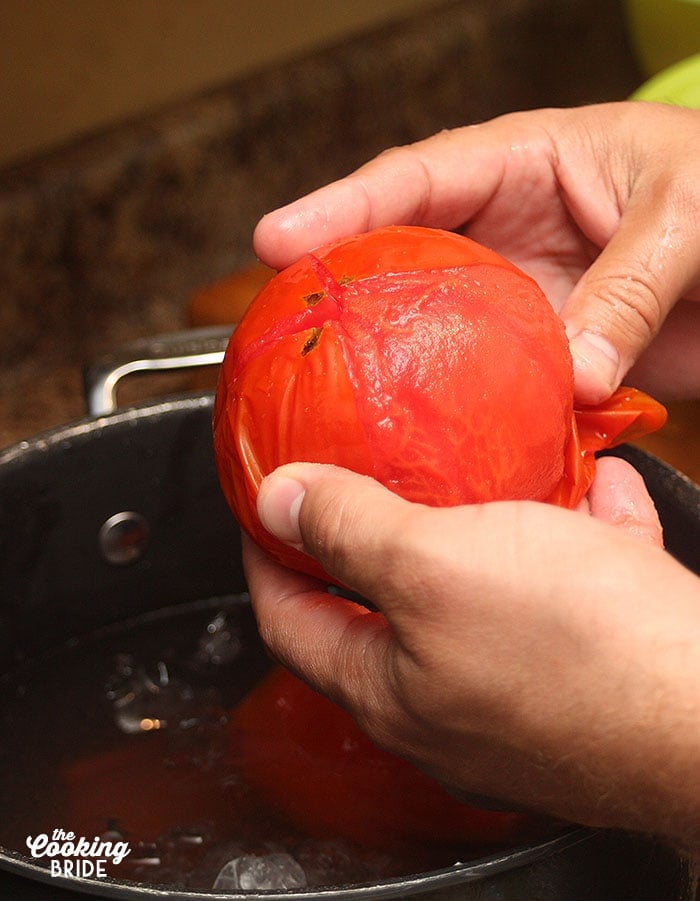
After a few minutes, you will notice the skins start to pucker and draw away from the tomato. When they look like the picture below, take them out and immediately plunge them into the ice water to stop the cooking process. Let the tomatoes sit for a few minutes, then transfer them to one of your mixing bowls to continue cooling.
Once the boiled tomatoes are cool enough that you can handle them with bare hands, begin removing the skins. They should peel right off with ease. If you compost, dump the skins in your compost pile, otherwise throw them away.
Next, cut the tomatoes in half. Remove the core and discard. Remove the seeds and squeeze as much juice out of the tomato as you can. You don’t need any fancy equipment for this … just use your hands! I do this right over my second bowl so I can collect the juice. Don’t worry about seeds mixed in with the juice for now. We can strain the seeds from the juice later.
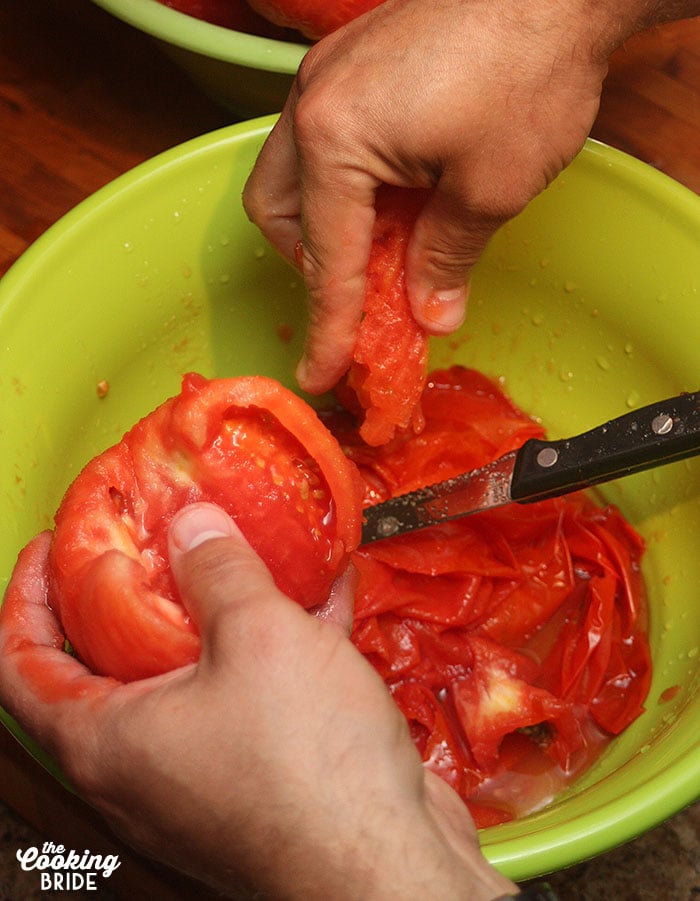
Place the cored and seeded tomatoes in the third bowl. At this point, you can put the the tomatoes in jars to can as-is. However, I like to cut them down further into diced tomatoes.

How to Can Fresh Tomatoes — Pressure Canning vs. Water Bath Canning
High acid foods just as jams, jellies and pickled items can be canned using the water bath canning method. As I mentioned earlier, the acid in the jar is enough to prevent the formation of bacteria.
Pressure canning is for low acid foods such as meat and vegetables. A certain temperature has to be reached to kill off any bacteria and seal the jar. You just can’t get that with water bath canning, no matter how hard you try.
Tomatoes are right on that line between high and low acid. You could go either way here. Since I have a pressure canner, I opt to use this method since processing time is 25 minutes vs. 1 hour and 25 minutes in a water bath.
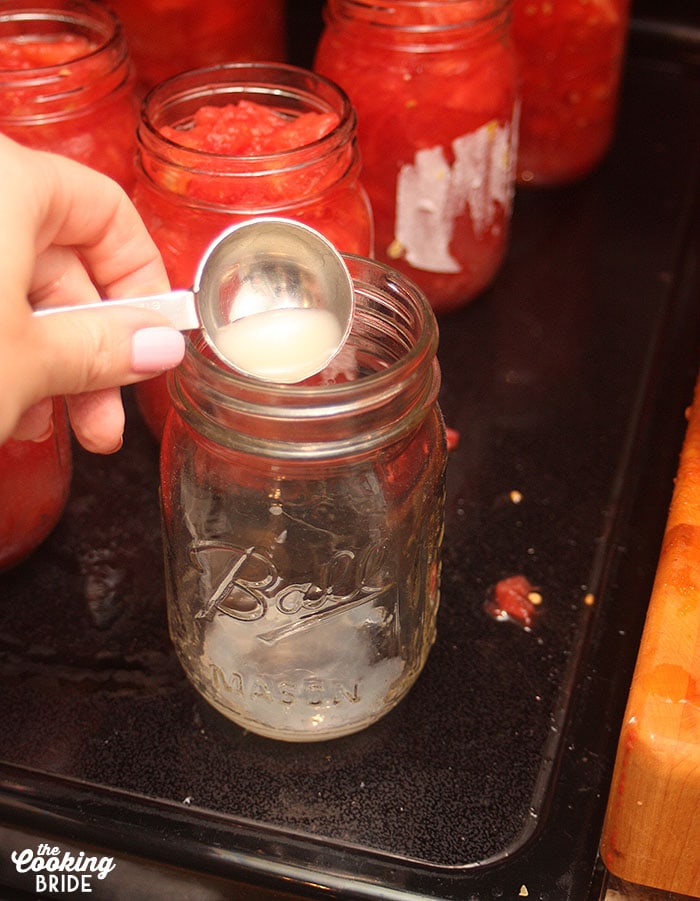
Before you get started, make sure your jars are completely clean. Add 2 tablespoons of bottled lemon juice to the bottom of each quart jar. If using pint jars, add 1 tablespoon of bottled lemon juice.
Can I used fresh lemon juice instead of bottled?
I get asked a lot if it is okay to use fresh lemon juice in lieu of bottled. Yes, I know that fresh is superior in every way to bottled. But in this case, the answer is no. Despite their acidity, tomatoes have a low pH level. You need to add acid to prevent bacteria from forming, hence the addition of the lemon juice. The acidity of fresh lemons can vary from fruit to fruit. The acid levels in bottled lemon juice are controlled and standardized, meaning you get consistency every time.
Pack tomatoes into the jars. You many need to use the back of a spoon to push out any air pockets. Fill the jars almost to the top. You need to leave ½-inch headspace.
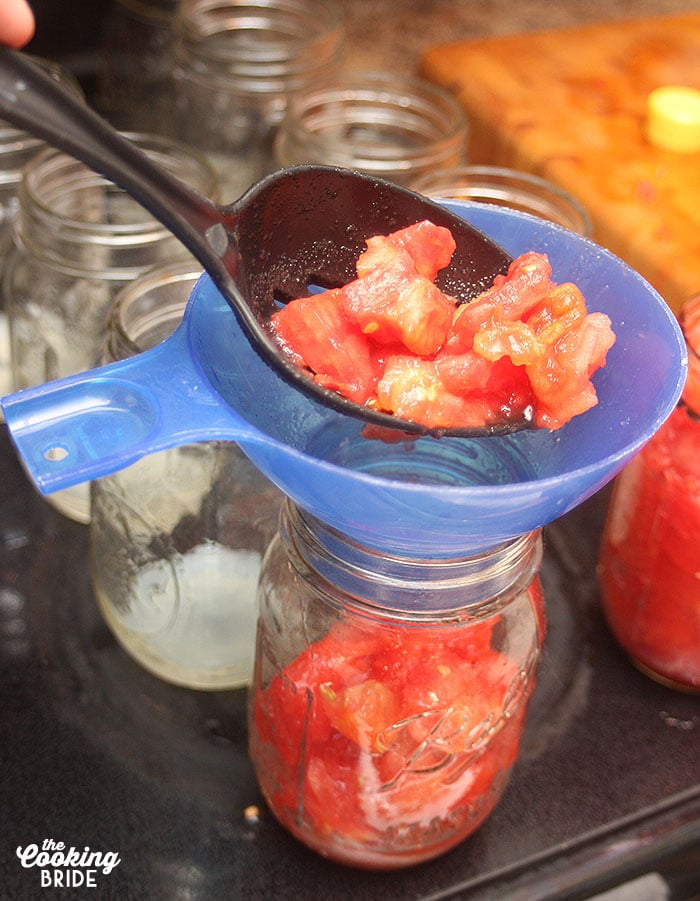
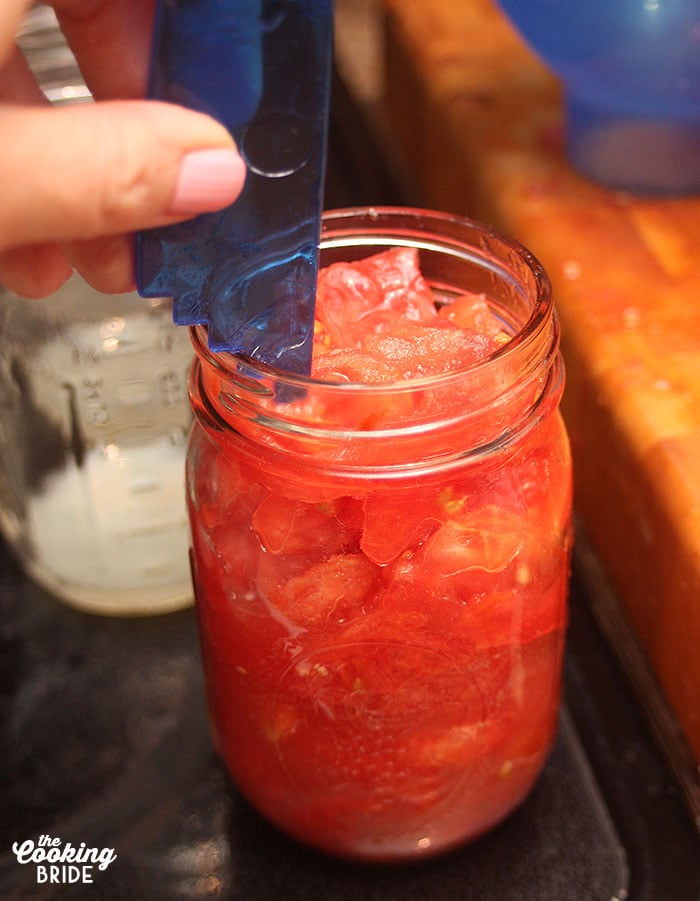
What’s headspace?
It’s the space between the bottom of the lid and the top of the food in the jar and affects the vacuum seal during the processing stage. The first time The Husband helped me pack tomatoes, he was eyeballing it until it looked close enough. No.
It’s important to get this right. Too little or too much headspace won’t give you a proper seal on your jars. The amount of headspace you need depends on the type of food you’re canning. Most recipes should tell you how much headspace to leave.
If you are new to water bath canning, check out my complete guide to water bath canning first. Bring the water to a boil then process, covered, for 1 hour and 15 minutes. Once time is up, remove the pot from the burner and allow the jars to sit in the canner for five minutes before removing them with the jar lifter that came with your canning set. Err on the side of caution here and use oven mitts while doing this. I learned this lesson the hard way when I once removed the lid of my pressure canner and scalded my fingers on the hot steam that escaped.
When pressure canning, be sure to follow the instructions that came with your canner. Once my processing time is over, I like to let the jars cool for a few hours in the canner.
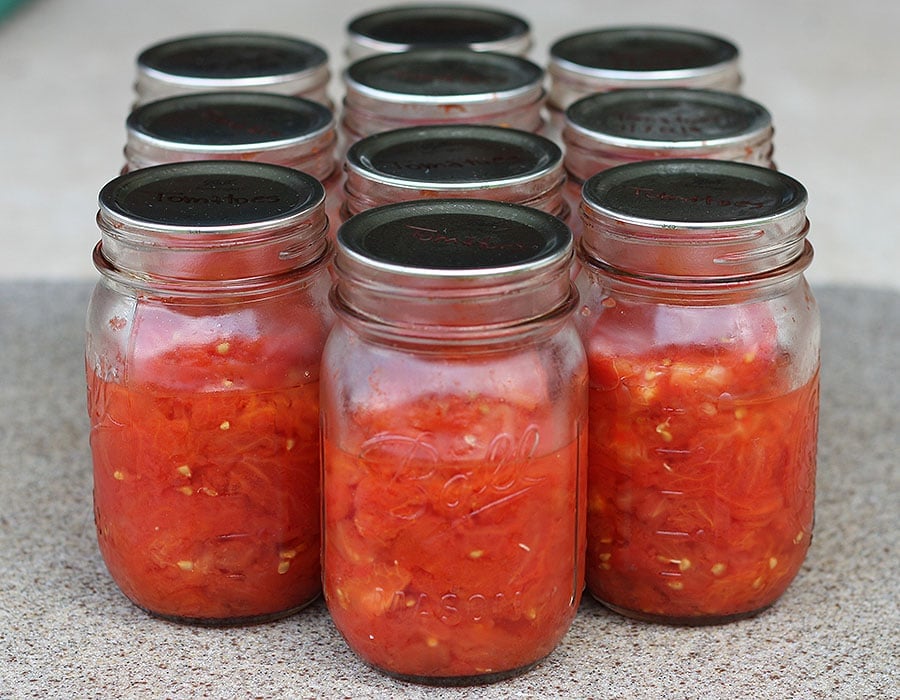
Place the processed jars on a clean towel on the counter or somewhere out of the way and allow them to cool for 24 hours. The vacuum seal will continue to form as the jars cool. Don’t be surprised if you hear a popping sound a couple hours after processing. That’s a good sign!
After the jars have cooled, remove the bands and check the seal on each jar. The lids should be concave and not flex when pushed gently with your finger. If a jar hasn’t properly sealed, it’s okay to eat. But you’ll need to store it in the fridge and use it within a few days. Properly sealed jars can be store in a cool, dry place for up to 18 months.

Need some ideas for your diced tomatoes?
How to Can Diced Tomatoes
Ingredients
- 25 pounds whole tomatoes
- 1 bottle lemon juice
- Pint or quart mason jars
- Jar lids
- Bands
Instructions
- Bring a large stock pot of water to a boil. Next to it, fill another stock pot or bucket with ice water.
- Peel the tomatoes by taking a sharp knife and cutting cross marks on the bottom of each tomato. Once the water comes to a boil, add the tomatoes to the pot a few at a time. Don’t overcrowd them.
- After a few minutes, the skins start to pucker and draw away from the tomato. Remove them from the pot with a slotted spoon and immediately plunge them into the ice water. Let the tomatoes sit for a few minutes, then transfer them to a large bowl and set aside. Continue with the rest of the tomatoes.
- Once the boiled tomatoes are cool enough that you can handle them with bare hands, begin removing the skins. They should peel right off with ease. Discard the tomato skins.
- Next, cut the tomatoes in half. Remove the core and discard. Remove the seeds and squeeze as much juice out of the tomato as you can.
- At this point, you can put the the tomatoes in jars to can as-is. However, I like to cut them down further into diced tomatoes.
- Add 2 tablespoons of BOTTLED lemon juice to the bottom of each quart jar. If using pint jars, add 1 tablespoon of bottled lemon juice to each jar..
- Pack tomatoes into the jars. Use the back of a spoon to push out any air pockets if necessary. Fill the leaving ½-inch of headspace.
- Once you’ve packed the jars, wipe the rims with a clean damp cloth.
- Heat a small pan of water on the stove at a low simmer, but DON’T bring it to a boil. Add your jar lids and let them simmer for a few minutes to activate the glue on the bottom of the lid.
- Carefully lift the lids one at a time and place them on top of your jars. Secure the lids in place with rings. Screw the rings on just tight enough to hold the lid in place.
- If water bath canning, place the jars in a stock pot deep enough to cover the jars with 1-2 inches of water. Bring the water to a boil then process, covered, for 85 minutes. Once time is up, remove the pot from the burner and allow the jars to sit in the canner for five minutes before removing them. Place the processed jars on a clean towel on the counter or somewhere out of the way and allow them to cool for 24 hours.
- If pressure canning, be sure to follow the instructions that came with your canner. Once the processing time is over, let the jar cool for a few hours in the canner.
- After the jars have cooled, remove the bands and check the seal on each jar. The lids should be concave and not flex when pushed gently with your finger. If a jar hasn’t properly sealed, it’s okay to eat. But you’ll need to store it in the fridge and use it within a few days.
- Properly sealed jars can be store in a cool, dry place for up to 18 months.


Awesome! Thanks, yes. It makes perfect sense. Thank you!
Hi Eric, if you purchase a canning kit similar to the one I recommend, it will come with a stick to measure headspace. Second picture from the bottom shows me holding one of these. Each notch in that stick is marked with a measurement. For example, the notch I have resting on the edge of the jar in the picture represents 1/2″ of headspace. You’ll notice the top of the food is touching the very bottom of the stick. That’s how you can ensure your headspace is exact. Does that make sense?
You mentioned your husband eyeballing the headspace and how that is a big no. How do you properly measure headspace?