The Basics of Brining
The secret to a moist, tasty bird is brining. It’s an extra step you should never skip because it makes all the difference when it comes to flavor.

This post may contain affiliate links. Click here to learn more about how affiliate links are used on this site.
My husband will tell you, I make a good bird. One complaint I hear a lot about roasting a turkey is that it’s dry. True, turkey is a lean meat without a lot of fat to keep it moist. My secret to a moist, tasty bird is a trick I learned several years ago when I first started cooking called brining. It’s an extra step that I never skip because it truly makes all the difference when it comes to flavor and texture.
What is brining?
There are two methods of brining – dry and wet. Dry brining involved coating a piece of meat in a layer of salt for several hours.
In this post, I’m discussing wet brine. At its most basic level, brining is nothing more than soaking a piece of meat in saltwater for a period of time before cooking.
How does it work? While the meat is soaking in the salt water solution, the protein fibers break down. This allows more of the salt solution to permeate the meat.
What are the benefits of brining?
First, it improves the flavor. Because the salt solution has permeated the meat, every bite will have loads of flavor.
Second, it tenderizes the meat. I’ll save you the science jargon. Basically, the salt solution breaks down proteins in the meat, making it more tender.
Third, it prevents the meat from drying out. Meat loses about 30-40% of its water during cooking. By adding more water, your meat stand a greater chance of being nice and juicy.
Fourth, it reduces cooking time. The added moisture in the meat allows the heat to transfer faster. In my experience, a brined turkey cooks about 30 minutes faster than unbrined.
What kinds of meat can you brine?
All types of meat, from beef to seafood, can benefit from brining. But it’s not a one size fits all technique. Poultry can handle longer brining times, while the texture of seafood and fish starts to turn rubbery if allowed to soak to long.
What type of salt should you use?
Salt is salt, right? Not exactly. Different types of salt have different weight by volume, which will affect the saltiness of your brine.
Table salt is cheap and you probably already have a container in your pantry. It’s more dense that other salts, so you will need less to achieve the perfect salinity ratio. Table salt also contains additives, such as anti-caking agents and iodine, that could affect the flavor of the meat, particularly if you have a sensitive palate.
Sea salt is a naturally occurring salt that doesn’t contain any additives. It’s also pretty expensive, so it may not be the most cost-effective option if you’re on a tight budget.
Pickling salt is also a pure salt with fine granules that makes it ideal for dissolving in water. It’s heavier by weight, making it a bit saltier. You’ll want to use less when making your brine.
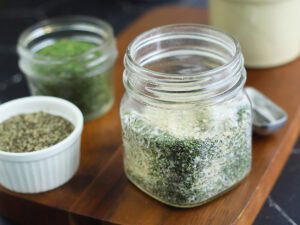
Kosher salt is my preferred salt for brining. It’s a pure salt with a lighter density that dissolves in water quickly. Since it’s a lighter salt, you’ll need to use more to achieve the same salinity ratio.

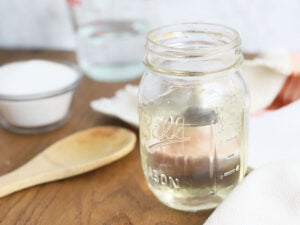
The Perfect Brining Solution
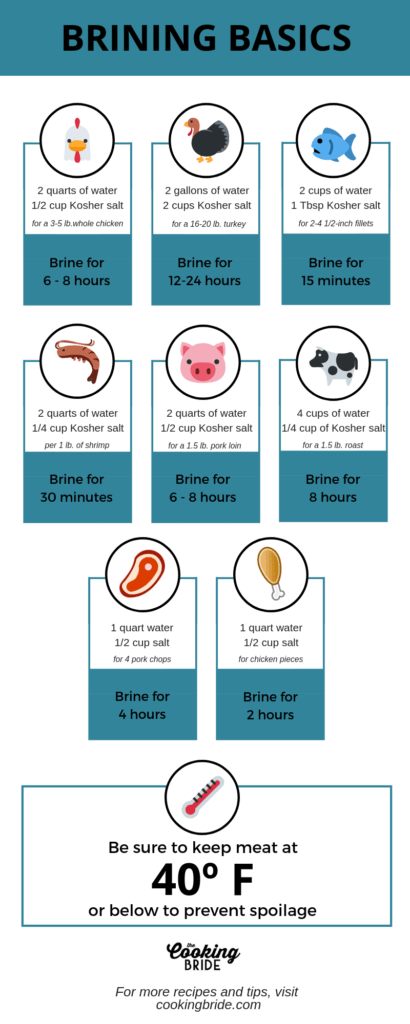
The basic brine solution ratio is one cup of kosher salt per one gallon of cool water. You may need more or less depending on the size of the meat you are brining and the size of the container.
Consider adding other items to the brine for more flavor.
The solution I reference above is for a basic brine. You can stop there, but you don’t have to. Consider adding herbs, spices, fruit or juices to your brine to add flavor. People down here in the South even like to brine using sweet tea!

More brining tips
- Salt will dissolve quicker in warm water. Just make sure you allow the water to cool before placing your item in the solution.
- Whole birds should be brined unstuffed.
- Fill your container with brine until the item is completely immersed in the solution. If you have an item that wants to float, place something heavy over it to weigh it down.
- Larger items, such as turkeys, should be allowed to brine for at least 24 hours.
- Any food safe container can be used. Just remember, the larger the container, the more brine solution you’ll need to fill it up.
- Meat should be kept at a temperature of 40 degrees F or below during brining. If you are brining a large turkey that won’t fit in your fridge, consider placing the turkey in a brine bag, putting it in a cooler, and packing ice around it. If I know it’s going to be a really cold night, I’ve even placed my cooler outside on the back porch. Just make sure your cooler is secure – you wouldn’t want critters infiltrating your backyard and making off with your dinner.
- Once you remove your item from the brine solution, make sure you allow it to dry completely. This will allow you to achieve a good sear or crisp skin on the outside. Allow the item to air dry for about 30 minutes on a counter or dry it off with paper towels.
- Do not reuse a brine.
Do you have any brining tips to add? Leave a comment and share!