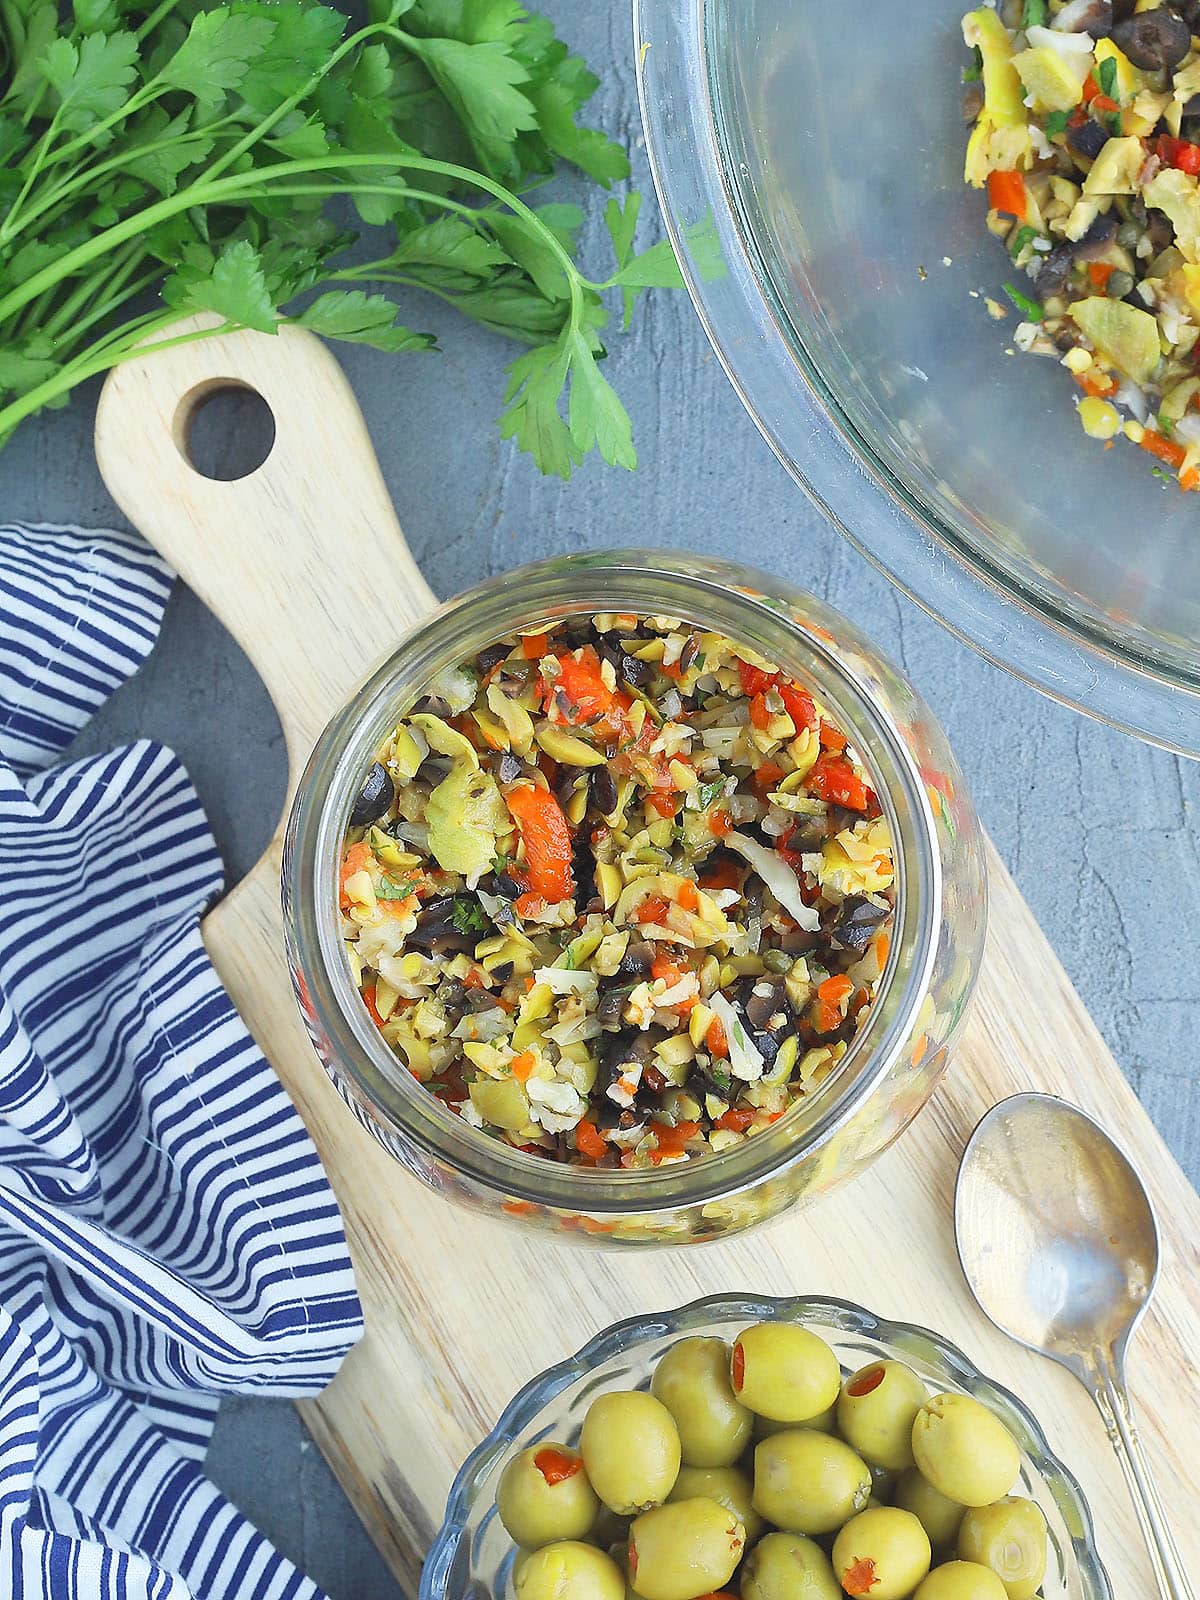
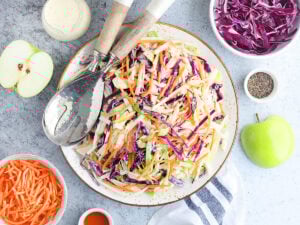
Muffuletta Olive Salad
Packed with a mix of olives, pickled vegetables, and savory herbs, this zesty muffuletta olive salad is a delightful addition to sandwiches and salads, or as a flavorful topping for crackers.
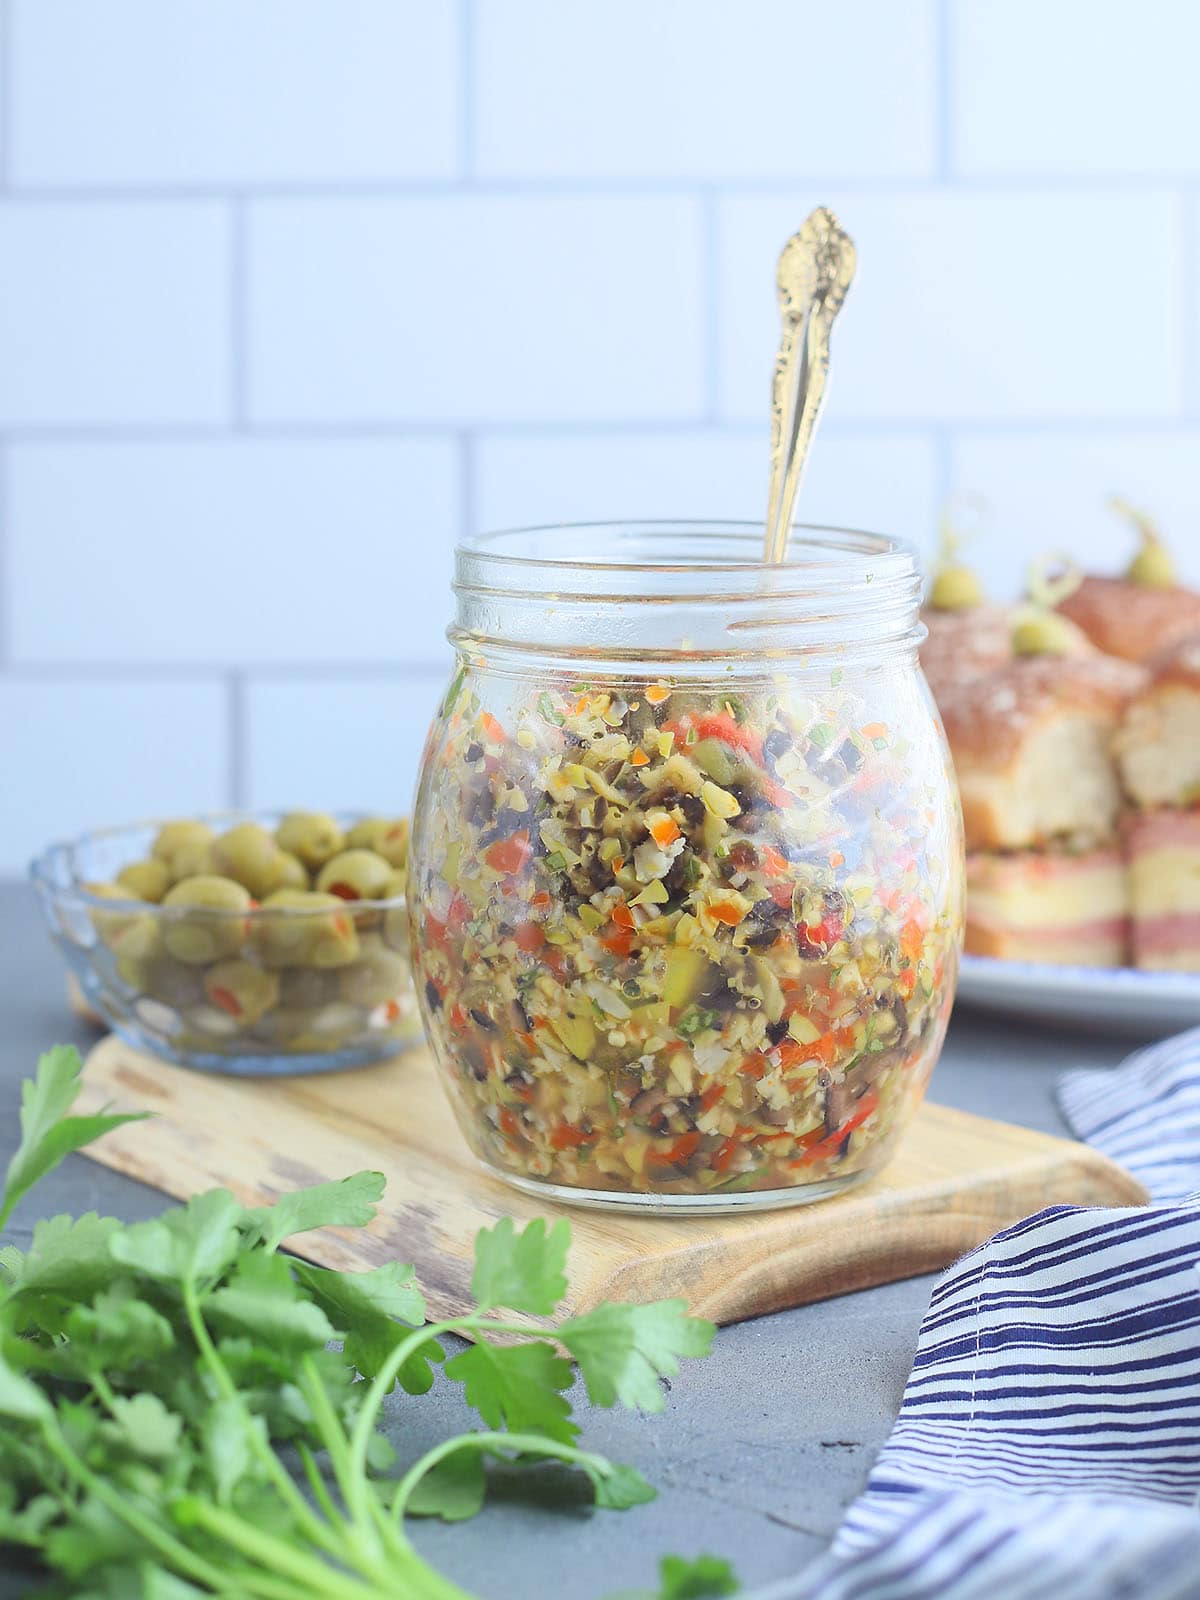
Muffulettas are my all-time favorite sandwich, but since I can’t always make it to New Orleans when a craving hits, I’ve learned to make them at home. A great muffuletta starts with Italian olive salad, and since store-bought versions can be hit or miss, I created my own.
Inspired by Central Grocery, the original creator of the muffuletta and a French Quarter landmark, I used their ingredient list as a starting point and tweaked it until it tasted just right—and after eating plenty of their muffulettas, I’m confident this one’s a winner.
Recipe at a Glance
- Packed with bold, briny, and tangy New Orleans–style flavor
- Quick and easy to make with simple, chopped ingredients
- Tastes even better after chilling, making it perfect for make-ahead prep
- Versatile—use it on muffulettas, sandwiches, pasta, or as an appetizer
- No hard-to-find grocery store olive salad required
- Naturally gluten-free and customizable to your taste
Summarize and save this content on
Jump to:
Ingredients you will need
Homemade Muffuletta Olive Salad is easy to make, endlessly versatile, and actually tastes better after it sits for a day. To make this muffuletta olive salad recipe, you will need:
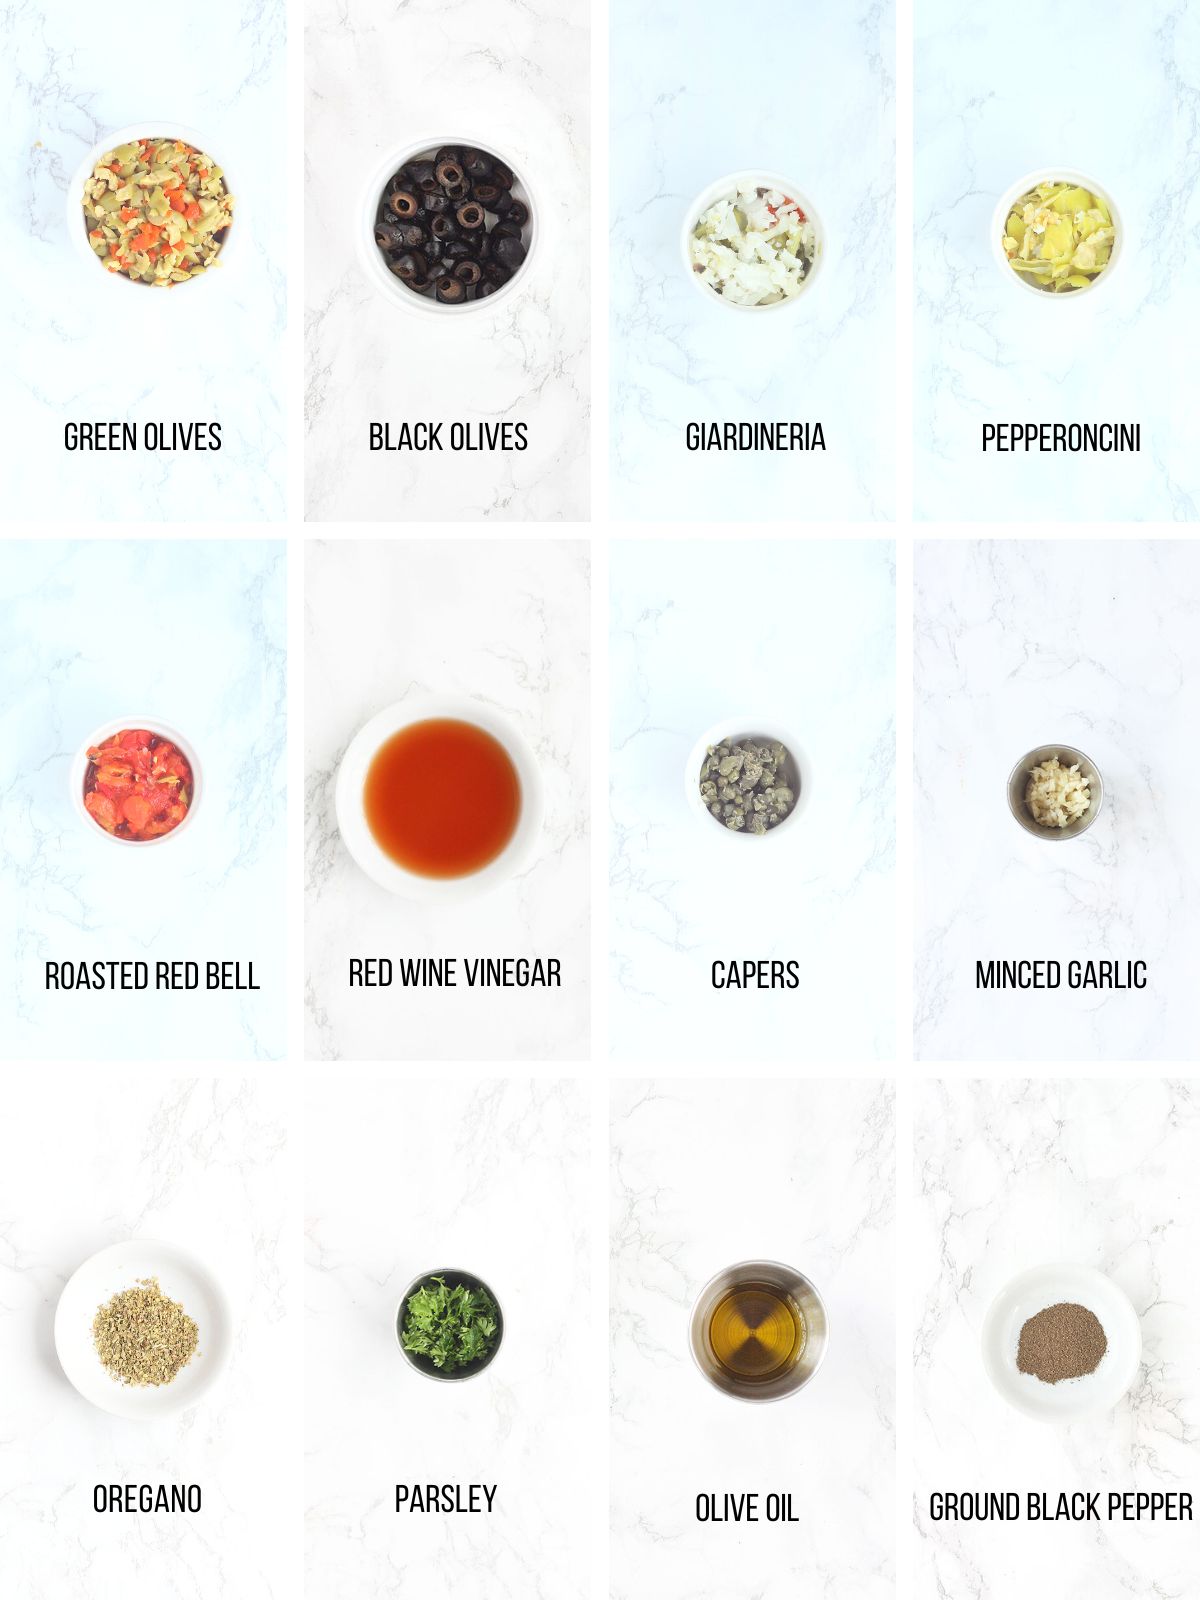
See the recipe card for full information on ingredients and quantities.
- Green olives with pimentos & black olives: The salty backbone of the recipe, offering depth and balance.
- Giardiniera & pepperoncini: Add crunch, tang, and a gentle heat. check out this recipe for Homemade Giardiniera.
- Roasted red bell peppers: Bring a touch of sweetness to round out the brine.
- Capers, garlic, and oregano: Classic Mediterranean flavors that give the salad its signature punch. Check out this post if you’ve ever wondered what are capers?
- Red wine vinegar & extra virgin olive oil: Tie everything together with brightness and richness.
Tools:
- Food processor or mini chopper
Substitutions and Variations
- Olives: Swap green or black olives for kalamata or Castelvetrano olives for a slightly different flavor profile.
- Giardiniera: Use mild or hot giardiniera depending on your heat preference, or substitute with finely chopped pickled vegetables.
- Pepperoncini: Banana peppers make a great substitute if that’s what you have on hand.
- Roasted red bell peppers: Jarred or homemade both work; sun-dried tomatoes can be used for a deeper, richer flavor.
- Fresh herbs: If fresh parsley isn’t available, use ½ teaspoon dried parsley or add fresh basil for a twist.
- Garlic: Garlic powder can be used in a pinch—start with ¼ teaspoon and adjust to taste.
- Vinegar: Red wine vinegar is classic, but white wine vinegar or a splash of lemon juice will also work.
- Spice it up: Add crushed red pepper flakes or a dash of hot sauce for extra heat.
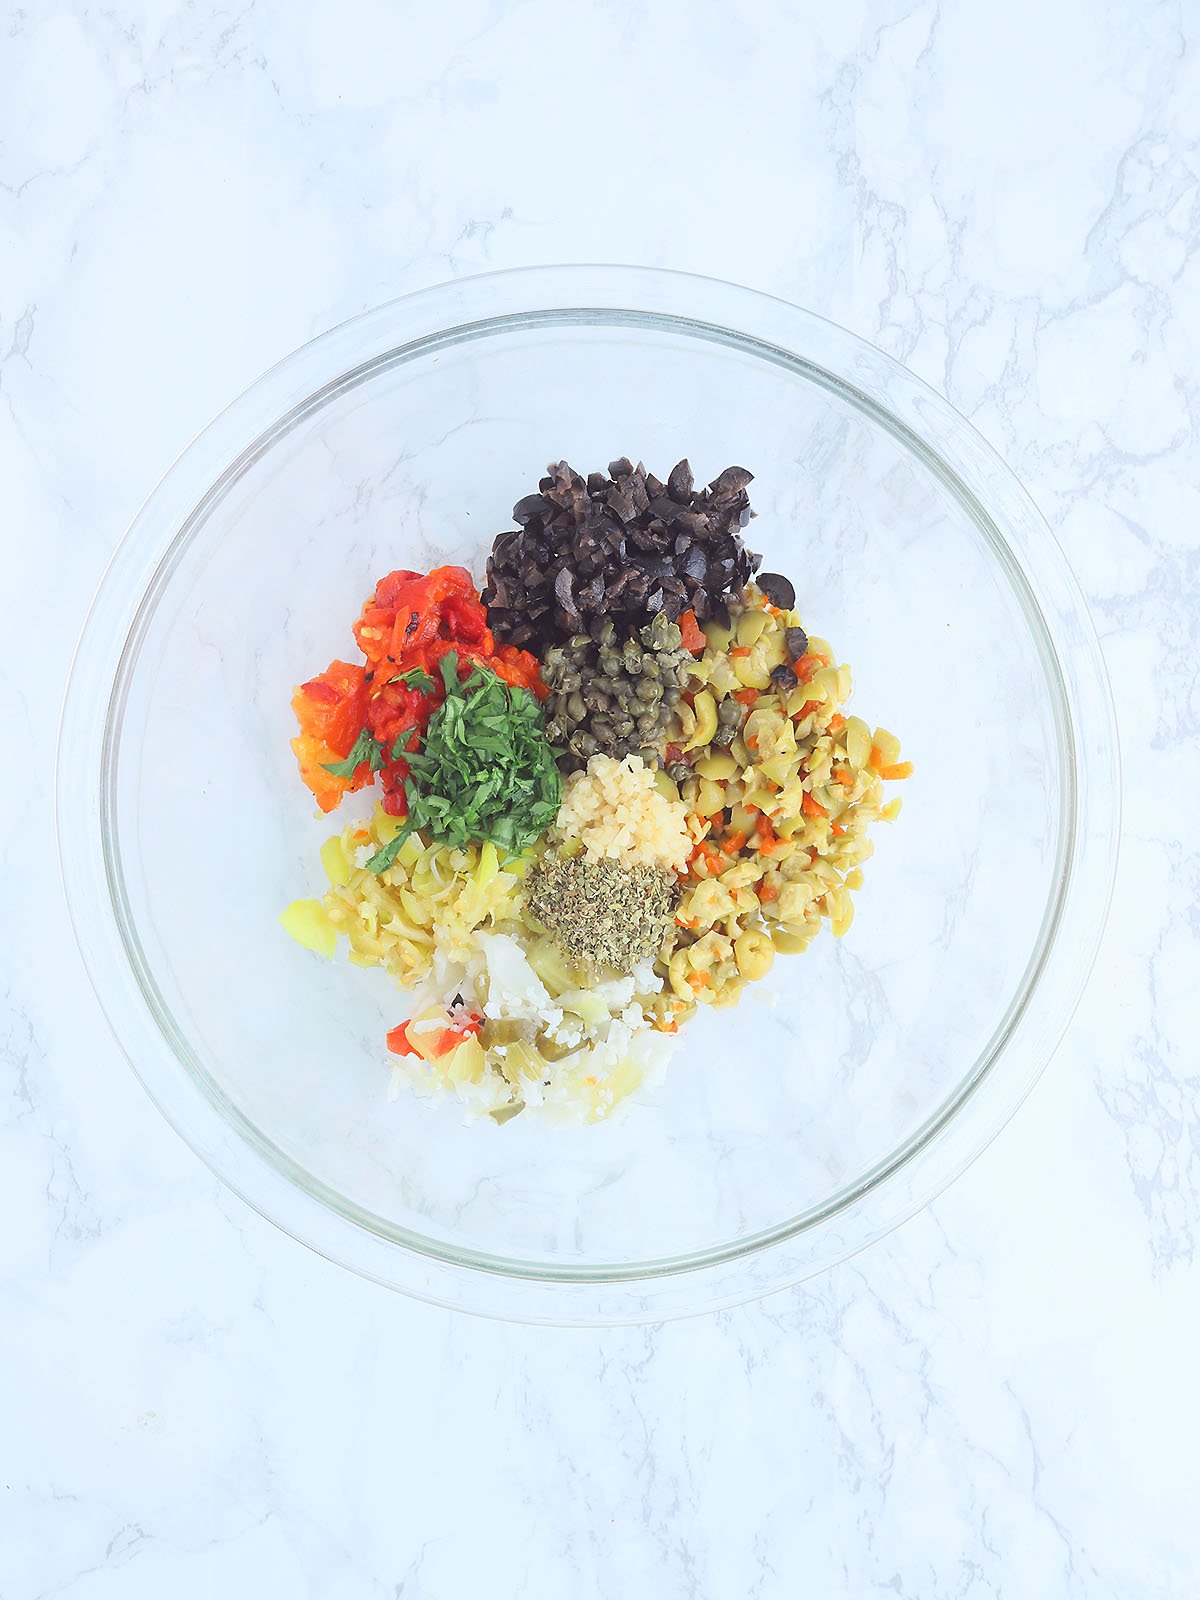
How to make muffuletta olive salad
Once everything is chopped, combine all the ingredients in a large mixing bowl and stir until everything is evenly mixed. Cover and refrigerate for at least 24 hours to allow the flavors to fully develop. That resting time is key—the salad only gets better as it sits.
Ways to Use Muffuletta olive salad
- Spoon it generously onto a classic muffuletta sandwich or these pepper jack stuffed hamburgers.
- Use it as a topping for grilled chicken, Mediterranean catfish fillets, as a pizza topping.
- Stir it into Italian pasta salad or add it to antipasto platters or charcuterie boards
- Serve it with bacon tomato basil crostini as an easy appetizer
- Use it as a sandwich topping with Italian meats and cold cuts
- Stir a few tablespoons into your favorite spaghetti sauce for added depth
Storage and freezing instructions
Storage: Store the olive spread in an airtight container in the refrigerator and consume within two weeks. Give it a good stir before using, as the oil and vinegar may settle.
Freezing: The salad can also be frozen for up to three months. Thaw completely before using. Please note that if freezing, the texture of the salad may differ slightly from fresh and it could contain more liquid.
Canning instructions: Homemade olive salad can be preserved using the water bath canning method. Pack the salad into clean half-pint or pint jars, leaving ¼ inch of headspace. Remove air bubbles, wipe the rims clean, add lids, and secure the bands.
Bring a large pot of water to a boil, then carefully add the jars, making sure they’re covered by at least two inches of water. Process for 10 minutes. Remove from heat and let the jars sit in the canner for 5 minutes, then transfer them to room temperature for 24 hours. Afterward, remove the rings and check the seals. Any jars that didn’t seal properly should be refrigerated.
Muffuletta olive salad FAQ’s
Is muffuletta olive salad spicy?
No. The pepperoncini peppers and roasted red bell peppers do not add any heat. If you prefer it spicy, try adding some chopped pickled jalapenos to suit your taste.
Can I use dried parsley in muffuletta olive salad?
Yes. Since dried herbs are more concentrated than fresh, you will need to use ½ a teaspoon of dried parsley.
Can I skip refrigerating muffuletta olive salad for 24 hours?
You can, but allowing the salad to chill for several hours first really allows the flavors to build. If you can’t give it a full 24 hours, at least give it 2-8 hours.
I’m allergic to one of the ingredients in muffuletta olive salad. Can I leave it out?
As long as the ingredient you’re allergic to isn’t olives, absolutely!
If one of my jars of muffuletta olive salad didn’t seal can I recan it?
I don’t recommend it. Canning a second time could negatively affect the texture of the salad.
Tried This Recipe? Let Me Know!
⭐️⭐️⭐️⭐️⭐️
If you made muffuletta olive salad, I’d love to hear how it turned out! Your ratings and reviews help others find the recipe and give me great feedback too.

Muffuletta Olive Salad
Ingredients
- ½ cup green olives with pimentos chopped
- ¼ cup black olives chopped
- ¼ cup diced Giardiniera mix
- ¼ cup chopped pepperoncini peppers
- ¼ cup roasted red bell peppers chopped
- 1 tablespoon red wine vinegar
- 1 tablespoon capers
- 1 teaspoon minced garlic
- ½ teaspoon dried oregano
- 1 teaspoon fresh parsley
- 1 tablespoon olive oil
Instructions
- Combine all the ingredients in a large mixing bowl.
- Stir until everything is evenly mixed.
- Cover and let the olive salad chill in the refrigerator for 24 hours.
Video
Notes
- Chop all ingredients into similar-sized pieces for the best texture and even flavor in every bite.
- This olive salad improves with time, so don’t skip the 24-hour chill if you can help it.
- Stir the salad well before serving, as the oil and vinegar may separate while chilling.
- Adjust the salt carefully—olives, capers, and giardiniera already bring plenty of saltiness.
- For extra flavor, taste after chilling and adjust vinegar, herbs, or garlic as needed.
- This recipe is ideal for making ahead for parties, sandwiches, or meal prep.

Hi, Evelyn. I would not take cold jars from the refrigerator and put them in hot water as they could explode. My jars are usually room temperature or warm and I have never had a problem. I have canned this myself. The texture is fine.
I’m concerned about putting the jars in boiling water. Usually when I can jams, the jars are hot. Have you canned them yourself? How is the texture?
Thank you for the insight, David!
I grew up in New Orleans and fondly remember skipping high school with a cadre of friends and going to Central Grocery for a muff or two (they can feed up to four) which we ate a few blocks away in Jackson Square. Now I live in SF, where the bread is just as good, but I’ve tried a couple of local muffs, was not impressed by the olive salad, and now buy a loaf and make my own.
But a few notes:
– The olives, giardiniera, and peppers have already been pickled and/or pasteurized. Hot water canning the already pickled mix, or freezing it, would make my mother turn in her grave, and worse, would just ruin the crispness of the vegies.
– Add acid to your taste. One tbsp lemon juice seems low to me, and any vinegar (cider, white, or sherry) will do. Whatever you use, add a tbsp, taste, and repeat as needed. Acid also reduces the need to over cook the already pickled vegetables.
Thanks for bringing that to my attention, Chuck! Fixed.
On the visual ingredient list with the thumbnail pictures, the pepperocinis in the upper right corner are labeled as garlic.